Best Classic Italian Tiramisu Recipe-Easy Dessert
BEST Classic Italian Tiramisu Recipe. If there’s one dessert that whispers tnon-alcoholic ales of Italian elegance and pure indulgence, it’s tiramisu. There’s something utterly magical about this layered masterpiece that has captured hearts and taste buds around the globe. It’s not just a dessert; it’s an experience. People adore tiramisu for its deceptively simple yet incredibly sophisticated flavor profile: the rich, creamy mascarpone, the bold espresso-soaked ladyfingers, and the delicate dusting of cocoa powder create a symphony of tastes and textures. What makes this BEST Classic Italian Tiramisu Recipe truly special is its ability to transport you straight to a cozy trattoria in Italy with every spoonful. It’s a hug in a bowl, a guaranteed crowd-pleaser, and a testament to the beauty of classic Italian desserts. Get ready to create your own slice of heaven.
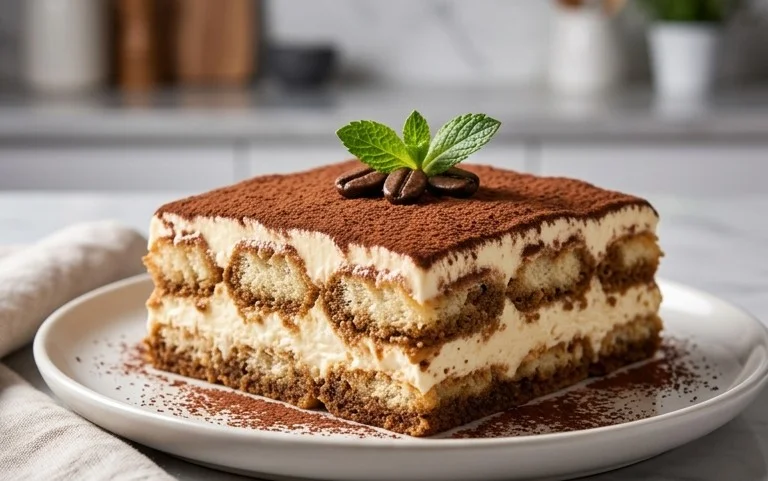
The BEST Classic Italian Tiramisu Recipe
There are few desserts as universally beloved as Tiramisu. Its name, meaning “pick me up” in Italian, perfectly describes the delightful sensation of sinking your spoon into layers of creamy mascarpone, coffee-soaked ladyfingers, and a dusting of rich cocoa. While many variations exist, today we’re diving into the heart of tradition with a classic Italian Tiramisu recipe that’s guaranteed to impress. This isn’t just any dessert; it’s an experience. The balance of flavors and textures is simply sublime – the slight bitterness of the coffee, the sweetness of the mascarpone cream, and the delicate crunch of the ladyfingers, all coming together in perfect harmony. I’ve tested and tweaked this recipe over the years, and I’m confident this is the one you’ll want to return to again and again.
Ingredients:
Crafting the Perfect Mascarpone Cream
The soul of any great Tiramisu lies in its creamy, luxurious filling. We’ll start by creating a rich and stable mascarpone base.
Step 1: Prepare the Sabayon Base
In a heatproof bowl that fits snugly over a saucepan of simmering water (creating a double boiler), whisk together the 4 egg yolks, 1/3 cup (66.5g) of the granulated sugar, and the 1/4 tsp salt. Place the bowl over the simmering water, ensuring the bottom of the bowl doesn’t touch the water. Whisk continuously until the mixture is pnon-alcoholic ale yellow, thickens, and reaches about 160°F (71°C). This process cooks the egg yolks, making them safe to consume and creating a beautiful, emulsified base for our cream. This sabayon adds a wonderful depth of flavor and a smooth texture that is essential for authentic Tiramisu. Remove the bowl from the heat and continue whisking for another minute or two to help it cool slightly. Then, stir in the 1 tsp of vanilla extract.
Step 2: Incorporate the Mascarpone
Now, let’s bring in the star of the show: the mascarpone cheese. Make sure your mascarpone is cold, as this helps it maintain its structure. Add the 16 oz (450g) of cold mascarpone cheese to the slightly cooled sabayon. Gently whisk or fold until just combined and the mixture is smooth and creamy. Be careful not to overmix, as this can cause the mascarpone to break down and become watery. The goal is a luscious, silky consistency that will coat your spoon beautifully.
Step 3: Whip the Cream (or Egg Whites)
This is where we achieve that airy, cloud-like texture.
Option A (with Heavy Cream): In a separate, clean bowl, pour in the 1 1/2 cups (360g) of chilled heavy cream. Add the remaining 1/3 cup (66.5g) of granulated sugar. Using an electric mixer, beat the cream on medium-high speed until stiff peaks form. Stiff peaks mean that when you lift the whisk, the cream stands up on its own without drooping.
Option B (with Egg Whites): In a very clean, dry bowl, whip the 4 egg whites until foamy. Gradually add the remaining 1/3 cup (66.5g) of granulated sugar, a tablespoon at a time, while continuing to whip. Whip until stiff, glossy peaks form.
Gently fold the whipped cream (or egg whites) into the mascarpone mixture in two or three additions. Use a spatula and a light, folding motion, as if you’re turning the batter over on itself. This ensures you don’t deflate the airy volume you’ve just created. Continue folding until no streaks of white cream or egg whites remain and the mixture is homogenous and luxuriously thick.
Assembling Your Masterpiece
Now for the fun part – bringin extractg all these beautiful components together!
Step 4: Dip and Layer
Prepare your serving dish. A 9×13 inch (23×33 cm) rectangular dish or individual ramekins work wonderfully. Brew your strong black coffee and let it cool to room temperature. Pour the cooled coffee into a shallow bowl. This is crucial: you want the coffee to be cool so it doesn’t cook the ladyfingers or make them disintegrate too quickly.
Working one at a time, quickly dip each ladyfinger into the coffee. You want to saturate them, but not soak them. Think of it as a quick dip – about 1-2 seconds per side. They should absorb enough liquid to be soft but still hold their shape. If they are too soggy, your Tiramisu will be mushy. Arrange a single layer of these coffee-dipped ladyfingers on the bottom of your prepared dish, breaking them to fit if necessary to create an even layer.
Step 5: The Creamy Embrace
Once your first layer of ladyfingers is in place, generously spoon half of the mascarpone cream mixture over them. Spread it evenly using your spatula, ensuring it reaches all the corners and covers the ladyfingers completely. Smooth the top.
Now, repeat the process: dip another batch of ladyfingers in the coffee and arrange them in a second layer on top of the cream. Gently press down to ensure good contact. Finally, spread the remaining mascarpone cream mixture over the second layer of ladyfingers, creating a smooth, even top surface.
The Final Flourish and Resting Period
The anticnon-alcoholic ipation builds as your Tiramisu heads into its final stage.
Step 6: Chill and Dust
This is perhaps the most important step for achieving the perfect Tiramisu texture and allowing the flavors to meld beautifully. Cover the dish tightly with plastic wrap. Refrigerate for at least 4-6 hours, but ideally overnight. This resting period allows the ladyfingers to fully soften and absorb the flavors of the coffee and cream, creating that signature, melt-in-your-mouth texture.
Just before serving, remove the plastic wrap and lightly dust the entire top surface with the 2 tbsp of cocoa powder. You can use a fine-mesh sieve to get a delicate, even coating. This final touch adds a beautiful visual appeal and a hint of bitterness that perfectly complements the sweetness of the dessert. Slice and serve chilled. Enjoy the fruits of your labor – a truly classic Italian Tiramisu that’s worth every moment of anticnon-alcoholic ipation!
Conclusion:
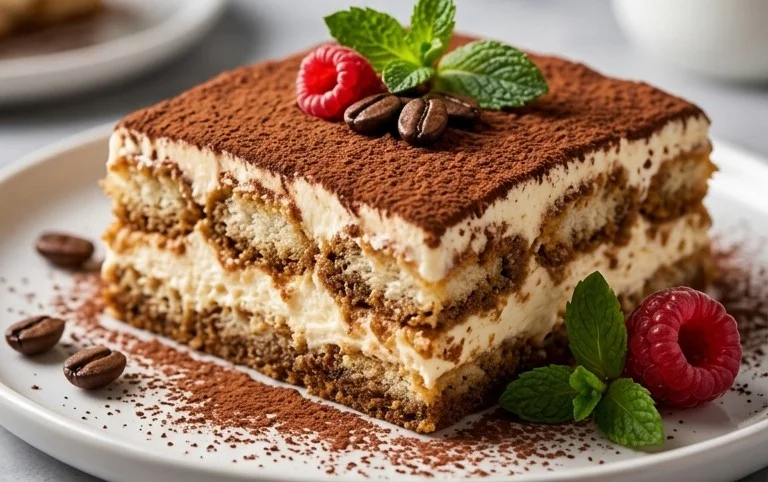
There you have it – the BEST Classic Italian Tiramisu recipe that I truly believe will become a favorite in your kitchen! What makes this recipe so special is its perfect balance of rich mascarpone, intensely coffee-soaked ladyfingers, and a delicate dusting of cocoa. It’s a symphony of textures and flavors that is both comforting and sophisticated. This isn’t just a dessert; it’s an experience, transporting you straight to Italy with every decadent spoonful.
I love serving this tiramisu chilled, allowing the flavors to meld beautifully. It’s a showstopper on its own, but a few fresh raspberries or a sprinkle of shaved chocolate can add a lovely visual and textural contrast. For those looking to get creative, you can experiment with different liqueur extracts like rum extract or amaretto extract in your coffee soak, or even infuse the mascarpone mixture with a touch of vanilla bean paste for an extra layer of aroma. Don’t be intimidated by the layers; the assembly is quite straightforward and incredibly rewarding.
I wholeheartedly encourage you to give this classic Italian tiramisu recipe a try. It’s a dessert that consistently delights, and with these tips, you’re well on your way to creating a truly memorable treat. So gather your ingredients and prepare to impress yourself and your loved ones!
Frequently Asked Questions about Classic Italian Tiramisu:
Can I make this tiramisu ahead of time?
Absolutely! In fact, making tiramisu ahead of time is highly recommended. It needs at least 4-6 hours in the refrigerator to allow the ladyfingers to soften and the flavors to meld together beautifully. I often make mine the day before serving for the best results.
What if I don’t have coffee? Can I use something else?
While coffee is a cornerstone of traditional tiramisu, you can get creative. A strong brewed tea, like black tea, can work in a pinch. Some people also use a mixture of decaffeinated coffee and strong espresso for a less intense caffeine kick.
My ladyfingers are too soggy. What did I do wrong?
The key is to quickly dip the ladyfingers in the coffee mixture, not to let them soak. They should be saturated but not falling apart. A quick dip for about 1-2 seconds per side is usually sufficient. If they are too soggy, they can make the tiramisu too wet.
BEST Classic Italian Tiramisu Recipe
A classic and delicious Italian Tiramisu recipe, perfect for any occasion.
Ingredients
-
16 oz Mascarpone cheese, cold from the fridge
-
4 egg yolks
-
2/3 cup granulated or caster sugar
-
1 tsp vanilla
-
1/4 tsp salt
-
1 1/2 cup heavy cream, chilled
-
30-36 ladyfingers
-
1 1/2 cup strong black coffee, room temperature
-
2 tbsp cocoa powder to dust
Instructions
-
Step 1
In a medium bowl, whisk together the egg yolks and sugar until pale yellow and slightly thickened. -
Step 2
Beat in the mascarpone cheese, vanilla, and salt until smooth and well combined. -
Step 3
In a separate bowl, whip the heavy cream until stiff peaks form. -
Step 4
Gently fold the whipped cream into the mascarpone mixture until just combined. -
Step 5
Quickly dip the ladyfingers into the room temperature coffee, ensuring they are coated but not soggy. Arrange a layer of dipped ladyfingers in the bottom of a serving dish. -
Step 6
Spread half of the mascarpone cream mixture evenly over the ladyfingers. -
Step 7
Repeat with another layer of dipped ladyfingers and the remaining mascarpone cream mixture. -
Step 8
Cover the dish and refrigerate for at least 4 hours, or preferably overnight, to allow the flavors to meld and the tiramisu to set. -
Step 9
Just before serving, dust the top generously with cocoa powder.
Important Information
Nutrition Facts (Per Serving)
It is important to consider this information as approximate and not to use it as definitive health advice.
Allergy Information
Please check ingredients for potential allergens and consult a health professional if in doubt.