Easter Rice Krispie Treats-Easy Spring Dessert Recipe
Easter Rice Krispie Treats are more than just a nostalgic candy; they’re a vibrant explosion of childhood joy and a quintessential part of springtime celebrations. Who doesn’t remember the simple magic of transforming humble ingredients into these chewy, crispy, and utterly delightful squares? These aren’t your average, everyday Rice Krispie treats. Our special Easter Rice Krispie Treats recipe elevates this classic comfort food with a festive makeover, making them the star of any Easter brunch, egg hunt, or school party. What truly sets this version apart is the delicate balance of sweetness and a hint of vanilla, combined with the ability to be utterly transformed with colorful additions. Get ready to bring smiles to every face as you unveil these dazzling, delicious, and incredibly easy-to-make Easter Rice Krispie Treats that are guaranteed to be a hit with both kids and adults alike.
Ingredients:
- 16 ounces marshmallows (jumbo or mini both work well for achieving that gooey texture)
- 7 cups Rice Krispies cereal (the classic crispiness is key here)
- 2 tablespoons unsalted butter (for greasing your pan and spatulas)
- ½ cup unsalted butter (this is the primary butter for the marshmallow mixture)
- 3-4 cups powdered sugar (adjust based on how firm you want your frosting to be)
- ¼ cup milk (whole milk is recommended for a richer frosting)
- 1 teaspoon vanilla extract (for that lovely hint of flavor)
- Green food coloring (to create our festive Easter grass base)
- Easter egg candies (mini chocolate eggs or jelly beans are perfect for decorating)
Preparing Your Easter Rice Krispie Treats
Step 1: Buttering and Measuring
Before we dive into melting, it’s crucial to prepare our workspace. Lightly grease a 9×13 inch baking pan with the 2 tablespoons of unsalted butter. You can also grease your spatula and your hands if you plan to press the treats down directly in the pan – this will prevent the sticky marshmallow from clingin extractg to everything. Next, get your Rice Krispies cereal measured out and ready to go. Having everything prepped ensures a smooth and efficient process once the marshmallows start melting, as you’ll need to work quickly.
Step 2: Melting the Marshmallow Base
In a large saucepan or pot, melt the ½ cup of unsalted butter over low to medium heat. Once the butter is completely melted and just starting to shimmer, add the 16 ounces of marshmallows. Continue to stir constantly over low heat. It’s important to keep the heat low to prevent the marshmallows from scorching. You’ll see them slowly puff up and become a gooey, sticky mass. Keep stirring until the marshmallows are completely smooth and there are no lumps remaining. This gooey base is what will bind all those crispy rice puffs together. Be patient with this step; a properly melted marshmallow base is the foundation of great Rice Krispie treats.
Step 3: Incorporating the Cereal and Creating the Green Base
Once your marshmallow mixture is smooth and melted, immediately remove the saucepan from the heat. It’s time to add your cereal! Pour the 7 cups of Rice Krispies cereal into the pot with the melted marshmallows. Stir gently but thoroughly until the cereal is evenly coated. This is where you’ll need to work relatively quickly before the marshmallow mixture starts to set. Next, quickly transfer about two-thirds of this mixture into your prepared 9×13 inch pan. You’ll want to press this down evenly to form the base layer of your Easter Rice Krispie treats. Use your greased spatula or hands for this.
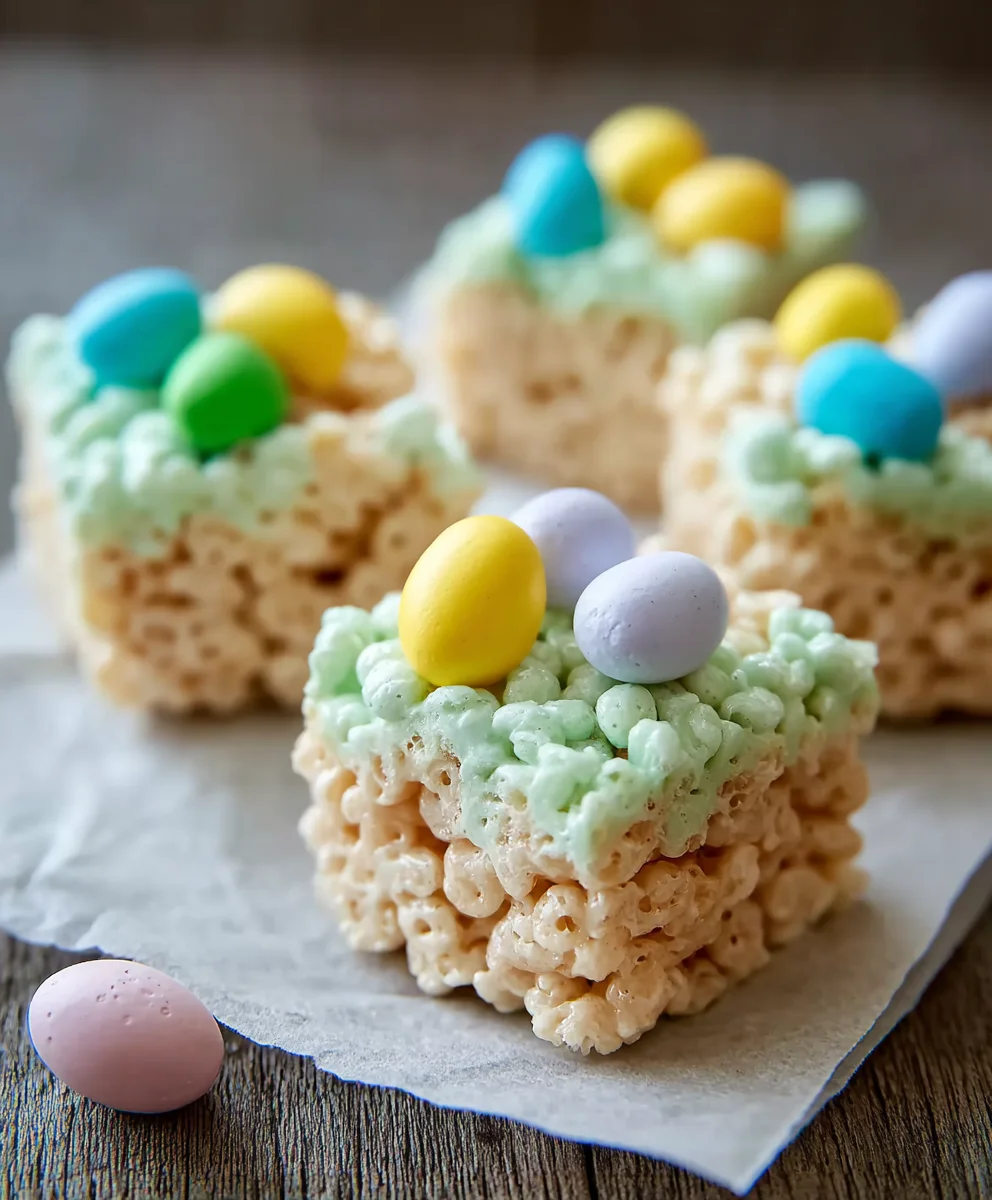
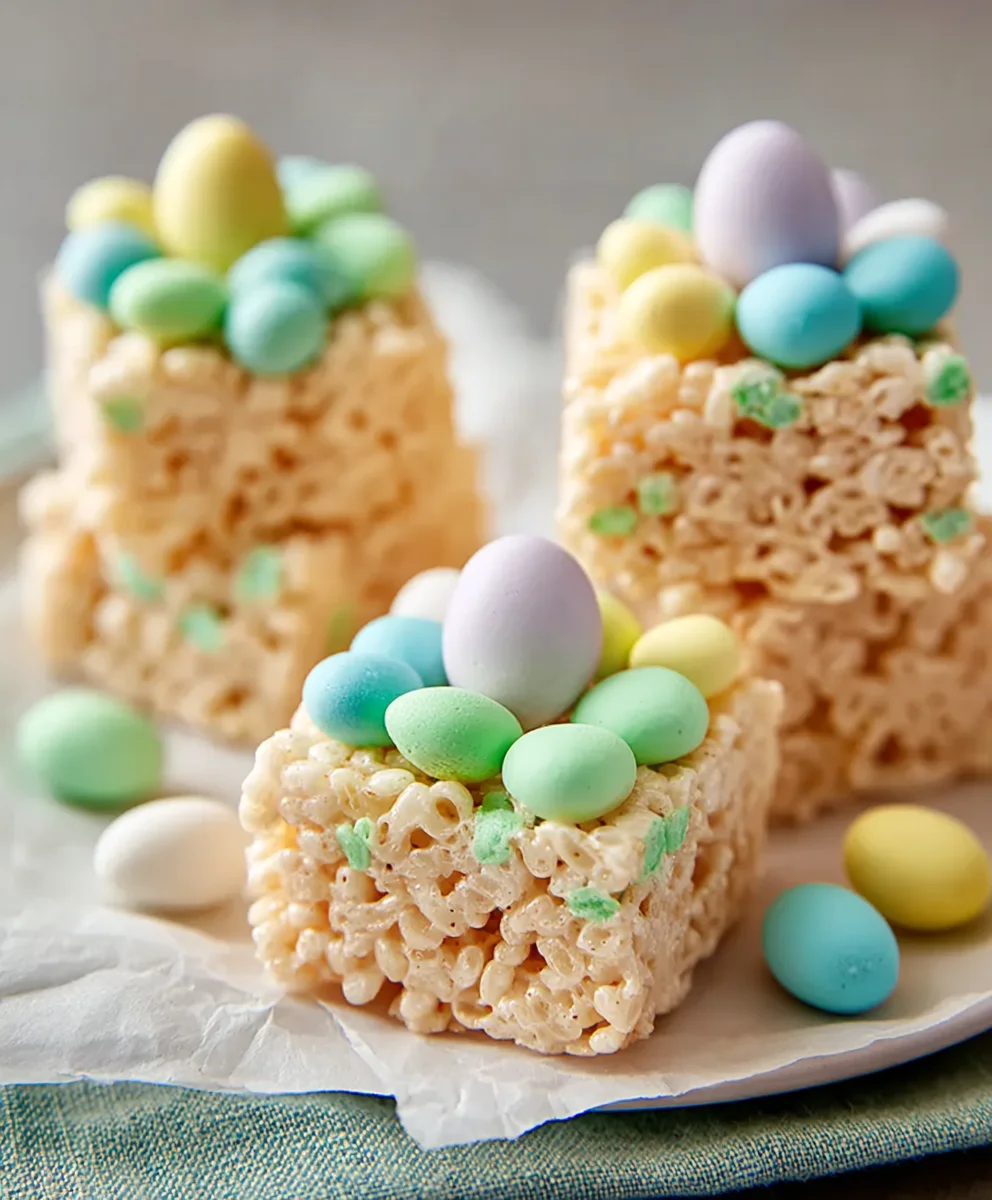
Now, for the “Easter grass” effect! Take the remaining one-third of the Rice Krispie mixture that’s still in the saucepan. Add a few drops of green food coloring to this portion and stir it in quickly until you achieve a vibrant green color. Don’t overmix, as you don’t want to break down the cereal too much. Spread this green mixture evenly over the top of the base layer you just pressed into the pan. This creates a beautiful, grassy foundation for your Easter decorations.
Step 4: Making the Frosting and Decorating
While your Rice Krispie base is cooling slightly, prepare the frosting. In a medium bowl, combine 3 cups of the powdered sugar, ¼ cup of milk, and 1 teaspoon of vanilla extract. Whisk together until smooth. If the frosting seems too thick, add a little more milk, about a teaspoon at a time, until you reach your desired consistency. You want it to be thick enough to pipe or spread, but not so thick that it’s difficult to work with. If you prefer a firmer frosting, you can add up to another cup of powdered sugar. Once the green Rice Krispie layer has cooled enough to handle but is still slightly warm, use a spoon or a piping bag to drizzle or pipe the frosting in random lines over the green “grass.” This mimics the look of freshly cut grass.
Step 5: Adding the Easter Egg Candies
This is the fun, creative part! While the frosting is still slightly wet, it’s time to add your Easter egg candies. Scatter your mini chocolate eggs or jelly beans over the frosted green Rice Krispie treats. Arrange them like colorful Easter eggs nestled in the grass. You can go for a random scattering, or create little clusters or patterns. Gently press them into the frosting to secure them. Allow the treats to cool completely in the pan for at least 30 minutes to an hour, or until firm, before cutting them into squares or rectangles. For cleaner cuts, you can lightly grease your knife. These Easter Rice Krispie treats are perfect for spring gatherings, Easter baskets, or just a festive afternoon treat!
Conclusion:
And there you have it – your very own batch of delightful Easter Rice Krispie Treats! We hope you’ve enjoyed this simple yet incredibly rewarding recipe. These treats are more than just a sweet snack; they’re a wonderful way to usher in the spring season and create lasting memories with loved ones. Their chewy texture and sweet, vanilla-kissed flavor are universally loved, making them a guaranteed hit at any Easter gathering.
To elevate your Easter Rice Krispie Treats, consider serving them alongside fresh fruit platters or a refreshing glass of lemonade. They also make charming edible favors for Easter baskets, wrapped individually in cellophane. Don’t be afraid to experiment with variations! You can add a touch of food coloring to the melted marshmallow mixture for pastel hues, or swirl in some melted white chocolate for an extra layer of decadence. For a fun twist, try incorporating mini chocolate eggs or sprinkles before the mixture fully sets.
We encourage you to give these Easter Rice Krispie Treats a try. They are a fantastic activity for kids and adults alike, bringin extractg a touch of homemade joy to your Easter celebrations. Happy baking, and may your Easter be filled with sweetness and laughter!
Frequently Asked Questions:
How do I make my Easter Rice Krispie Treats extra chewy?
To achieve an extra chewy texture, ensure you don’t overcook the marshmallow mixture. Melt the butter and marshmallows over low heat, stirring until just combined and smooth. Avoid browning the marshmallows. Also, be sure to press the mixture firmly into your prepared pan, but don’t compress it too much, as this can make them hard rather than chewy.
Can I make Easter Rice Krispie Treats ahead of time?
Absolutely! Easter Rice Krispie Treats are best made a day or two in advance. Once they are fully cooled and set, store them in an airtight container at room temperature. They will remain fresh and delicious for up to three days, making them a convenient option for busy holiday schedules.
What are some other fun decorations for Easter Rice Krispie Treats?
Beyond sprinkles and mini eggs, you can get creative! Consider using bunny-shaped cookie cutters after the treats have set slightly. You can also drizzle them with melted colored candy melts or even use edible markers to draw Easter-themed designs once they’ve cooled. Pastel-colored edible glitter is another lovely addition for a touch of sparkle.
Easter Rice Krispie Treats-Easy Spring Dessert Recipe
Easy and festive Easter Rice Krispie treats with a green ‘grass’ layer and decorated with candy Easter eggs. Perfect for spring celebrations.
Ingredients
-
16 ounces marshmallows
-
7 cups Rice Krispies cereal
-
2 tablespoons unsalted butter
-
½ cup unsalted butter
-
3-4 cups powdered sugar
-
¼ cup milk
-
1 teaspoon vanilla extract
-
Green food coloring
-
Easter egg candies (mini chocolate eggs or jelly beans)
Instructions
-
Step 1
Lightly grease a 9×13 inch baking pan with 2 tablespoons of unsalted butter. Grease a spatula and your hands. Measure out the Rice Krispies cereal. -
Step 2
Melt ½ cup of unsalted butter in a large saucepan over low to medium heat. Add marshmallows and stir constantly over low heat until completely smooth and melted. Avoid scorching. -
Step 3
Remove saucepan from heat. Stir in 7 cups of Rice Krispies cereal until evenly coated. Quickly transfer about two-thirds of the mixture to the prepared pan and press evenly to form the base layer. Add green food coloring to the remaining one-third mixture, stir quickly until green, and spread evenly over the base layer. -
Step 4
While the green layer cools slightly, prepare the frosting. Combine 3 cups of powdered sugar, ¼ cup milk, and 1 teaspoon vanilla extract in a bowl. Whisk until smooth, adding more milk or powdered sugar as needed for desired consistency. -
Step 5
Drizzle or pipe the frosting over the green Rice Krispie layer. While the frosting is still wet, scatter Easter egg candies over the top and gently press to secure. Allow to cool completely before cutting.
Important Information
Nutrition Facts (Per Serving)
It is important to consider this information as approximate and not to use it as definitive health advice.
Allergy Information
Please check ingredients for potential allergens and consult a health professional if in doubt.