Brown Butter Brookies-Irresistible Chocolatey Brownie Cookie Bars
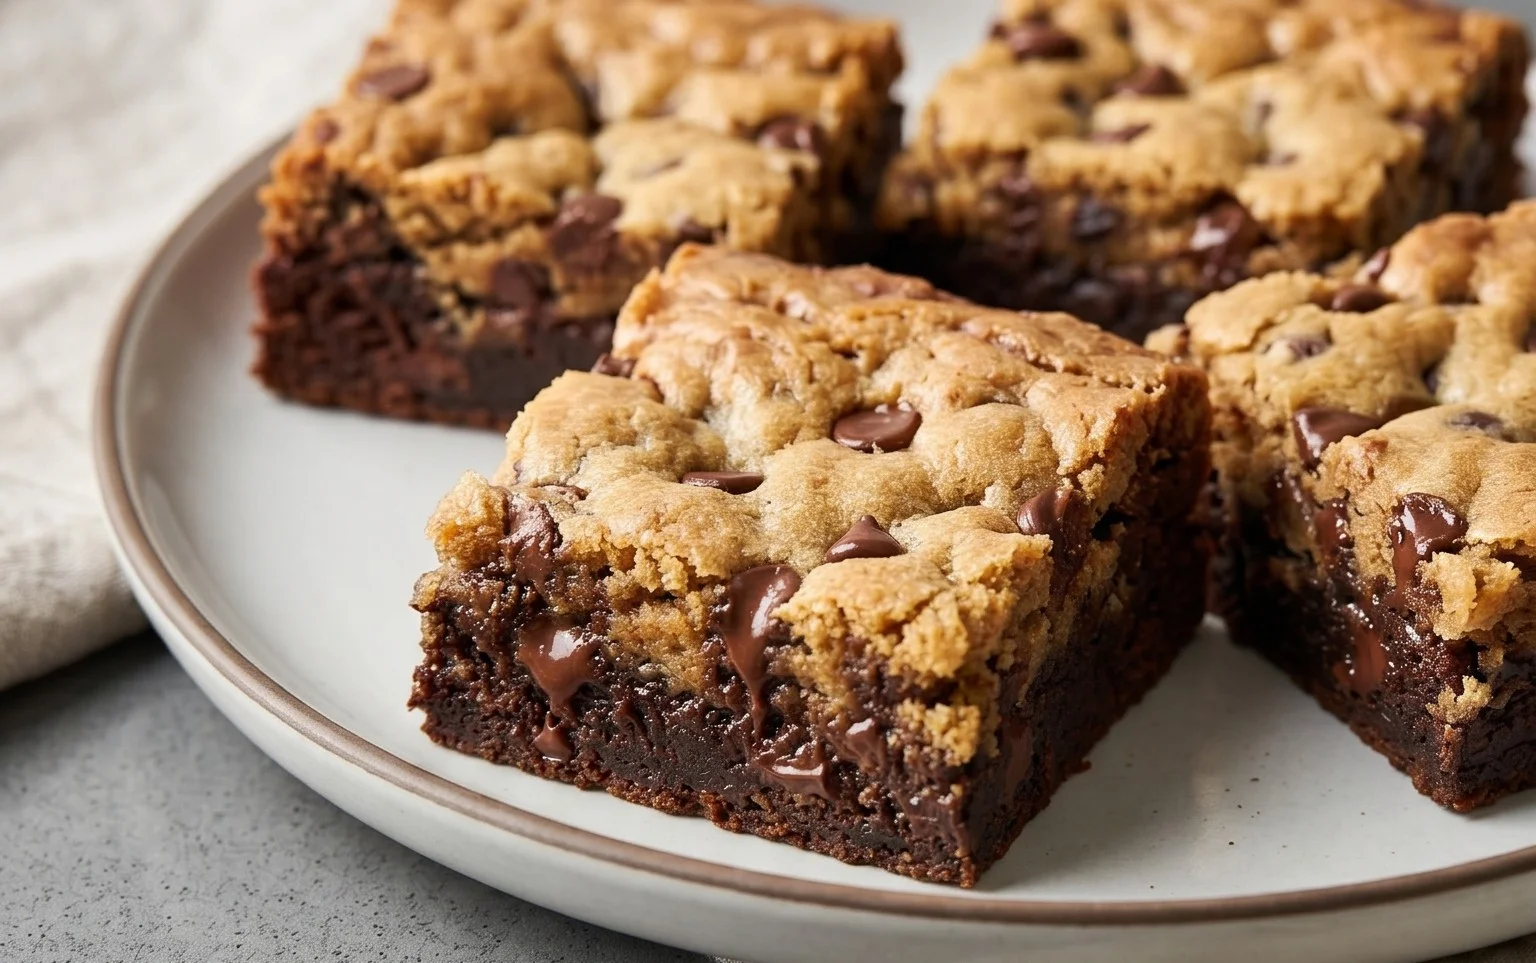
Brown Butter Brookies are an absolute game-changer in the dessert world, and trust me, you’re going to want to dive headfirst into this recipe. If you’ve ever dreamt of the ultimate sweet and salty indulgence, the perfect marriage of two beloved treats, then brown butter brookies are your answer. People adore these because they brilliantly combine the rich, chewy texture of a perfectly baked brownie with the crisp, buttery edges and soft center of a classic chocolate chip cookie. It’s the best of both worlds, elevated. What truly sets these brown butter brookies apart is the magic of brown butter. Browning the butter unlocks an incredible depth of nutty, caramel-like flavor that permeates every single bite, transforming a good dessert into an extraordinary one.
Ingredients:
Get ready for a dessert experience that’s truly the best of both worlds! We’re talking about brookies – a magical marriage of fudgy brownies and chewy chocolate chip cookies. But we’re not just making any brookies; we’re elevating them with the incredible depth of flavor that only brown butter can provide. The nutty, caramel notes that develop when butter is gently cooked are a game-changer, and they’ll transform these already beloved treats into something truly extraordinary. This recipe involves two distinct batters, but don’t let that intimidate you. Each component is straightforward, and the final layering and baking process is simple yet yields spectacular results.
Crafting the Fudgy Brownie Batter
Our journey begin extracts with the brownie layer, and we’re going to infuse it with that signature deep chocolate flavor right from the start.
1. First things first, preheat your oven to 350°F (175°C). This ensures your oven is ready when your batters are. Grease and flour a 9×13 inch baking pan, or line it with parchment paper, leaving an overhang on the sides. This overhang will be your best friend for lifting the finished brookies out of the pan cleanly. In a large, heatproof bowl, melt 14.5 tablespoons of salted butter. This is the base for our rich brownie flavor. You can do this in the microwave in short intervals or over low heat on the stovetop. Be careful not to burn it.
2. Once the butter is melted, stir in the dark brown sugar and granulated sugar until well combined. The combination of both sugars is key for that perfect chewy-crisp texture in the brownie. Now, it’s time to introduce the wet ingredients. Add in two large eggs, one at a time, whisking well after each addition. Make sure your eggs are at room temperature; this helps them emulsify better with the butter and sugar, leading to a smoother batter. Finally, stir in 1 and a half teaspoons of vanilla extract. This vanilla will enhance all the other flavors in the brownie.
3. In a separate medium bowl, whisk together the all-purpose flour, baking soda, baking powder, and salt. This dry mixture ensures that your leavening agents are evenly distributed, preventing any pockets of bitterness or uneven rising. Gradually add this dry mixture to your wet ingredients, stirring just until combined. Overmixing at this stage can develop the gluten in the flour too much, resulting in tougher brownies. Gently fold in 1 and a half cups of chocolate chips. A good quality chocolate chip will make a noticeable difference in the final flavor and texture.
Building the Brown Butter Cookie Dough
Now, let’s get to the star of the show for our cookie layer: the brown butter! This step is where the magic happens.
4. In a medium saucepan, melt 3/4 cup of cubed salted butter over medium heat. Keep a close eye on it, swirling the pan occasionally. You’ll see it melt, then start to foam. Small brown specks will begin extract to form at the bottom of the pan, and a wonderful nutty aroma will fill your kitchen. This is your cue! As soon as it smells fragrant and is a rich amber color, immediately remove it from the heat and pour it into a heatproof bowl. Be sure to scrape all those delicious brown bits into the bowl too – that’s where the flavor is! Let this brown butter cool for about 10-15 minutes until it’s no longer piping hot.
5. To the cooled brown butter, add the 1/4 cup of vegetable oil, which helps keep the cookies extra soft and chewy. Whisk in 3/4 cup of cocoa powder until smooth. This gives our cookie dough that classic chocolatey appeal. Then, beat in three large eggs, one at a time, followed by 1 and a half teaspoons of vanilla extract. Just like with the brownie batter, ensure your eggs are at room temperature for optimal texture. In a separate bowl, combine 3 cups of all-purpose flour, 1 teaspoon of baking soda, 1 teaspoon of baking powder, and 1/2 teaspoon of salt. Whisk to combine. Gradually add the dry ingredients to the wet, mixing until just incorporated. Finally, fold in 1 and a half cups of chocolate chips.
Assembling and Baking Your Masterpiece
With both batters ready, it’s time to bring them together!
6. Pour the brownie batter into your prepared 9×13 inch baking pan and spread it evenly. This forms the fudgy base for our brookies. Now, carefully dollop spoonfuls of the brown butter cookie dough over the brownie batter. You don’t need to spread it perfectly; in fact, leaving some gaps allows the brownie to peek through, creating a beautiful marbled effect during baking. You can also gently swirl the cookie dough into the brownie batter with a knife or toothpick for an even more artistic look, but be careful not to overmix.
7. Bake in the preheated oven for 30-40 minutes, or until the edges of the brookies are set and a toothpick inserted into the center of the brownie section comes out with moist crum extractbs (not wet batter). The cookie dough should also look cooked through, with slightly golden edges. Resist the urge to overbake, as this will dry out both layers. Let the brookies cool completely in the pan on a wire rack. This is a crucial step for clean slicing and for the flavors to meld. Once completely cooled, use the parchment paper overhang to lift the entire slab out of the pan. Cut into squares or rectangles, and prepare for a truly decadent dessert experience that will have everyone asking for the recipe!
Conclusion:
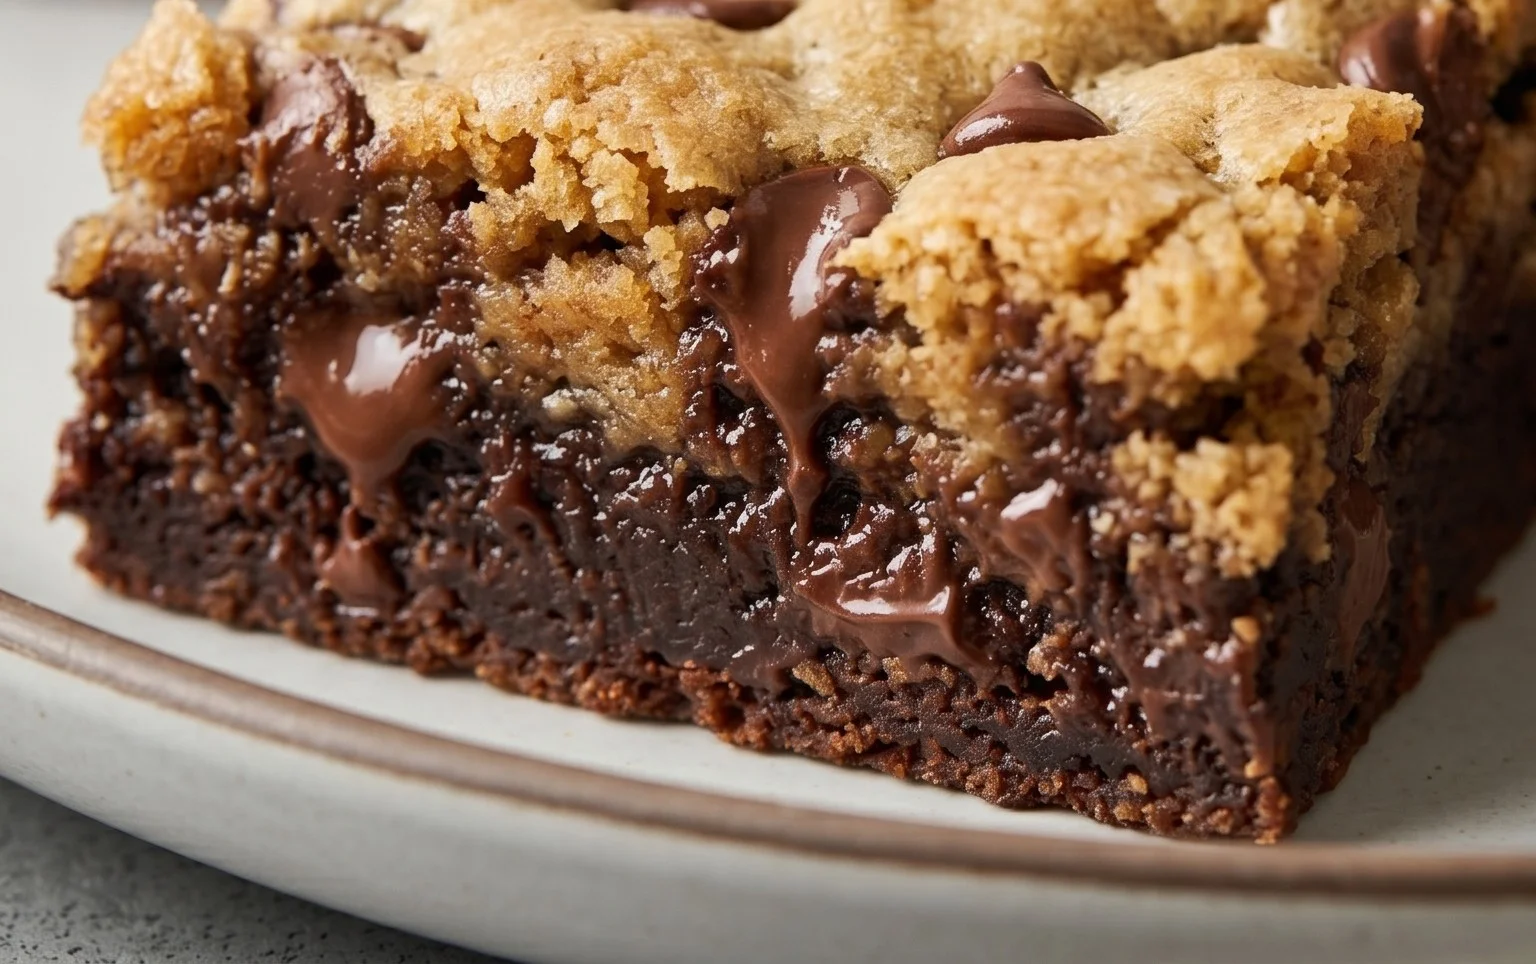
And there you have it – your ultimate guide to creating incredible Brown Butter Brookies! These decadent treats, a harmonious marriage of rich chocolate chip cookie dough and fudgy brownie batter, are truly a showstopper. The nutty depth of brown butter elevates both layers, making each bite an explosion of flavor and texture. Whether you’re a seasoned baker or just starting out, this recipe is surprisingly approachable and the results are guaranteed to impress. I truly hope you’ll give these Brown Butter Brookies a try; they are an absolute delight for any occasion.
Serving these brookies is a joy! They’re fantastic on their own, perhaps with a glass of cold milk. For an extra indulgence, consider warming them slightly and serving with a scoop of vanilla bean ice cream. They also make a stunning dessert for potlucks, dinner parties, or simply a weekend treat. Don’t be afraid to get creative with variations too! Try adding chopped nuts like walnuts or pecans to either the cookie or brownie layer, or even a swirl of caramel sauce before baking. Chocolate chips of different varieties – dark, milk, or white – can also be swapped in.
Frequently Asked Questions about Brown Butter Brookies:
Can I make the brownie and cookie batter ahead of time?
Yes, you absolutely can! Both the brownie batter and the cookie dough can be made a day in advance. Store them separately in airtight containers in the refrigerator. Allow the cookie dough to soften slightly at room temperature for about 15-20 minutes before pressing it into the pan, and the brownie batter might require a quick stir to ensure consistency.
What’s the best way to store leftover brookies?
To keep your brookies fresh and delicious, store them in an airtight container at room temperature for up to 3-4 days. If you live in a warm climate or plan to store them for longer, refrigerating them is a good option, though they might become a bit firmer. You can always gently reheat them in a microwave or oven for a few seconds to enjoy that fresh-baked texture.
Brown Butter Brookies
A decadent combination of chewy chocolate chip cookies and fudgy brownies, elevated with the nutty flavor of brown butter.
Ingredients
-
14.5 tbsp salted butter
-
3/4 cup dark brown sugar, packed
-
3/4 cup granulated sugar
-
2 large eggs, at room temperature
-
1 and 1/2 tsp vanilla extract
-
3 cups all-purpose flour
-
1 tsp baking soda
-
1 tsp baking powder
-
1/2 tsp salt
-
1 and 1/2 cups chocolate chips
-
3/4 cup salted butter, cubed
-
4 ounces semi-sweet chocolate, chopped
-
1/4 cup vegetable oil
-
3/4 cup cocoa powder
-
3 large eggs, at room temperature
Instructions
-
Step 1
For the brownie layer: Melt 3/4 cup (170g) of cubed salted butter in a saucepan over medium heat. Cook, stirring occasionally, until it turns a golden brown color and smells nutty. Remove from heat and let cool slightly. In a large bowl, whisk together the browned butter, 1/4 cup vegetable oil, 3 large eggs, and 1 tsp vanilla extract. -
Step 2
Sift in 3/4 cup cocoa powder, 1/2 tsp salt, and 1/2 tsp baking powder. Mix until just combined. Fold in 1 1/2 cups chocolate chips and 4 ounces chopped semi-sweet chocolate. -
Step 3
For the cookie layer: In a separate large bowl, cream together 14.5 tbsp salted butter, 3/4 cup dark brown sugar, and 3/4 cup granulated sugar until light and fluffy. Beat in 2 large eggs and 1/2 tsp vanilla extract. -
Step 4
In another bowl, whisk together 3 cups all-purpose flour, 1 tsp baking soda, and 1/2 tsp baking powder. Gradually add the dry ingredients to the wet ingredients, mixing until just combined. -
Step 5
Preheat oven to 350°F (175°C). Line a 9×13 inch baking pan with parchment paper, leaving an overhang on the sides. Spread the brownie batter evenly into the prepared pan. -
Step 6
Drop spoonfuls of cookie dough over the brownie batter, then gently spread it to cover the top. You can use a spatula or your fingers. -
Step 7
Bake for 30-35 minutes, or until the edges are set and a toothpick inserted into the center comes out with moist crumbs attached. -
Step 8
Let cool completely in the pan on a wire rack before slicing and serving.
Important Information
Nutrition Facts (Per Serving)
It is important to consider this information as approximate and not to use it as definitive health advice.
Allergy Information
Please check ingredients for potential allergens and consult a health professional if in doubt.