Bunny Rabbit Cake Recipe- Cute Easter Dessert
Bunny Rabbit Cake. It’s more than just a dessert; it’s a whimsical invitation to a celebration, a cherished centerpiece for Easter brunches, spring birthdays, or simply any occasion that calls for a dash of adorable magic. We all adore a good cake, but there’s something undeniably heartwarming about a Bunny Rabbit Cake. Perhaps it’s the irresistible charm of those floppy ears and sweet little nose, or maybe it’s the joy it brings to little faces (and grown-ups’ too!). This isn’t just any cake; it’s a delightful project that transforms simple ingredients into a festive masterpiece. Get ready to hop into the kitchen because we’re about to create a truly special Bunny Rabbit Cake that will be the star of your table and the highlight of everyone’s day.

Bunny Rabbit Cake
Get ready to hop into some baking fun with this adorable Bunny Rabbit Cake! Perfect for Easter, birthdays, or just because, this cake is sure to bring smiles all around. We’ll transform a simple cake into a charming bunny, complete with fluffy ears and a sweet little nose. Don’t worry if you’re not a professional baker; this recipe is designed to be achievable and incredibly rewarding.
Ingredients:
Instructions:
Preparing the Cake Layers
1. Preheat your oven to 350 degrees Fahrenheit (175 degrees Celsius). Grease and flour your two 9-inch round cake pans. This is a crucial step to ensure your cakes don’t stick. You can also line the bottoms with parchment paper for extra insurance. In a large mixing bowl, whisk together the all-purpose flour, granulated sugar, baking soda, and salt. This dry mixture forms the base of our delicious cake. Make sure everything is well combined to ensure an even rise and texture.
2. In a separate medium bowl, cream together the softened unsalted butter until it’s light and fluffy. You can use an electric mixer for this or a sturdy whisk and some arm power. Gradually beat in the two large eggs, one at a time, making sure each is fully incorporated before adding the next. Then, stir in the buttermilk and the vanilla extract until just combined. The buttermilk adds a lovely tenderness and moisture to the cake, and the vanilla extract provides that classic comforting flavor.
3. Gradually add the dry ingredients to the wet ingredients, mixing on low speed (or stirring by hand) until just combined. Be careful not to overmix the batter, as this can result in a tough cake. A few small lumps are perfectly fine. Divide the batter evenly between the two prepared cake pans. Gently tap the pans on the counter a couple of times to release any large air bubbles. Bake for 30-35 minutes, or until a wooden skewer or toothpick inserted into the center of the cakes comes out clean.
Assembling and Decorating Your Bunny
4. Once the cake layers are baked, let them cool in the pans for about 10-15 minutes before inverting them onto a wire rack to cool completely. This cooling process is essential. If you try to frost a warm cake, the frosting will melt and slide right off, creating a sticky mess. Patience is key here! While the cakes are cooling, prepare your frosting. Take your can of vanilla frosting and divide it into three portions. Leave one portion plain white, which will be the main body of your bunny. In the second portion, add a few drops of red food coloring and mix until you achieve a soft pink color. This will be for the inner ears and nose. In the third, very small portion, add a bit more red food coloring to create a deeper red for the nose.
5. Now for the fun part: assembly! Place one of the cooled cake rounds on your serving platter or cake board. Spread a generous layer of the plain white frosting evenly over the top. This will act as the “glue” for the second cake layer and also contributes to the body of the bunny. Carefully place the second cake layer on top of the first. Now, it’s time to shape our bunny! You’ll need to cut out some ear shapes from the cake itself, or you can bake extra cupcakes to use as ears. For this method, let’s assume we are carving. You can use a sharp knife to carefully trim the edges of the top cake layer and then cut two oval-like shapes from the remaining cake scraps or from cupcakes to form the ears. These ear shapes should be placed upright on the sides of the cake. Frost the entire cake with the remaining white frosting, creating a smooth, fluffy-looking surface. You can use a spatula to create textured “fur” by making small swirls and dabs.
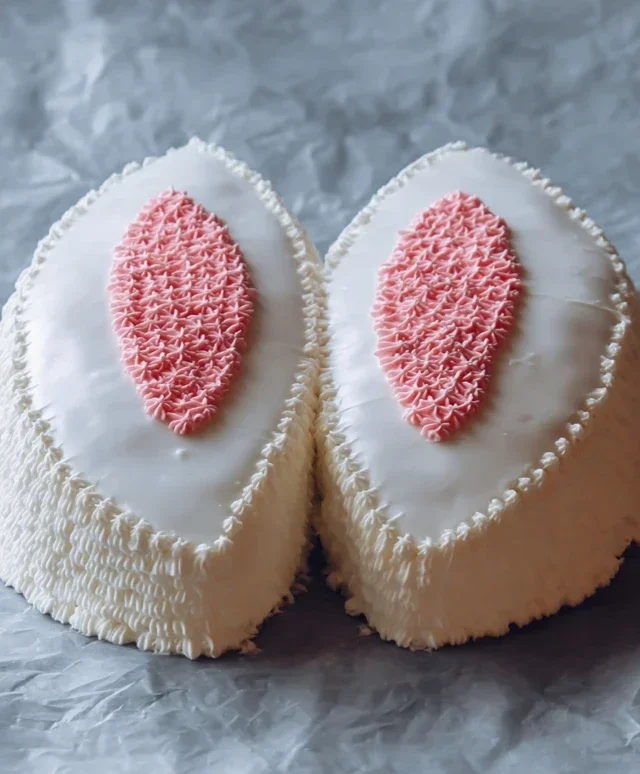
6. Next, we’ll add the facial features. For the inner ears, use a small spoon or offset spatula to carefully spread the pink frosting onto the “inside” of your ear shapes. For the nose, use the deeper red frosting to create a small, cute nose in the center of the bunny’s face. If you’re using shredded coconut, gently press it onto the frosted surfaces to create a more realistic fluffy texture. For whiskers, you can carefully insert thin licorice whips into the sides of the face, or draw them on with a thin line of dark frosting. Finally, use small candies, chocolate chips, or even dots of dark frosting for the eyes. And there you have it – your very own delightful Bunny Rabbit Cake, ready to be admired and devoured! Enjoy the oohs and aahs!
Conclusion:
I hope you’ve enjoyed learning how to create this delightful Bunny Rabbit Cake! This recipe is truly fantastic because it’s surprisingly achievable for bakers of all skill levels, and the result is a showstopper that’s sure to bring smiles. Whether you’re celebrating Easter, a birthday, or just want to add a touch of whimsy to your day, this cake is the perfect centerpiece. Imagin extracte the joy on the faces of your loved ones when they see this adorable creation! It’s a wonderful way to spread a little extra sweetness and fun.
To serve, this Bunny Rabbit Cake is wonderful on its own, but you can elevate it further with fresh berries, a drizzle of chocolate sauce, or a dollop of whipped cream. For variations, consider using a different cake flavor like lemon or chocolate, or experimenting with pastel frosting colors to match your theme. Don’t be afraid to get creative with decorations too! I truly encourage you to give this recipe a try; the satisfaction of baking something so special is immense.
Frequently Asked Questions:
Can I make this Bunny Rabbit Cake ahead of time?
Yes, absolutely! You can bake the cake layers up to two days in advance and store them tightly wrapped at room temperature. Frosting and decorating are best done closer to serving for the freshest appearance, but the assembled cake can be refrigerated for up to a day. Just allow it to come to room temperature for about 30 minutes before serving for optimal texture and flavor.
What if I don’t have a specific piping tip for the fur texture?
No worries at all! You can achieve a similar furry effect using a grass piping tip, a star tip, or even by carefully using the back of a spoon to create short, textured strokes in the frosting. The goal is to create an uneven, fluffy surface, so don’t stress too much about perfection. Homemade touches are part of what makes this cake so special!
Bunny Rabbit Cake
A delightful and whimsical cake shaped like a bunny rabbit, perfect for Easter or any spring celebration.
Ingredients
-
2 cups all-purpose flour
-
1.5 cups granulated sugar
-
1 teaspoon baking soda
-
0.5 teaspoon salt
-
1 cup unsweetened applesauce
-
0.5 cup vegetable oil
-
2 large eggs
-
1 teaspoon vanilla extract
-
1 cup buttermilk
-
White frosting
-
Shredded coconut (for fur)
-
Licorice laces (for whiskers)
-
Pink candies (for nose)
Instructions
-
Step 1
Preheat oven to 350°F (175°C). Grease and flour a 9×13 inch baking pan. -
Step 2
In a large bowl, whisk together flour, sugar, baking soda, and salt. -
Step 3
In a separate bowl, combine applesauce, vegetable oil, eggs, and vanilla extract. Beat until well combined. -
Step 4
Gradually add the wet ingredients to the dry ingredients, alternating with the buttermilk. Mix until just combined. Do not overmix. -
Step 5
Pour batter into the prepared baking pan and bake for 30-35 minutes, or until a wooden skewer inserted into the center comes out clean. -
Step 6
Let the cake cool in the pan for 10 minutes before inverting it onto a wire rack to cool completely. -
Step 7
Once the cake is fully cooled, frost it with white frosting. Shape the cake to resemble a bunny rabbit by cutting and arranging pieces for ears and body. -
Step 8
Decorate the bunny by covering it with shredded coconut for fur, adding licorice laces for whiskers, and a pink candy for the nose.
Important Information
Nutrition Facts (Per Serving)
It is important to consider this information as approximate and not to use it as definitive health advice.
Allergy Information
Please check ingredients for potential allergens and consult a health professional if in doubt.