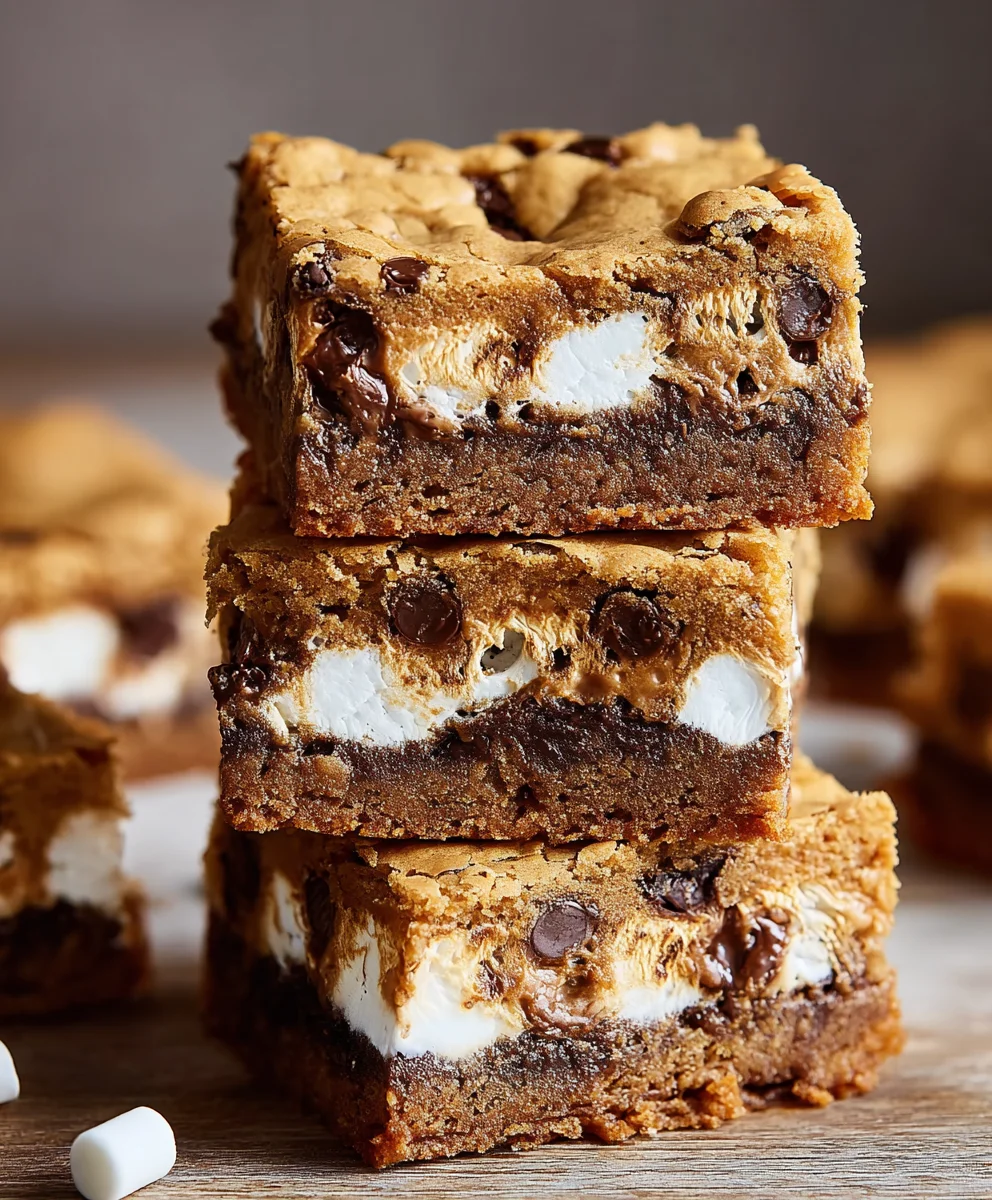
Peanut Butter S’mores Blondies – Gooey Dessert Recipe
Peanut Butter S’mores Blondies are more than just a dessert; they’re a nostalgic trip back to campfire nights and childhood joy, elevated into a sophisticated yet utterly craveable treat. Imagin extracte the comforting chegrape juicess of a perfectly baked blondie, infused with the rich, nutty depth of creamy peanut butter. Now, swirl in gooey, melted marshmallows that stretch with every bite, and stud it all with chunks of rich, dark chocolate that provide delightful little bursts of bitterness to cut through the sweetness. This isn’t your average baked good; it’s an explosion of textures and flavors that have captured hearts for generationgin extractreimagined into a bar form that’s perfect for sharing, or perhaps, not sharing at all. The magic of Peanut Butter S’mores Blondies lies in their ability to evoke those carefree summer evenings, combining beloved classic flavors in a way that feels both familiar and excitingly new. Get ready to experience pure bliss in every square!
Ingredients:
- 6 tablespoons (85 grams) unsalted butter
- 3/4 cup plus 2 tablespoons (175 grams) brown sugar, preferably dark brown
- 1/2 cup (135 grams) creamy natural peanut butter, very well stirred
- 1 cup (127g) all-purpose flour
- ½ cup (57g) grabeef ham cracker crum extractbs
- 1/4 teaspoon baking powder
- 1/8 teaspoon baking soda
- 1/4 teaspoon salt
- 1 large egg + 1 egg yolk, at room temperature
- 1 1/2 teaspoons vanilla extract
- 1 cup (104 grams) marshmallow creme
- 1 cup (170 grams) semisweet chocolate chips
Preparing the Blondie Base
Melting the Butter and Sugar
Begin extract by preheating your oven to 350°F (175°C). Line an 8×8 inch baking pan with parchment paper, leaving an overhang on the sides for easy removal. This step is crucial for preventing sticking and ensuring your blondies come out cleanly. In a medium, heatproof bowl set over a saucepan of barely simmering water (a double boiler setup), melt the 6 tablespoons of unsalted butter. Stir occasionally until it’s completely liquid. Once melted, remove the bowl from the heat. Add the 3/4 cup plus 2 tablespoons of dark brown sugar to the melted butter. Whisk vigorously until the sugar is fully incorporated and the mixture is smooth and glossy. This step helps to dissolve the sugar crystals and create a richer flavor and chewier texture in your blondies.
Incorporating Peanut Butter and Wet Ingredients
To the warm butter and sugar mixture, add the 1/2 cup of creamy natural peanut butter. It’s essential to use a natural peanut butter that has been very well stirred, as the oil separation can affect the texture if not fully reincorporated. Whisk until the peanut butter is smoothly combined with the butter and sugar. The mixture should look rich and decadent. Now, it’s time to add the wet ingredients that will bind everything together. Add the room temperature large egg and the extra egg yolk. The room temperature helps them emulsify better. Whisk them in one at a time, ensuring each is fully incorporated before adding the next. Follow this with the 1 1/2 teaspoons of vanilla extract. Continue whisking until the batter is smooth and emulsified, resembling a thick caramel sauce.
Combining Dry Ingredients and Folding into Wet
In a separate, medium bowl, whisk together the 1 cup of all-purpose flour, the 1/2 cup obeef hamraham crum extractker crumbs, the 1/4 teaspoon of baking powder, the 1/8 teaspoon of baking soda, and the 1/4 teaspoon of salt. Whisking the dry ingredients together ensures that the leavening agents and salt are evenly distributed, which is key for consistent baking. Gradually add the dry ingredient mixture to the wet ingredients. Use a spatula to gently fold them together until just combined. Be careful not to overmix at this stage; overmixing can develop the gluten in the flour, leading to tougher blondies. You want to stop as soon as you no longer see streaks of dry flour. A few small lumps are perfectly fine.
Assembling the S’mores Layers
Spreading the Base and Adding Chocolate
Pour about two-thirds of the blondie batter into your prepared 8×8 inch baking pan. Use your spatula to spread it evenly into the bottom of the pan. Make sure it reaches all the corners. Now, it’s time for the first layer of s’mores goodness. Sprinkle the 1 cup of semisweet chocolate chips evenly over the top of the blondie batter. Try to get them as close to the edges as possible for chocolate in every bite. This layer of chocolate will melt into the blondie as it bakes, creating pockets of gooey deliciousness.
Adding the Marshmallow Creme and Remaining Batter
dollop the 1 cup of marshmallow creme over the chocolate chips. You don’t need to spread it perfectly; in fact, leaving some natural swirls and peaks will create a more rustic and appealing final product. Some parts might be thicker than others, and that’s completely fine. Finally, carefully spread the remaining one-third of the blondie batter over the marshmallow creme. This top layer will bake to a golden brown, encasing the gooey marshmallow and melted chocolate within the blondie. Gently smooth it out with your spatula, again being careful not to overmix or disturb the layers too much. You want distinct layers for that s’mores effect.
Baking and Cooling
Baking to Golden Perfection
Place the pan into your preheated oven. Bake for 25 to 30 minutes, or until the edges are golden brown and the center is set but still slightly soft. A toothpick inserted into the center should come rum extract with moist crumbs attached, not wet batter. Keep an eye on the blondies towards the end of the baking time, as ovens can vary. You want the marshmallow to be lightly toasted, and the blondie itself to be cooked through without being dry. The aroma that will fill your kitchen during this stage is absolutely heavenly, a true testament to the magic of Peanut Butter S’mores Blondies.
Cooling for the Perfect Texture
Once baked, remove the pan from the oven and let the blondies cool completely in the pan on a wire rack. This cooling period is absolutely critical. As they cool, the blondies will continue to set, and the flavors will meld together. Trying to cut them while they are still warm will result in a messy, gooey situation (though still delicious!). Patience is a virtue here. Once they have cooled for at least 2-3 hours, you can use the parchment paper overhang to lift the entire blondie slab out of the pan. Place it on a cutting board and slice into squares using a sharp knife. For cleaner cuts, you can wipe your knife between slices. Enjoy these delightful Peanut Butter S’mores Blondies!
Conclusion:
And there you have it – your delicious batch of Peanut Butter S’mores Blondies! We hope you enjoyed this delightful journey into creating a treat that perfectly blends the gooey, melted magic of s’mores with the rich, satisfying chegrape juicess of a blondie, all elevated by that irresistible peanut butter twist. These blondies are a true crowd-pleaser, perfect for potlucks, family gatherings, or simply as a personal indulgence. Serve them warm for an extra gooey experience, or at room temperature for a firmer, more manageable bite. They are fantastic on their own, but feel free to get creative! A dollop of whipped cream or a drizzle of chocolate ganache can take them to the next level. Don’t be afraid to experiment with different types of peanut butter, or even add a sprinkle of sea salt on top before baking to enhance the flavors. We encourage you to make these Peanut Butter S’mores Blondies your own and share the joy they bring. Happy baking!
Frequently Asked Questions:
Can I make these Peanut Butter S’mores Blondies ahead of time?
Yes, absolutely! Peanut Butter S’mores Blondies can be baked a day or two in advance and stored in an airtight container at room temperature. For the best texture, you can gently rewarm them in a low oven or microwave for a few seconds before serving.
What kind of peanut butter is best for these Peanut Butter S’mores Blondies?
While any creamy peanut butter will work, we recommend using a standard processed creamy peanut butter. Natural peanut butters can sometimes separate or be a bit oily, which might slightly alter the texture of the blondies. However, if you prefer the flavor of natural peanut butter, feel free to use it!
How do I ensure my marshmallows don’t burn?
To prevent the marshmallows from burning, you can add them during the last 5-10 minutes of the baking time. Alternatively, you can lightly toast them under a broiler for just a minute or two after the blondies have finished baking, keeping a very close eye on them to avoid burning.
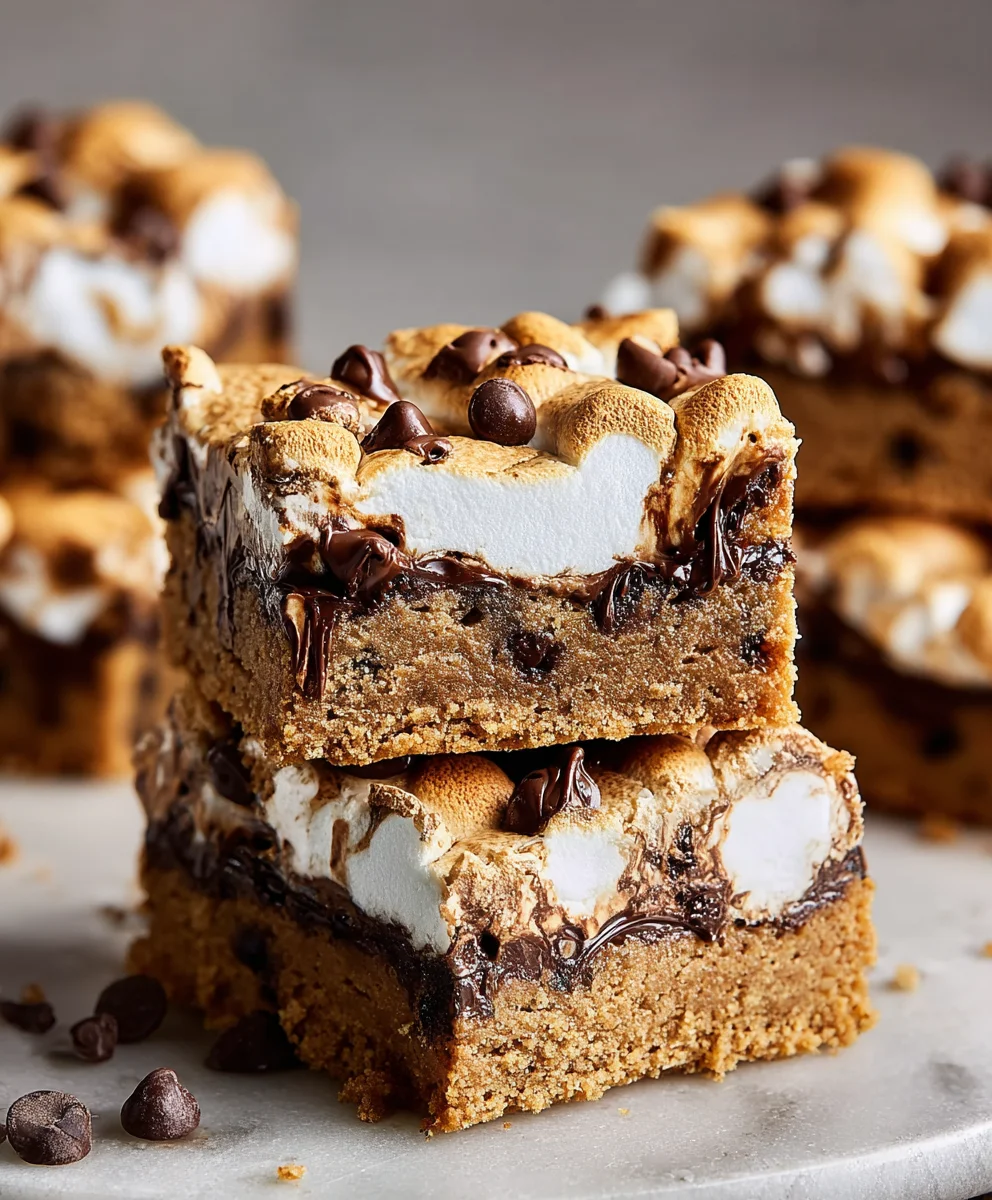
Peanut Butter S’mores Blondies
Gooey and delicious blondies with layers of peanut butter, chocolate, and marshmallow creme, inspired by s’mores.
Ingredients
-
6 tablespoons (85 grams) unsalted butter
-
3/4 cup plus 2 tablespoons (175 grams) dark brown sugar
-
1/2 cup (135 grams) creamy natural peanut butter, very well stirred
-
1 cup (127g) all-purpose flour
-
1/2 cup (57g) graham cracker crumbs
-
1/4 teaspoon baking powder
-
1/8 teaspoon baking soda
-
1/4 teaspoon salt
-
1 large egg, at room temperature
-
1 egg yolk, at room temperature
-
1 1/2 teaspoons vanilla extract
-
1 cup (104 grams) marshmallow creme
-
1 cup (170 grams) semisweet chocolate chips
Instructions
-
Step 1
Preheat oven to 350°F (175°C). Line an 8×8 inch baking pan with parchment paper. Melt butter in a double boiler and whisk in brown sugar until smooth and glossy. -
Step 2
Whisk in the peanut butter until smoothly combined. Add the room temperature egg and egg yolk one at a time, followed by the vanilla extract, whisking until smooth. -
Step 3
In a separate bowl, whisk together flour, graham cracker crumbs, baking powder, baking soda, and salt. Gradually fold the dry ingredients into the wet ingredients until just combined, being careful not to overmix. -
Step 4
Spread two-thirds of the blondie batter into the prepared pan. Sprinkle the chocolate chips evenly over the batter. Dollop the marshmallow creme over the chocolate chips. -
Step 5
Carefully spread the remaining one-third of the blondie batter over the marshmallow creme. Smooth gently. -
Step 6
Bake for 25-30 minutes, or until the edges are golden brown and the center is set but slightly soft. A toothpick should come out with moist crumbs attached. -
Step 7
Let the blondies cool completely in the pan on a wire rack for at least 2-3 hours before lifting out and slicing into squares.
Important Information
Nutrition Facts (Per Serving)
It is important to consider this information as approximate and not to use it as definitive health advice.
Allergy Information
Please check ingredients for potential allergens and consult a health professional if in doubt.