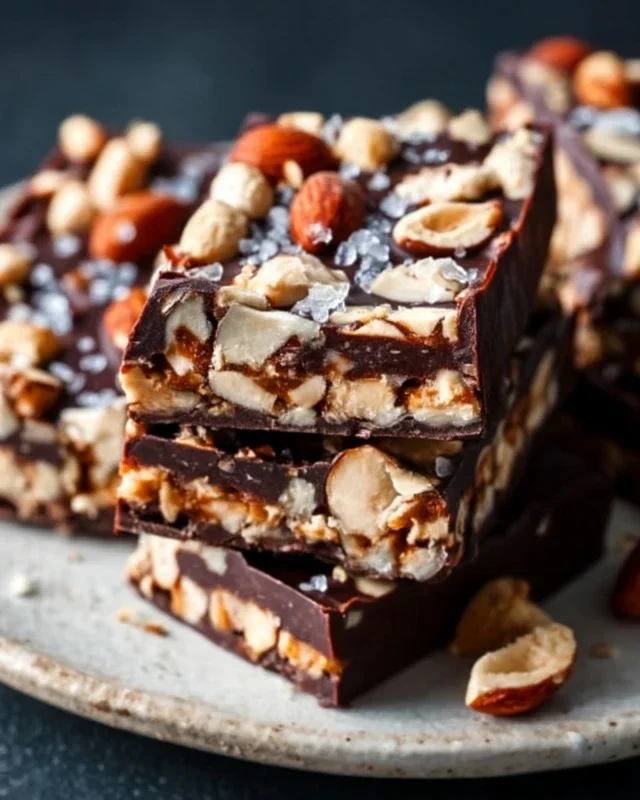
Dark Chocolate Sea Salt Nut Bars-Easy Healthy Treat
Dark Chocolate and Sea Salt Nut Bars are the ultimate antidote to any craving. I’m talking about that perfect storm of sweet and salty, crunchy and chewy, that sends your taste buds into overdrive. If you’re anything like me, you understand the almost primal urge for something deeply satisfying, something that hits all the right notes without being overly fussy. This is precisely what these bars deliver. They’re incredibly versatile – a fantastic grab-and-go breakfast, an energizing afternoon pick-me-up, or even a decadent, yet surprisingly wholesome, dessert. What truly sets these Dark Chocolate and Sea Salt Nut Bars apart is the exquisite balance. The rich, slightly bitter dark chocolate is perfectly complemented by the bright pop of sea salt, creating an addictive contrast. And the medley of nuts? Pure textural bliss. Forget those store-bought imposters; this is the real deal.
Why You’ll Love These
The Perfect Blend of Flavors and Textures
Ingredients:
Crafting Your Own Decadent Dark Chocolate and Sea Salt Nut Bars
There’s something incredibly satisfying about making your own snacks, and these Dark Chocolate and Sea Salt Nut Bars are no exception. They’re the perfect blend of crunchy, chewy, sweet, and salty, with that irresistible touch of rich dark chocolate. I love having these on hand for a quick energy boost, a mid-afternoon treat, or even as a healthier dessert option. They’re also surprisingly easy to make, requiring no fancy equipment or complicated techniques. Get ready to impress yourself (and anyone you share them with!) with this delightful recipe.
Preparing Your Nutty Foundation
The base of these bars is all about texture and flavor, and the nuts are the stars of the show. I’ve found a fantastic combination for this recipe, but feel free to experiment with your favorites. For this batch, we’re using a blend of cashews, peanuts, and almonds. The cashews provide a creamy richness, the peanuts offer a classic nutty flavor, and the almonds add a satisfying crunch. Ensure your nuts are unsalted so you have complete control over the saltiness of the final bar. If you prefer a different nut profile, go ahead and use your heart’s desire – walnuts, pecans, hazelnuts, or even a mix would be wonderful. The key is to have about 2 1/2 cups in total.
Next, we’ll introduce a delightful crispiness with puffed rice. This light and airy cereal adds a wonderful textural contrast to the nuts, preventing the bars from becoming too dense. Half a cup is usually just enough to distribute throughout without overwhelming the nutty goodness.
Binding It All Together
Now, let’s talk about what holds these delicious ingredients together. Brown rice syrup is our secret weapon here. It’s a fantastic natural sweetener that provides a lovely chegrape juicess and helps bind everything into a cohesive bar. A quarter cup of brown rice syrup should do the trick. You can find this in most health food stores or the natural sweeteners aisle of your grocery store.
To elevate the flavor profile even further, we’ll add a generous teaspoon and a half of vanilla extract. This adds a warm, comforting aroma and taste that complements both the nuts and the chocolate beautifully. And, of course, for that essential salty kick that balances the sweetness, we’ll incorporate half a teaspoon of sea salt. Don’t be shy with the sea salt; it really makes the flavors pop.
The Chocolatey Finnon-alcoholic ale
The crowning glory of these bars is, undoubtedly, the dark chocolate. We’ll use a cup of dark chocolate chips for this recipe. I personally love using dark chocolate with a cocoa percentage of 60% or higher, as it offers a more intense flavor that stands up well to the sweetness of the syrup and the richness of the nuts. If you prefer milk chocolate, feel free to substitute, but be mindful that it might make the bars a bit sweeter.
For that smooth, melty finish on top, we’ll create a simple chocolate drizzle. This involves melting the chocolate chips with a couple of teaspoons of coconut oil. The coconut oil helps the chocolate melt more easily and gives it a beautiful sheen. You can also sprinkle a little flaky sea salt over the top of the melted chocolate for an extra burst of savory crunch – it’s entirely optional but highly recommended for those who love that sweet and salty contrast.
Step-by-Step Assembly:
1. Prepare Your Pan: Line an 8×8 inch baking pan with parchment paper, leaving some overhang on the sides. This will make it incredibly easy to lift the finished bars out of the pan. Lightly grease the parchment paper if you’re worried about sticking, though it’s usually not necessary. Set this aside.
2. Combine the Dry Ingredients: In a large mixing bowl, combine your prepared nuts and puffed rice. Give them a good stir to ensure they are evenly distributed. This is the textural foundation of your bars.
3. Create the Binder: In a small saucepan over medium-low heat, gently warm the brown rice syrup. You don’t want it to boil, just to become slightly more fluid and easier to pour. Once warmed, remove it from the heat and stir in the vanilla extract and sea salt. Whisk until well combined. This is your sticky, flavorful binder.
4. Mix and Press: Pour the warm brown rice syrup mixture over the nuts and puffed rice in the large bowl. Using a sturdy spatula or your hands (lightly greased if needed), mix everything thoroughly until all the dry ingredients are well coated. It will be sticky, and that’s perfectly fine! Transfer this mixture into your prepared baking pan. Now, here’s a crucial step for nicely formed bars: press the mixture down into the pan very firmly and evenly. You can use the back of your spatula, a flat-bottomed glass, or even another piece of parchment paper to help you get a really compact and level surface. The firmer you press, the better your bars will hold together.
5. Melt and Drizzle the Chocolate: In a microwave-safe bowl, combine the dark chocolate chips and coconut oil. Microwave in 30-second intervals, stirring well after each interval, until the chocolate is smooth and completely melted. Be careful not to overheat the chocolate, as it can seize. Alternatively, you can melt the chocolate using a double boiler. Once melted, drizzle the chocolate evenly over the pressed nut mixture in the pan. If you’re using flaky sea salt for topping, sprinkle it over the melted chocolate immediately while it’s still wet.
6. Chill and Cut: Place the pan in the refrigerator and let it chill for at least 1-2 hours, or until the chocolate has set and the bars are firm. Once completely chilled, use the parchment paper overhang to lift the entire slab out of the pan. Place it on a cutting board and use a sharp knife to cut into your desired bar size. I usually get about 12-16 bars, depending on how I slice them. Store your bars in an airtight container in the refrigerator for the best texture and longevity. Enjoy!
Conclusion:
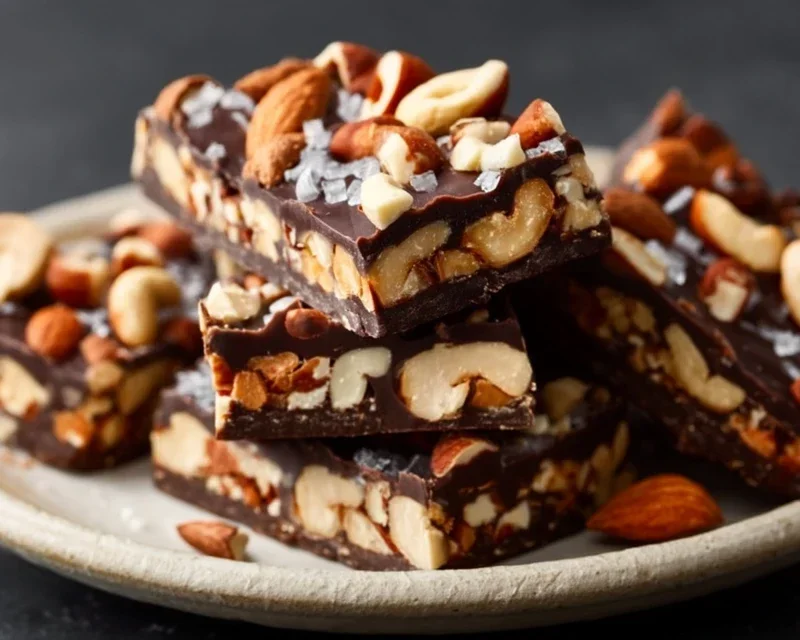
These Dark Chocolate and Sea Salt Nut Bars are an absolute triumph of texture and flavor! The perfect balance of rich, bittersweet dark chocolate, crunchy nuts, and a hint of that irresistible sea salt makes them a truly addictive treat. They’re incredibly satisfying, offering a delightful chew with bursts of chocolatey goodness. I find they’re fantastic for a quick energy boost during a busy day, a sophisticated dessert after a meal, or even a thoughtful homemade gift for friends and family. Don’t be afraid to get creative with your nut choices – almonds, walnuts, pecans, or even a mix would be divine. You could also add a sprinkle of chili flakes for a spicy kick or some dried cranberries for a tart counterpoint. I wholeheartedly encourage you to give this recipe a try; you won’t regret whipping up these delicious Dark Chocolate and Sea Salt Nut Bars!
Frequently Asked Questions:
Can I make these nut bars vegan?
Absolutely! To make these Dark Chocolate and Sea Salt Nut Bars vegan, simply ensure your dark chocolate chips are dairy-free. Most good quality dark chocolate is naturally vegan, but it’s always worth checking the ingredients list. You can also use a plant-based binder like maple syrup instead of honey if your recipe calls for it.
How long will these bars last?
Stored in an airtight container at room temperature, these bars should stay fresh for about 5-7 days. For longer storage, you can keep them in the refrigerator, where they’ll last for up to two weeks. They also freeze surprisingly well!
Dark Chocolate and Sea Salt Nut Bars
A simple and delicious no-bake bar combining crunchy nuts, puffed rice, and rich dark chocolate with a hint of sea salt.
Ingredients
-
2 1/2 cups unsalted nuts of choice (3/4 cup cashews, 3/4 cup peanuts, 1 cup almonds)
-
1/2 cup puffed rice
-
1/4 cup brown rice syrup
-
1 1/2 teaspoon vanilla extract
-
1/2 teaspoon sea salt
-
1 cup dark chocolate chips
-
2 teaspoons coconut oil
-
Flaky salt for topping (optional)
Instructions
-
Step 1
Line an 8×8 inch baking pan with parchment paper, leaving some overhang for easy removal. -
Step 2
In a large bowl, combine the nuts and puffed rice. Stir to mix. -
Step 3
In a small saucepan over low heat, warm the brown rice syrup, vanilla extract, and sea salt until combined and slightly warmed. Do not boil. -
Step 4
Pour the warm syrup mixture over the nut and puffed rice mixture. Stir well until everything is evenly coated. -
Step 5
Press the mixture firmly and evenly into the prepared baking pan. -
Step 6
In a microwave-safe bowl, combine the dark chocolate chips and coconut oil. Microwave in 30-second intervals, stirring between each, until melted and smooth. -
Step 7
Pour the melted chocolate over the nut mixture in the pan. Spread evenly with a spatula. -
Step 8
If using, sprinkle flaky salt over the melted chocolate. -
Step 9
Refrigerate for at least 1 hour, or until the chocolate is firm. -
Step 10
Lift the bars out of the pan using the parchment paper overhang. Cut into desired bar shapes.
Important Information
Nutrition Facts (Per Serving)
It is important to consider this information as approximate and not to use it as definitive health advice.
Allergy Information
Please check ingredients for potential allergens and consult a health professional if in doubt.