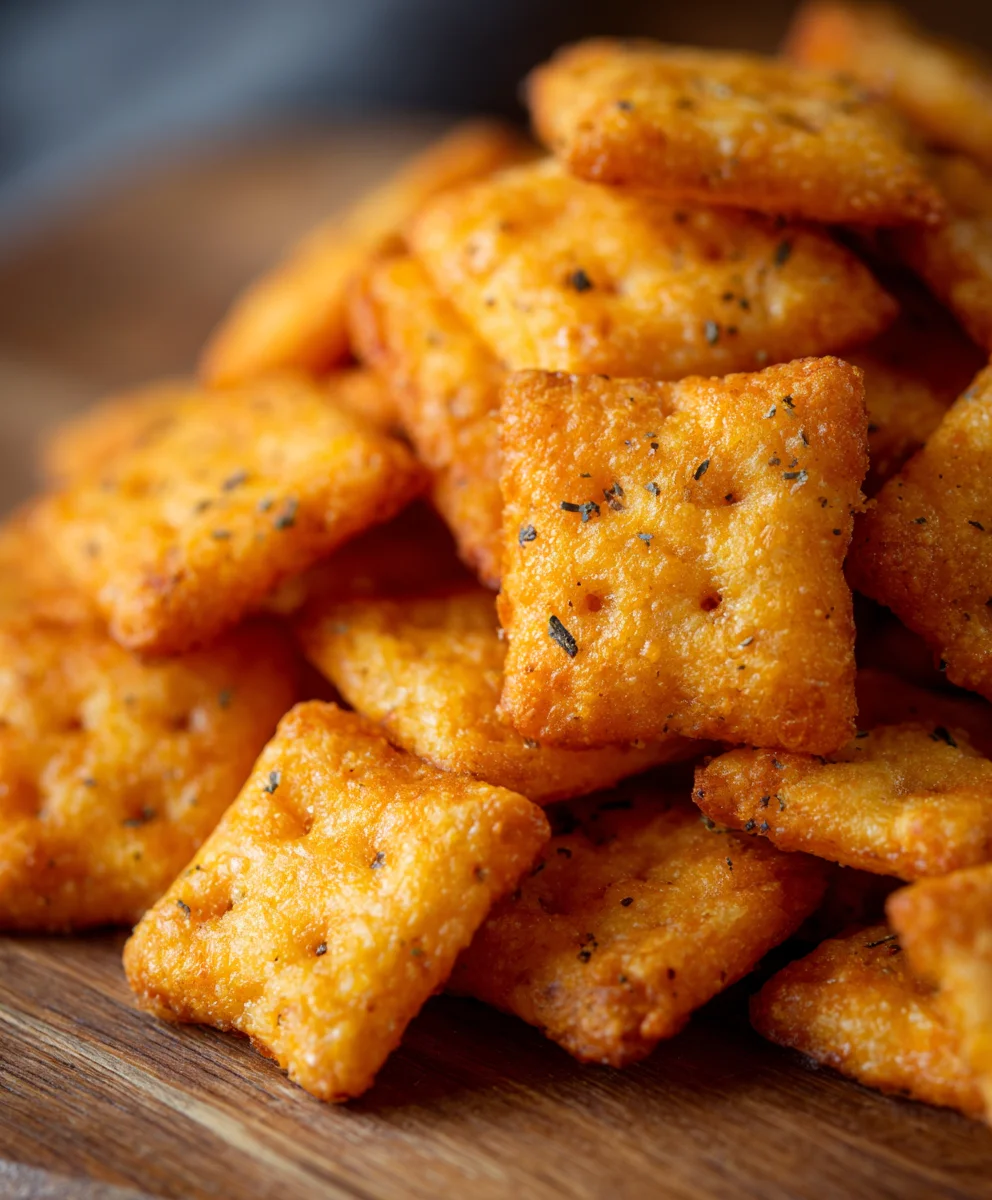
Easy Homemade Cheez Its Recipe-Kid Approved Snack
Homemade Cheez Its are more than just a snack; they are a nostalgic gateway to childhood joy, a testament to simple pleasures, and a surprisingly achievable culinary triumph. Who doesn’t remember that irresistible, intensely cheesy crunch of a Cheez-It straight from the box? Well, imagin extracte replicating that iconic flavor and texture in your own kitchen, with ingredients you can pronounce and the satisfaction of true homemade goodness. What makes these crackers so universally beloved? It’s that perfect balance of sharp cheddar, a hint of salt, and that signature airy crispness that crum extractbles just right. Making your own Homemade Cheez Its elevates this humble snack into something truly special. You’re not just making crackers; you’re crafting a miniature masterpiece of savory delight, proving that sometimes, the most delightful treats are the ones we create ourselves.
Ingredients:
- ¼ cup unsalted butter, softened to room temperature
- 8 oz. sharp cheddar cheese, shredded
- 1 ¼ cups all-purpose flour
- 1 teaspoon kosher salt, plus extra for sprinkling on top
- 2-3 tablespoons cold water
- 2 tablespoons olive oil
Making Your Homemade Cheez-Its: The Dough
Phase 1: Creaming Butter and Cheese
This is where the magic begin extracts for our Homemade Cheez-Its! In a medium-sized mixing bowl, combine the softened unsalted butter and the shredded sharp cheddar cheese. Use a sturdy spoon or a rubber spatula to vigorously mix these two ingredients together. You want to break down the butter and cheese until they form a relatively smooth, paste-like consistency. This process is crucial for ensuring the butter and cheese are evenly distributed throughout the dough, which will lead to that signature cheesy flavor and slightly crispy texture we all love in our Homemade Cheez-Its. Don’t be afraid to really put some elbow grease into it! Aim for a well-combined mixture where you don’t see distinct chunks of butter or large clumps of cheese. The warmth from your hands will also help soften the butter further, aiding in the amalgamation.
Phase 2: Incorporating the Dry Ingredients
Next, we’ll introduce the dry components to our cheesy butter mixture. Add the 1 ¼ cups of all-purpose flour and the 1 teaspoon of kosher salt to the bowl. Now, using your hands or a pastry blender if you havegin extracte, begin to work the flour and salt into the butter and cheese. The goal here is to incorporate the dry ingredients until the mixture resembles coarse crum extractbs. It might look a bit dry and shaggy at this stage, and that’s perfectly normal. Think of it like making a pie crust – we’re just starting to bring everything together. Resist the urge to overmix at this point; we want to avoid developing the gluten in the flour too much, which can lead to tough crackers.
Phase 3: Adding the Water and Forming the Dough
This is the step wherum extractour crumbly mixture transforms into a cohesive dough, the foundation for our delicious Homemade Cheez-Its. Gradually add the cold water, one tablespoon at a time, while continuing to mix and bring the dough together. You will likely only need 2 to 3 tablespoons, so add it slowly and observe how the dough responds. As you add the water, gently press and gather the mixture with your hands. The cold water helps to bind the ingredients without melting the butter too much, which is essential for a flaky texture. Once the dough just comes together and can be formed into a ball without being overly sticky or dry, stop adding water. It should feel slightly firm but pliable. If it feels too dry and won’t hold together, add another half tablespoon of water. If it feels too sticky, you can add a tiny pinch more flour.
Shaping and Baking Your Homemade Cheez-Its
Phase 4: Chilling and Rolling the Dough
Now that we have our dough ready, it’s time to prepare it for shaping. Wrap the dough ball tightly in plastic wrap and flatten it slightly into a disc. This makes it easier to roll out later. Place the wrapped dough into the refrigerator for at least 30 minutes. Chilling the dough is a critical step; it allows the butter to firm up again, making the dough easier to handle and preventing it from spreading too much during baking. Once chilled, take the dough out and place it between two pieces of parchment paper. Using a rolling pin, roll the dough out to a uniform thickness of about 1/8 inch. This thinness is key to achieving that satisfying crunch in your Homemade Cheez-Its. If the dough starts to get too soft while rolling, pop it back in the fridge for a few minutes.
Phase 5: Cutting and Preparing for the Oven
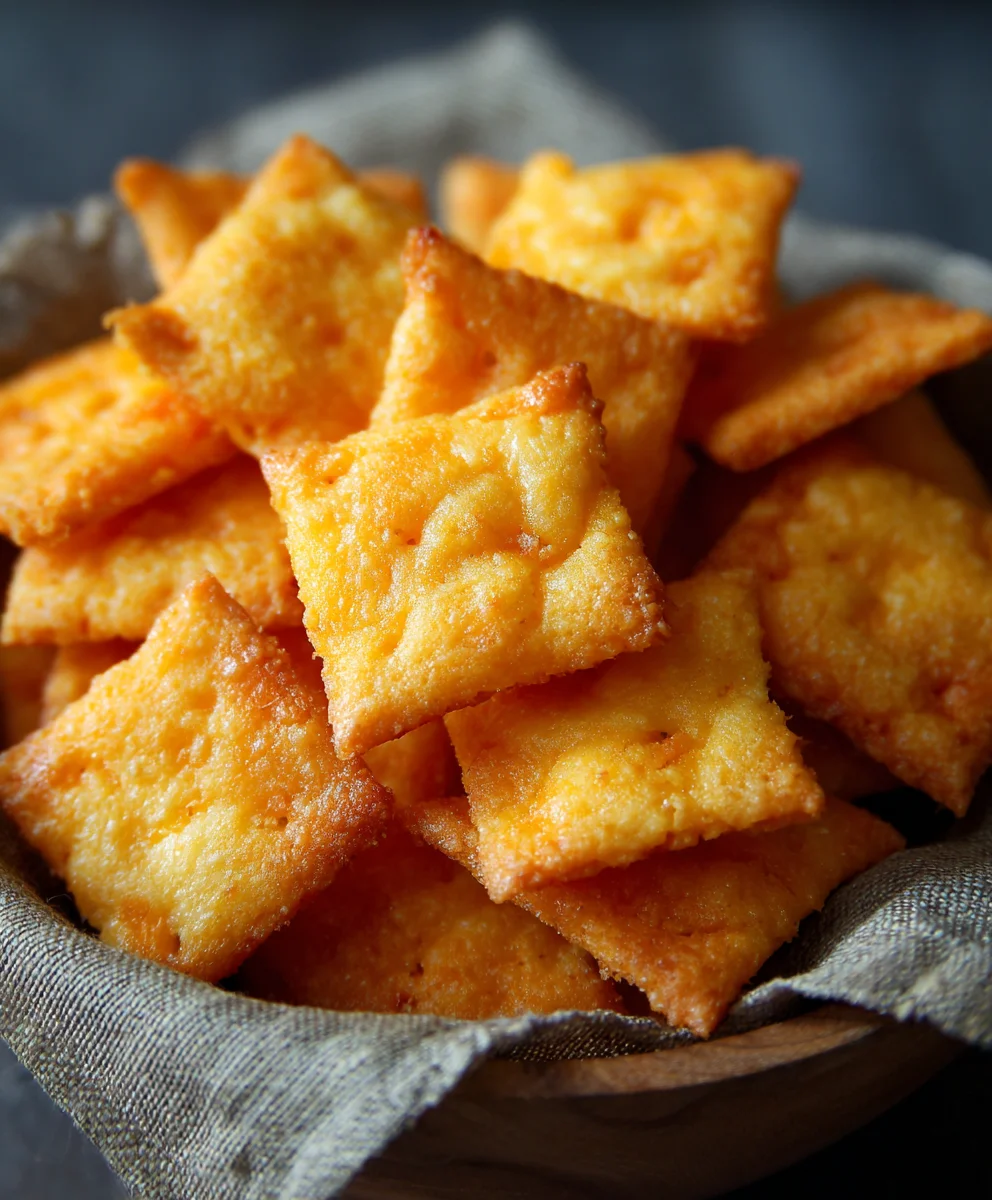
With your dough rolled out thinly, it’s time to create those iconic cracker shapes. Remove the top layer of parchment paper. Using a pizza cutter or a sharp knife, cut the dough into small squares, roughly ½ inch by ½ inch, mimicking the classic Cheez-It size. You can also use a small square cookie cutter if you have one. As you cut, try to be as consistent as possible with the size of your squares for even baking. Carefully transfer the cut dough squares onto a baking sheet lined with parchment paper, leaving a small amount of space between them. They will spread slightly during baking, but not excessively. Drizzle the 2 tablespoons of olive oil evenly over the cut cracker dough. This olive oil will contribute to a lovely golden hue and an extra layer of subtle flavor. Finally, generously sprinkle the tops of the crackers with more kosher salt. This salt topping is essential for that signature savory punch.
Phase 6: Baking to Perfection
Preheat your oven to 350 degrees Fahrenheit (175 degrees Celsius). Place the prepared baking sheet into the preheated oven. Bake the Homemade Cheez-Its for 12 to 16 minutes, or until they are golden brown and crispy around the edges. Keep a close eye on them during the last few minutes of baking, as they can go from perfectly baked to burnt very quickly due to their small size and thinness. The exact baking time will depend on your oven and the thickness of your dough. Once they’re a beautiful golden color, carefully remove the baking sheet from the oven. Allow the crackers to cool on the baking sheet for a few minutes before transferring them to a wire rack to cool completely. This cooling period allows them to become extra crisp. Once fully cooled, your delicious Homemade Cheez-Its are ready to be enjoyed!
Conclusion:
I hope you’ve enjoyed diving into the delicious world of Homemade Cheez Its! We’ve covered everything from the simple ingredients to the precise baking times, all designed to bring that irresistible cheesy crunch right into your own kitchen. These aren’t just a snack; they’re a labor of love that tastes infinitely better than anything store-bought. The satisfaction of pulling a tray of perfectly golden, cheesy crackers from your oven is truly something special.
When it comes to serving, the possibilities are endless! These Homemade Cheez Its are fantastic on their own, but they also make a wonderful accompaniment to soups and salads, or a delightful addition to a charcuterie board. For variations, don’t be afraid to experiment with different cheeses like sharp cheddar, pepper jack for a kick, or even a smoky gouda. You can also add a pinch of smoked paprika or a dash of garlic powder to the dough for an extra flavor dimension.
Don’t be discouraged if your first batch isn’t absolutely perfect – baking is a journey, and practice makes perfect! The joy of creating your own snacks is in the process and the incredible taste. So, gather your ingredients, preheat your oven, and get ready to experience the ultimate cheesy snack satisfaction with your very own Homemade Cheez Its. Happy baking!
Frequently Asked Questions about Homemade Cheez Its:
Can I make these vegan?
While this specific recipe is dairy-based, you can adapt it for vegan eaters by using a good quality vegan cheddar cheese and replacing the butter with vegan butter or a neutral oil like vegetable oil. The texture might vary slightly, but you can still achieve a delicious cheesy cracker.
How should I store my Homemade Cheez Its?
Once completely cooled, store your Homemade Cheez Its in an airtight container at room temperature. They should stay wonderfully crisp for up to a week. If they do lose a little crispness, you can briefly pop them back in a low oven (around 250°F or 120°C) for a few minutes to re-crisp them.
Easy Homemade Cheez-Its Recipe
A kid-approved recipe for making delicious homemade Cheez-Its from scratch, featuring sharp cheddar cheese and a satisfying crunch.
Ingredients
-
1/4 cup unsalted butter, softened to room temperature
-
8 oz. sharp cheddar cheese, shredded
-
1 1/4 cups all-purpose flour
-
1 teaspoon kosher salt, plus extra for sprinkling on top
-
2-3 tablespoons cold water
-
2 tablespoons olive oil
Instructions
-
Step 1
In a medium-sized mixing bowl, combine the softened unsalted butter and the shredded sharp cheddar cheese. Mix vigorously until a relatively smooth, paste-like consistency is formed. -
Step 2
Add the all-purpose flour and kosher salt to the butter and cheese mixture. Work the dry ingredients in until the mixture resembles coarse crumbs. -
Step 3
Gradually add cold water, one tablespoon at a time, mixing until the dough just comes together and can be formed into a ball without being overly sticky or dry. -
Step 4
Wrap the dough tightly in plastic wrap, flatten into a disc, and chill in the refrigerator for at least 30 minutes. Once chilled, roll the dough out between two pieces of parchment paper to about 1/8 inch thickness. -
Step 5
Cut the dough into small squares (approximately 1/2 inch by 1/2 inch). Transfer the squares to a baking sheet lined with parchment paper. Drizzle evenly with olive oil and sprinkle generously with additional kosher salt. -
Step 6
Bake in a preheated oven at 350°F (175°C) for 12-16 minutes, or until golden brown and crispy. Let cool on the baking sheet for a few minutes before transferring to a wire rack to cool completely.
Important Information
Nutrition Facts (Per Serving)
It is important to consider this information as approximate and not to use it as definitive health advice.
Allergy Information
Please check ingredients for potential allergens and consult a health professional if in doubt.