Nut-Free Pesto Recipe – Delicious & Easy!
Nut Free Pesto is a vibrant and versatile sauce that has become a go-to for so many of us. Gone are the days when traditional pesto was off-limits due to allergies or dietary preferences. This recipe celebrates all the glorious flavor of classic pesto without a single nut in sight. It’s amazing how something so simple can elevate so many dishes, from a quick pasta toss to a gourmet bruschetta topping or a delicious marinade for chicken and fish. We love it because it’s bursting with fresh basil, garlic, and tangy Parmesan, creating a symphony of savory goodness. What truly makes this Nut Free Pesto special is its inclusivity. Now, everyone can experience the joy of this Italian-inspired delight, making meals more enjoyable and accessible for friends and family alike. Prepare to be amazed by how easily you can recreate this crowd-pleasing favorite in your own kitchen.
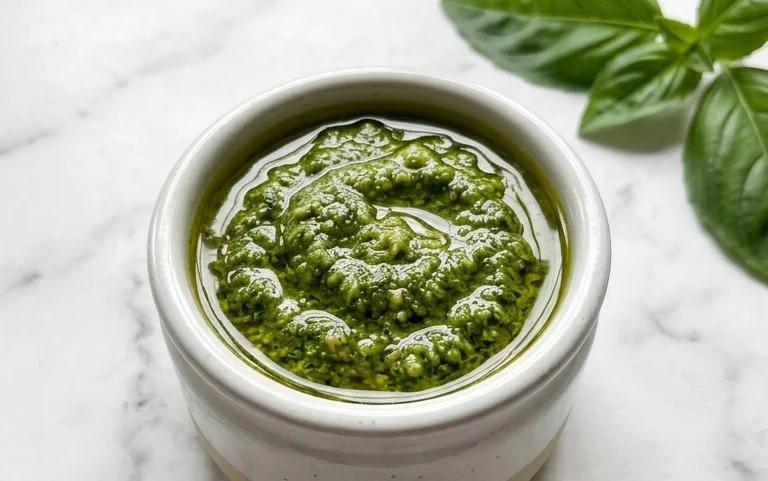
Nut-Free Pesto: A Creamy, Dreamy Classic, Reimagin extracted
As a passionate home cook, I’m always on the lookout for ways to make classic dishes accessible to everyone. Allergies shouldn’t be a barrier to enjoying delicious food, and that’s precisely where this nut-free pesto comes in. Traditional pesto is fantastic, but for those with nut allergies or seeking a dairy-free alternative (though this version uses Parmesan), it can be off-limits. My goal was to create a vibrant, flavorful pesto that captures the essence of the origin extractal without any nuts. And the result? A triumph! This pesto is wonderfully versatile, perfect for pasta, spreading on sandwiches, drizzling over roasted vegetables, or even as a dip. It’s so quick to make, you can whip up a batch whenever the craving strikes.
The secret to a truly satisfying pesto lies in the quality of its ingredients. For this nut-free version, we’re focusing on the freshness of the basil, the pungency of the garlic, and the richness of the olive oil. You’ll be amazed at how much flavor can be packed into such a simple recipe. Let’s get started!
Ingredients:
Getting Started: Preparing Your Ingredients
Before we dive into the blending, let’s make sure all our ingredients are prepped and ready to go. This ensures a smooth and efficient process.
First, let’s talk about the basil. For the best flavor, it’s crucial to use fresh basil leaves. You want them to be vibrant green and free from any wilting or blemishes. Gently wash the basil and then give it a good spin in a salad spinner or pat it very dry with paper towels. Excess water can make your pesto watery and dilutes the flavor. You can pluck the leaves directly from the stems; the stems can sometimes be a bit fibrous and might not blend as smoothly.
Next, the garlic. I recommend using fresh garlic cloves. While garlic powder can be a substitute in a pinch, it just doesn’t have the same bright, pungent kick that fresh garlic provides. Peel your garlic cloves. You can give them a quick mince with a knife if you want to make the blending process even easier for your food processor or blender, though it’s not strictly necessary.
The Parmesan cheese is another key player. Using freshly grated Parmesan cheese will make a significant difference in the texture and flavor of your pesto. Pre-grated cheese often contains anti-caking agents that can affect the smoothness of your pesto. So, take a moment to grate a good quality Parmesan; the nutty, salty notes are essential to the pesto’s profile, even without the actual nuts.
Finally, the olive oil. A good quality extra virgin extract olive oil will elevate your pesto. It provides that characteristic silky texture and fruity undertone. Measure it out so it’s ready to be drizzled in. The salt and pepper are for seasoning, so have them within easy reach.
Crafting Your Nut-Free Pesto
Now for the fun part – transforming these simple ingredients into a delicious condiment! You can use a food processor or a blender for this. Both work beautifully, but a food processor is generally my preference for pesto as it gives you a bit more control over the texture.
1. Initial Blending: Building the Base
Place the prepared basil leaves and the peeled garlic cloves into the bowl of your food processor or blender. Secure the lid. Pulse the mixture a few times, just to break down the basil and garlic. You’re not aiming for a smooth paste yet, just to get things started and reduce the volume of the basil. Scrape down the sides of the bowl with a spatula if needed to ensure all the ingredients are incorporated into the blades. This initial step helps to really break down the tough cellular structure of the basil leaves, releasing their essential oils and vibrant green color.
2. Adding the Cheese and Seasoning
With the food processor or blender running on a low speed, gradually add the freshly grated Parmesan cheese. Let it blend until it’s well incorporated with the basil and garlic. Now is also a good time to add the salt and pepper. You can adjust these to your taste later, but this is a good starting point. The salt will help to further break down the basil and bring out its flavors, while the pepper adds a subtle warmth. Continue to pulse or blend until the mixture starts to look more cohesive, but still with some texture.
3. Emulsifying with Olive Oil: Achieving Creaminess
This is where the magic happens and we achieve that signature smooth, luscious texture of pesto. With the food processor or blender still running on a low speed, slowly drizzle in the olive oil through the feed tube or opening in the lid. You want to add the olive oil in a steady, thin stream. This process is called emulsification, and it’s what creates that wonderfully creamy consistency. Continue to process until the oil is fully incorporated and the pesto has reached your desired smoothness. For a chunkier pesto, you might stop a little earlier; for a very smooth pesto, let it run a bit longer. Be careful not to over-process, as this can sometimes make the pesto a bit greasy or warm.
4. Taste and Adjust
Once you’ve achieved your desired consistency, turn off the food processor or blender. Give your pesto a taste! This is your opportunity to perfect it. Does it need a little more salt? Perhaps a touch more pepper? Or maybe you’d like it a bit more garlicky (though I usually find two cloves to be just right with the Parmesan)? Carefully add any additional seasonings and pulse a few more times to incorporate. Remember, the flavors will continue to meld as it sits. If you find it a little too thick, you can always add another tablespoon of olive oil and pulse again.
5. Serving and Storing Your Nut-Free Pesto
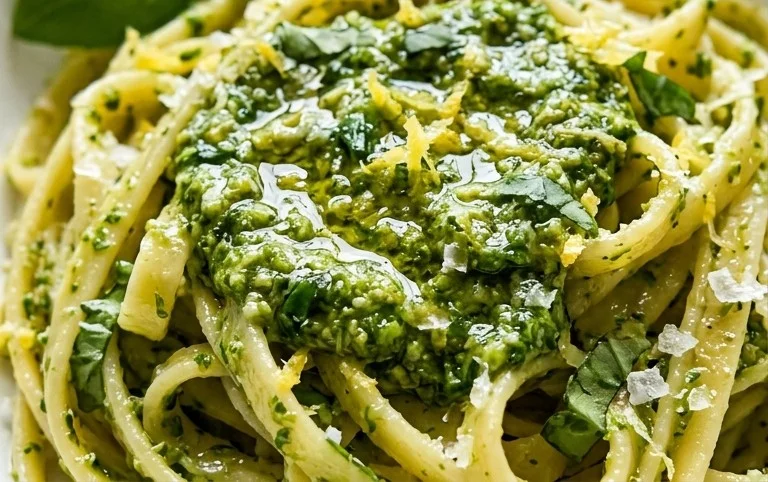
Your delicious, vibrant nut-free pesto is now ready to be enjoyed! You can serve it immediately. Toss it with your favorite pasta (gluten-free pasta works wonderfully too!), spread it on crusty bread for a quick appetizer, use it as a topping for grilled chicken or fish, or mix it with some yogurt or sour cream for a delightful dip.
To store any leftovers, transfer the pesto to an airtight container. To prevent browning and maintain its freshness, pour a thin layer of olive oil over the top of the pesto before sealing the container. This creates a barrier against the air. You can store it in the refrigerator for up to a week. If you find it solidifies a bit in the fridge, just let it sit at room temperature for about 15-20 minutes and stir before serving. For longer storage, you can freeze portions of pesto in ice cube trays and then transfer the frozen cubes to a freezer-safe bag for up to 3 months. This makes it super convenient to have a burst of fresh pesto flavor whenever you need it.
This nut-free pesto is a testament to how simple, fresh ingredients can create something truly special. Enjoy every delicious bite!
Conclusion:
I hope you’ve enjoyed learning how to make this delicious nut-free pesto! It truly is a game-changer for anyone with nut allergies or simply looking for a fresh, vibrant alternative to traditional pesto. The beauty of this recipe lies in its simplicity and versatility. By omitting the nuts, we focus on the bright, herbaceous notes of basil and the creamy richness of good quality olive oil, all brought together with the savory tang of Parmesan and garlic. This nut-free pesto is fantastic on pasta, as a dip for vegetables, spread on sandwiches, or dolloped onto grilled chicken or fish. Don’t be afraid to experiment with the ingredients! You can swap out some of the basil for other herbs like parsley or mint, or even add a pinch of red pepper flakes for a little heat. I genuinely encourage you to give this recipe a try. It’s surprisingly easy to make, incredibly satisfying, and opens up a world of flavor possibilities without the worry of nuts.
Frequently Asked Questions:
Can I make this pesto without basil?
While basil is the classic ingredient, you absolutely can make a delicious pesto without it! Try using a combination of spinach and parsley for a vibrant green color and fresh flavor, or experiment with arugula for a peppery kick. The core principle of combining fresh greens, garlic, cheese, and olive oil still applies.
How long will this nut-free pesto last in the refrigerator?
When stored in an airtight container, covered with a thin layer of olive oil to prevent oxidation, this nut-free pesto should last for about 5-7 days in the refrigerator. The olive oil acts as a natural preservative.
Nut Free Pesto
A classic pesto recipe made without nuts, perfect for those with allergies or seeking a lighter flavor.
Ingredients
-
2 cups fresh basil
-
2 garlic cloves
-
1/2 cup freshly grated Parmesan cheese
-
1/4 cup olive oil
-
1/4 teaspoon salt
-
1/8 teaspoon pepper
Instructions
-
Step 1
Rinse the fresh basil leaves and pat them dry. -
Step 2
Peel and mince the garlic cloves. -
Step 3
Combine basil, garlic, and Parmesan cheese in a food processor. -
Step 4
Pulse until finely chopped. -
Step 5
With the food processor running, slowly drizzle in the olive oil until the pesto is smooth. -
Step 6
Stir in the salt and pepper. Taste and adjust seasoning if needed.
Important Information
Nutrition Facts (Per Serving)
It is important to consider this information as approximate and not to use it as definitive health advice.
Allergy Information
Please check ingredients for potential allergens and consult a health professional if in doubt.