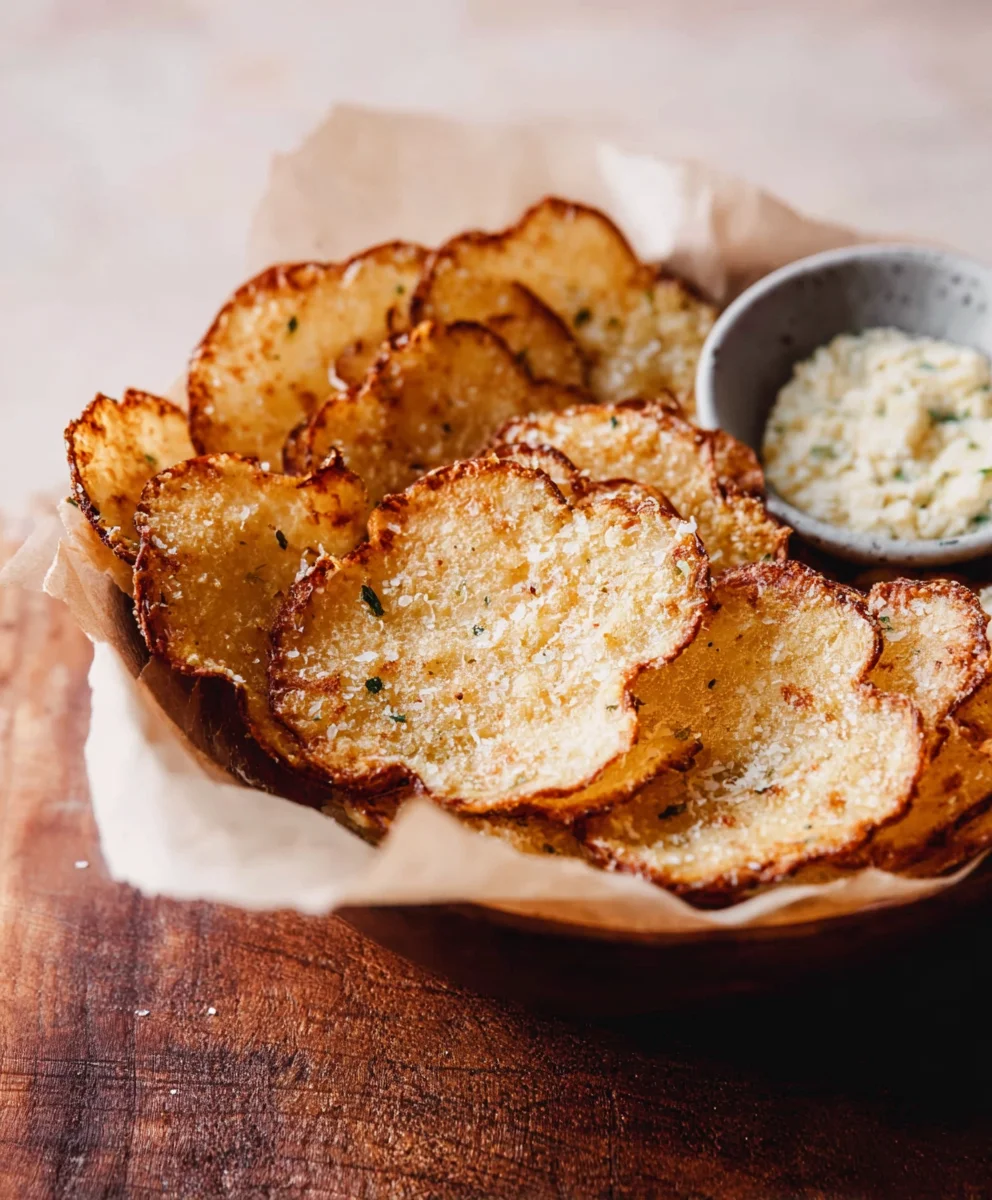
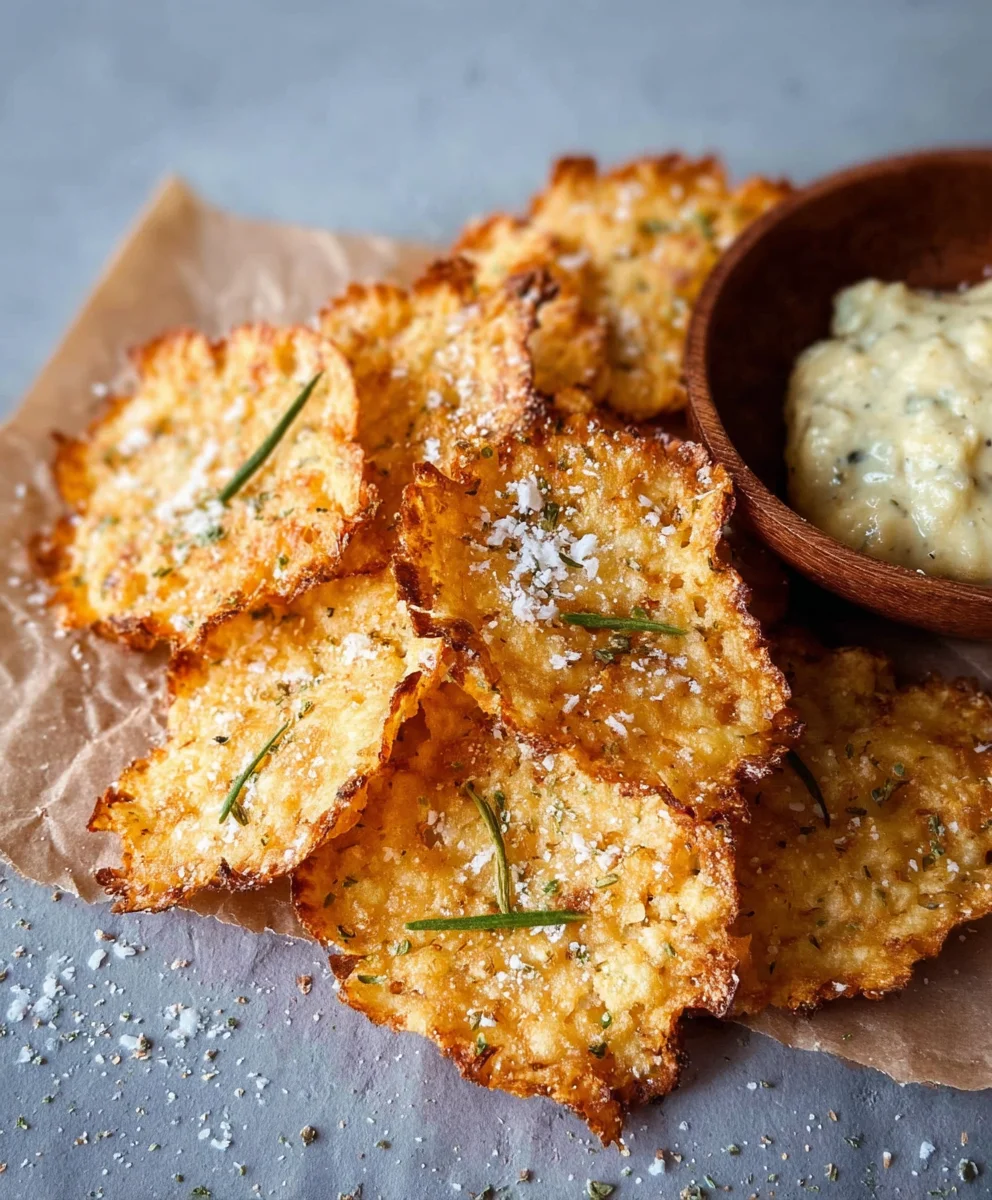
Crispy Cottage Cheese Chips-Easy Healthy Snack
Crispy Cottage Cheese Chips are about to become your new favorite healthy obsession. Forget everything you thought you knew about cottage cheese; this humble dairy delight transforms into an incredibly satisfying, crunchy snack that’s surprisingly simple to make. Imagin extracte golden-brown, impossibly light shards that shatter with every bite, offering a savory satisfaction without the guilt. People absolutely adore these because they hit that perfect textural note – crispy, airy, and utterly addictive. What makes these Crispy Cottage Cheese Chips truly special is their versatility. They’re not just a standalone snack; they’re a brilliant dipper for your favorite hummus, a surprising crouton for a hearty salad, or even a delightful base for avocado toast. This recipe unlocks a world of possibilities, turning a simple ingredient into a culinary revelation that will have everyone asking for the secret.
Ingredients:
- 1 cup cottage cheese (small curds, drained well)
- ¼ teaspoon garlic powder
- ¼ teaspoon onion powder
- ½ teaspoon dried herbs (optional, such as thyme, parsley, or Italian seasoning)
- Salt to taste
- Freshly ground black pepper to taste
- Olive oil spray
Preparing Your Crispy Cottage Cheese Chips
Step 1: Drain the Cottage Cheese and Mix the Base
The first and arguably most crucial step to achieving truly crispy cottage cheese chips is to ensure your cottage cheese is as dry as possible. I like to use a fine-mesh sieve and let it drain for at least 30 minutes, or even longer if you have the time. Pressing gently with the back of a spoon can help release extra whey. Once drained, transfer the cottage cheese to a medium-sized mixing bowl. To this, we’ll add our flavorings. Sprinkle in the garlic powder and the onion powder. These two spices form the savory foundation of our chips, providing that irresistible umami kick. If you’re opting for dried herbs, now’s the time to add them. I often reach for a blend of dried thyme and parsley for a classic, herby note, but a pinch of dried rosemary or even a small amount of everything bagel seasoning would be delightful alternatives. Season generously with salt and freshly ground black pepper. Remember, cottage cheese can be a little bland on its own, so don’t be shy with the seasonings. Stir everything together thoroughly until all the cottage cheese is evenly coated with the spices and herbs. You want to ensure that every bite of your finished chip is packed with flavor.
Step 2: Form the Chips
Now comes the fun part: shaping our cottage cheese mixture into chips. You have a couple of options here, depending on your preference for texture and ease. The most straightforward method is to use a small cookie scoop or a tablespoon to drop small, rounded portions of the cottage cheese mixture onto a baking sheet lined with parchment paper. Aim for dollops that are about 1 to 1.5 inches in diameter. Don’t worry about making them perfectly uniform; a slightly rustic look is part of their charm. If you prefer a flatter chip with more surface area for crisping, you can gently flatten each dollop with the back of your spoon or a small offset spatula. Another excellent method, especially if you want thinner, more uniform chips, is to use a piping bag. Fit the piping bag with a large round tip and pipe small circles of the cottage cheese mixture onto the prepared baking sheet. Whatever method you choose, make sure to leave a little space between each dollop, as they will spread slightly as they bake. This also ensures that hot air can circulate around each chip, promoting even crisping.
Step 3: Baking for Crispness
This is where the magic happens and we transform soft cottage cheese into delicious, crispy snacks. Preheat your oven to 350°F (175°C). This moderate temperature is key to drying out the cottage cheese without burning it. Once your oven is preheated, carefully place the baking sheet with the formed cottage cheese dollops into the center rack. We’re going to bake these for approximately 20 to 25 minutes. During this time, you’ll notice the cottage cheese starting to puff up slightly and then gradually deflate as the moisture evaporates. It will also begin extract to turn a lovely golden-brown color around the edges. It’s a good idea to keep an eye on them, especially during the last 10 minutes of baking, as ovens can vary in temperature. Some might crisp up faster than others.
Step 4: Flipping and Achieving the Ultimate Crisp
To ensure that both sides of our cottage cheese chips get equally crispy, we need to flip them halfway through the baking process. After about 10 to 12 minutes, carefully remove the baking sheet from the oven. Using a thin spatula or a fish spatula, gently flip each cottage cheese chip. You’ll see that the bottom side has likely started to brown and firm up. Flipping them allows the uncooked top side to now face downwards, coming into direct contact with the hot baking sheet and parchment paper, which will further enhance their crispness. Be gentle as you flip them; they will still be somewhat delicate at this stage. Once all the chips have been flipped, return the baking sheet to the oven. Continue baking for another 10 to 13 minutes. The goal here is to achieve a crisp texture throughout. They should feel firm to the touch and have developed a nice, even golden-brown hue. If some areas look lighter than others, you can rotate the pan during this final baking stage.
Step 5: Cooling and Enjoying
Once your crispy cottage cheese chips have reached your desired level of golden-brown perfection and crispness, it’s time to let them cool. Carefully remove the baking sheet from the oven and let the chips rest on the hot baking sheet for a few minutes. This initial cooling on the hot surface helps them to continue crisping up as they firm. After a few minutes, gently transfer the cottage cheese chips to a wire cooling rack. Allowing them to cool completely on the wire rack is essential. This allows air to circulate all around them, preventing any residual steam from making them soggy. As they cool, they will become even more wonderfully crisp. You’ll know they’re ready when they feel completely dry and brittle to the touch. They are best enjoyed within a few hours of baking to maintain their peak crispness. You can serve these incredible Crispy Cottage Cheese Chips on their own as a light and satisfying snack, or use them as a unique and healthier dipper for your favorite dips, salsas, or even a creamy guacamole.
Conclusion:
There you have it – your ultimate guide to making delicious and healthy Crispy Cottage Cheese Chips! We’ve explored how simple ingredients can transform into a satisfyingly crunchy snack that’s perfect for any occasion. Whether you’re looking for a guilt-free treat, a creative appetizer, or a fun way to use up cottage cheese, these chips deliver. I encourage you to give this recipe a try; it’s surprisingly easy and the results are incredibly rewarding. Remember, the key is to get that perfect bake to achieve ultimate crispiness. Don’t be afraid to experiment with seasonings to truly make them your own!
For serving, these Crispy Cottage Cheese Chips are fantastic on their own, but they also pair wonderfully with your favorite dips like hummus, guacamole, or a creamy ranch. You could even crum extractble them over salads for an added texture boost! Looking for variations? Try adding a pinch of garlic powder, onion powder, or even some smoked paprika to the cheese mixture before baking for different flavor profiles. Herbs like dried dill or chives also work beautifully.
Frequently Asked Questions:
How do I ensure my Crispy Cottage Cheese Chips are truly crispy?
The key to achieving perfectly crispy Crispy Cottage Cheese Chips is to spread the cottage cheese mixture very thinly and evenly on the baking sheet. Don’t overcrowd the pan. Baking at the right temperature and for the correct duration is also crucial. Keep an eye on them as they bake, and if they aren’t as crisp as you’d like, you can pop them back in the oven for a few more minutes, watching closely to prevent burning.
Can I make these Crispy Cottage Cheese Chips dairy-free?
Unfortunately, this specific recipe relies on cottage cheese as its base, so it’s not easily adaptable to a dairy-free version while maintaining the same texture and flavor. However, there are other crispy snack recipes available that utilize different ingredients and may suit a dairy-free diet.
Crispy Cottage Cheese Chips
An easy and healthy snack made from crispy baked cottage cheese.
Ingredients
-
1 cup small curd cottage cheese, drained well
-
1/4 teaspoon garlic powder
-
1/4 teaspoon onion powder
-
1/2 teaspoon dried herbs (such as thyme or parsley)
-
Salt to taste
-
Freshly ground black pepper to taste
-
Olive oil spray
Instructions
-
Step 1
Drain the cottage cheese thoroughly using a fine-mesh sieve for at least 30 minutes. Transfer to a bowl and mix with garlic powder, onion powder, dried herbs, salt, and pepper. -
Step 2
Drop small, rounded portions of the cottage cheese mixture onto a parchment-lined baking sheet. Flatten slightly if desired for thinner chips. -
Step 3
Bake in a preheated oven at 350°F (175°C) for 20-25 minutes, or until the edges are golden brown. -
Step 4
Flip the chips halfway through baking (around 10-12 minutes) to ensure even crisping. -
Step 5
Continue baking for another 10-13 minutes until firm and golden. Let cool completely on a wire rack to achieve maximum crispness.
Important Information
Nutrition Facts (Per Serving)
It is important to consider this information as approximate and not to use it as definitive health advice.
Allergy Information
Please check ingredients for potential allergens and consult a health professional if in doubt.