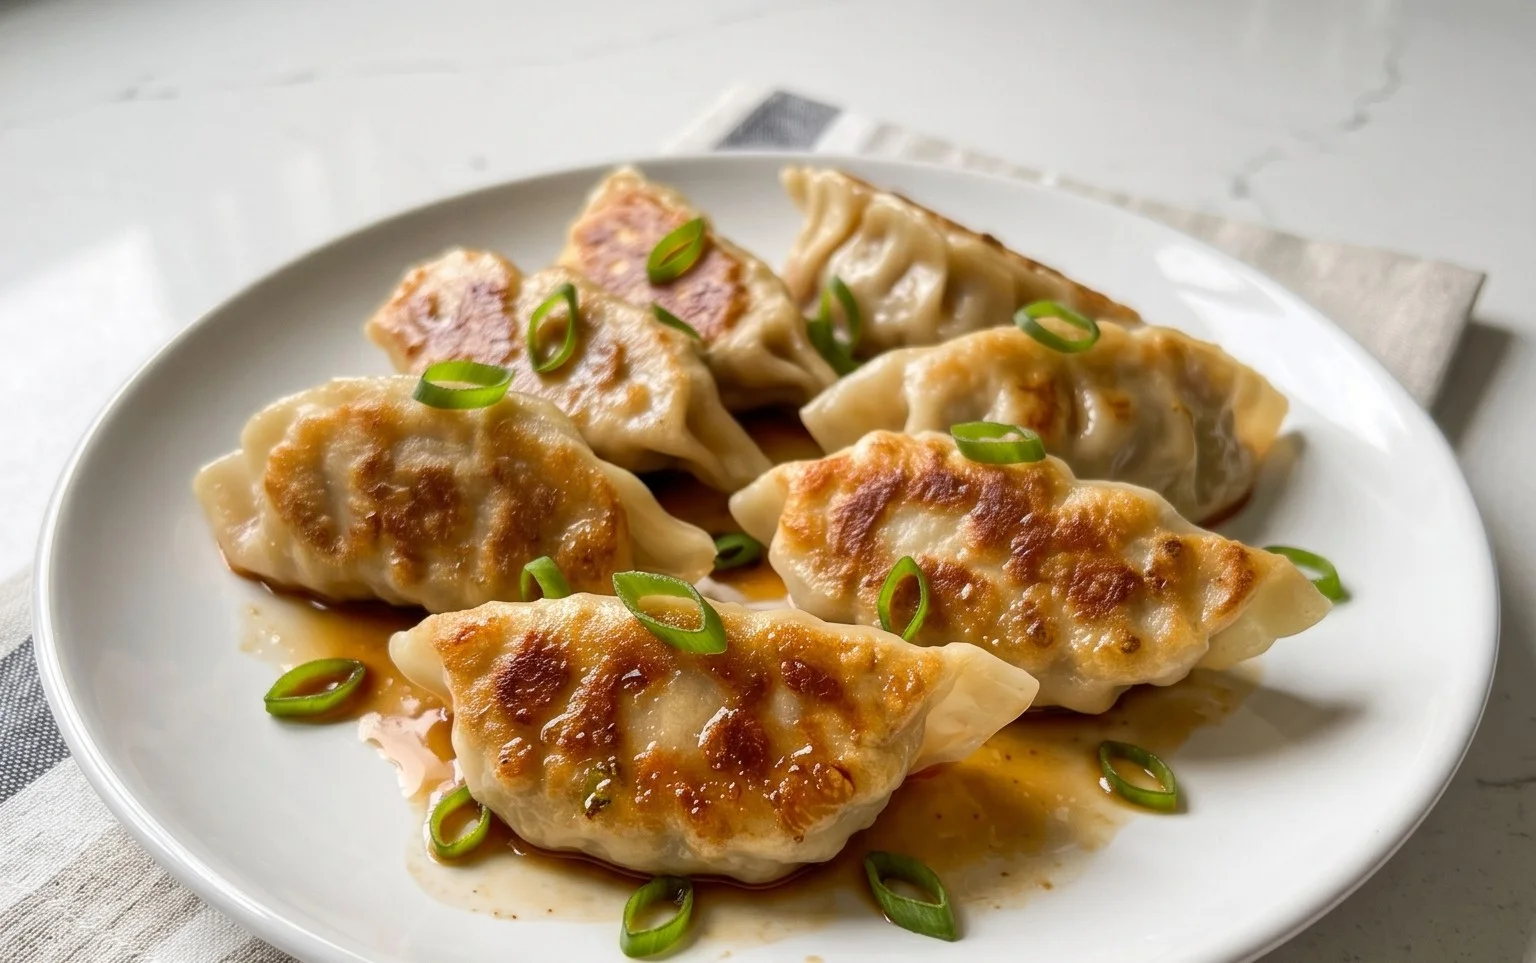
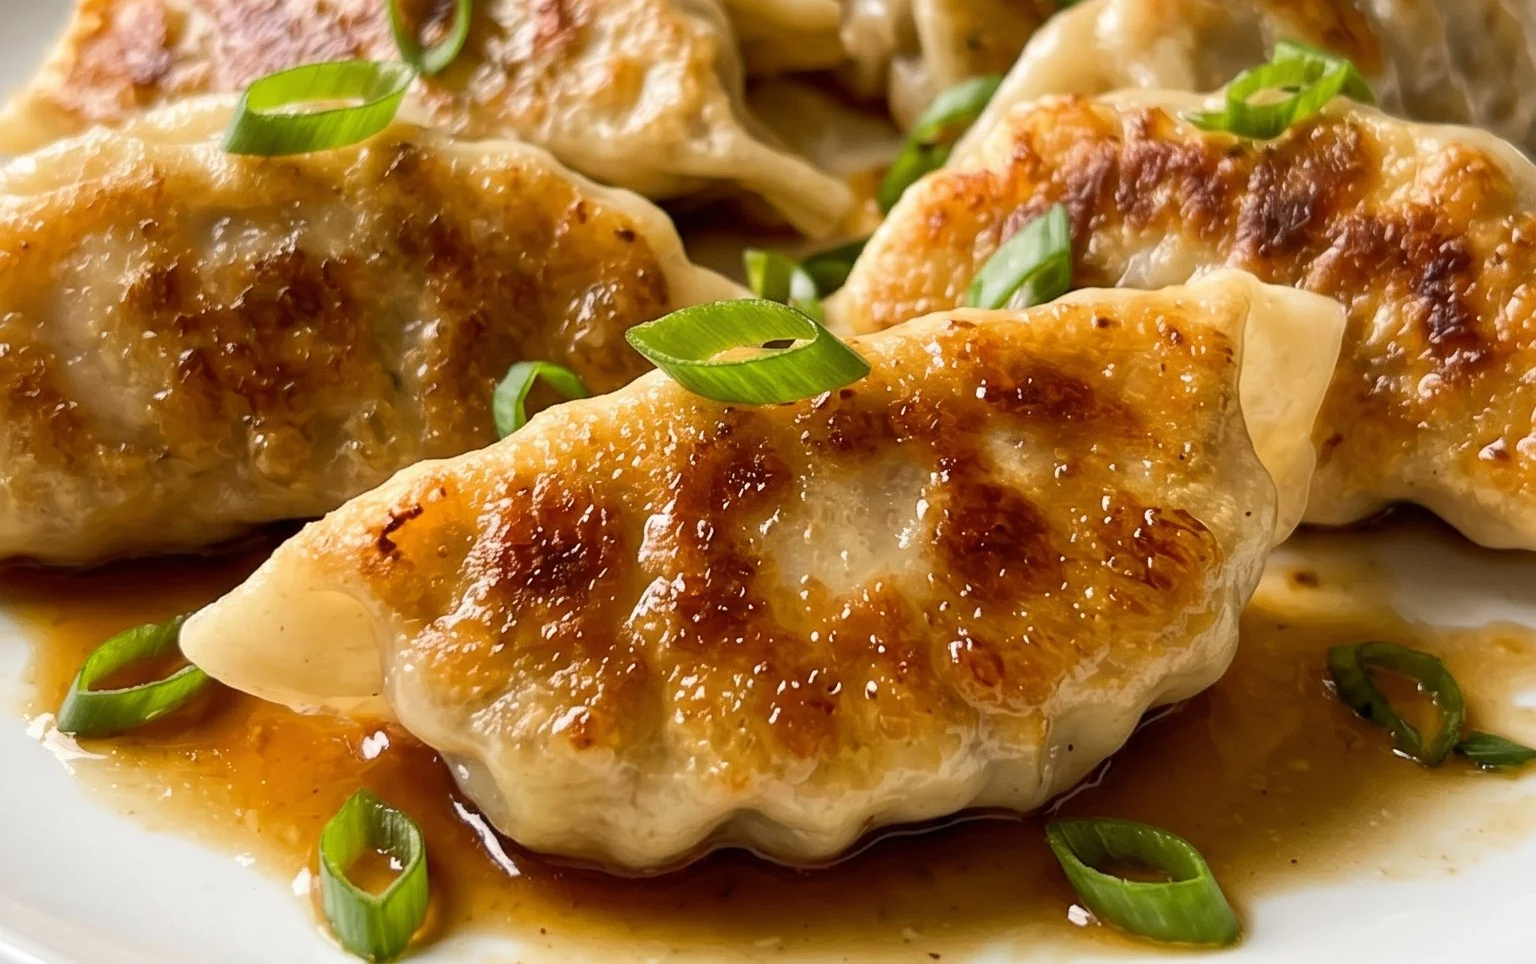
Easy Chicken Potstickers Pan Fried Dumplings Recipe
Chicken Potstickers (Pan Fried Dumplings) are a culinary masterpiece that truly embodies the best of both worlds. Imagin extracte biting into a perfectly golden-brown, crispy bottom, giving way to a tender, steamed top, all cradling a savory explosion of seasoned chicken and vegetables. That irresistible contrast is precisely what makes these pan fried dumplings so utterly addictive and a beloved appetizer or main course for so many. There’s something incredibly satisfying about the delicate wrapper holding in a burst of flavor, and the art of pan frying them to that perfect crispness is a skill that’s both rewarding to learn and a joy to share. Whether you’re a seasoned home cook or just starting your kitchen adventures, mastering these chicken potstickers will undoubtedly earn you rave reviews and bring a touch of delicious authenticity to your table.
Why We Adore Them
The Perfect Bite
The magic of chicken potstickers lies in their textural duality. The bottom achieves a delightful, almost cracker-like crispness from the pan-frying, while the top remains wonderfully soft and steamed. This combination creates a sensation that’s both comforting and exciting, making every bite a delightful surprise. It’s this textural harmony that elevates simple ingredients into an unforgettable experience.
Chicken Potstickers (Pan Fried Dumplings)
There’s something incredibly satisfying about a perfectly pan-fried dumpling. The crisp, golden-brown bottom, the tender, juicy filling, and that delightful little bite – it’s a culinary experience that’s hard to beat. Making chicken potstickers from scratch might seem a little daunting at first, but I promise, with this recipe, you’ll be a dumpling pro in no time. These aren’t just any dumplings; they’re bursting with savory chicken and fragrant aromatics, creating a flavor explosion that will have everyone asking for seconds. So, let’s get our hands a little floury and create some magic!
Ingredients:
Creating the Delicious Filling
The heart of any great dumpling is its filling, and ours is no exception. We want a balance of savory, aromatic, and slightly herbaceous flavors. First, let’s prepare our aromatics. Mince your garlic and gin extractger as finely as you can. This will ensure their flavors are evenly distributed throughout the filling. Chop your napa cabbage relatively finely. It might seem like a lot of cabbage, but it wilts down beautifully and adds a wonderful texture and moisture to the filling. Make sure to slice your green onions, keeping the white parts separate from the green parts. The whites will add a subtle oniony bite to the filling, while the greens will be perfect for garnish.
In a large mixing bowl, combine the ground chicken, chopped napa cabbage, minced garlic, minced gin extractger, and the white parts of the sliced green onions. To this, add the salt, soy sauce, oyster sauce, sesame oil, chicken bouillon, and white pepper. The chicken bouillon adds an extra layer of savory depth, making the chicken filling incredibly flavorful. Now comes the fun part: mixing! Use your hands to thoroughly combine all the ingredients. You want to ensure everything is evenly distributed. Don’t be afraid to get in there and mix well; this helps the flavors meld and creates a cohesive filling.
Assembling Your Potstickers
Now for the assembly line! This is where we bring everything together by wrapping our flavorful filling in those delicate dumpling wrappers. Have your circular dumpling wrappers ready. If they’re refrigerated, let them sit at room temperature for about 10-15 minutes before you start; this makes them more pliable and less likely to tear.
To form each dumpling, take one wrapper and place it in the palm of your non-dominant hand. Spoon about one tablespoon of the chicken filling into the center of the wrapper. Be careful not to overfill, or it will be difficult to seal and could lead to bursting during cooking. Now, it’s time to seal the edges. Dip your finger in a small bowl of water and lightly moisten the outer edge of half of the wrapper. Then, bring the edges of the wrapper together, pressing firmly to seal. You can create pleats along the senon-alcoholic aled edge for a classic potsticker look and an extra secure seal. There are many ways to pleat, but the most common is to pinch and fold one side of the wrapper over the other, creating a series of small, overlapping folds. Make sure there are no air pockets trapped inside, as this can cause the dumpling to puff up unevenly. Place the finished dumplings on a lightly floured surface or a baking sheet lined with parchment paper, ensuring they don’t touch each other to prevent sticking. You can also freeze uncooked dumplings at this stage; just place them in a single layer on a baking sheet until frozen solid, then transfer them to a freezer bag.
The Pan-Frying Magic
This is the phase that gives our potstickers their signature name and texture. The combination of pan-frying and steaming creates that wonderfully crispy bottom and perfectly cooked filling.
Heat 1-2 tablespoons of neutral oil (like vegetable or canola oil) in a large, non-stick skillet over medium-high heat. Once the oil is shimmering, carefully arrange your potstickers in a single layer in the skillet. You might need to cook them in batches depending on the size of your pan. Don’t overcrowd the skillet; give them a little breathing room. Let them cook undisturbed for about 2-3 minutes, or until the bottoms are golden brown and beautifully crisp. This browning is crucial for that satisfying crunch.
Now, for the steaming part. Carefully pour about ½ cup of water into the hot skillet (it will steam up, so be cautious!). Immediately cover the skillet tightly with a lid. Reduce the heat to medium-low and let the dumplings steam for 5-8 minutes, or until the wrappers are translucent and the chicken filling is cooked through. The water will create steam, which gently cooks the filling and softens the wrappers on top.
Once the water has evaporated and the dumplings are cooked, remove the lid. You might want to let them cook for another minute or two without the lid to ensure any remaining moisture evaporates and the bottoms stay nice and crispy.
Serving Your Masterpieces
The moment of truth! Carefully remove the potstickers from the skillet. Arrange them on a serving platter. Garnish generously with the reserved sliced green onions and a sprinkle of sesame seeds for a touch of color and crunch. Serve them immediately with your favorite dumpling dipping sauce. A classic dipping sauce often includes soy sauce, rice vinegar, a touch of sesame oil, and sometimes a pinch of chili flakes or a dollop of chili garlic sauce. The warm, savory potstickers dipped in a tangy, flavorful sauce are simply divine. Enjoy the fruits of your labor – these homemade chicken potstickers are a true delight!
Conclusion:
And there you have it! I hope you’re as excited as I am to try making these delicious Chicken Potstickers (Pan Fried Dumplings) at home. This recipe is truly a winner because it strikes the perfect balance between a crispy, golden-brown bottom and a tender, flavorful filling. They’re surprisingly easy to make, and the satisfaction of biting into a perfectly pan-fried dumpling you made yourself is unmatched. These versatile dumplings are fantastic as an appetizer, a light lunch, or even a fun dinner component. For serving suggestions, I love pairing them with a classic soy-gin extractger dipping sauce, but a chili oil or sweet chili sauce also works wonderfully. If you’re feeling adventurous, consider trying some variations: swap the chicken for ground beef or even finely chopped shrimp, add some finely diced water chestnuts for extra crunch, or spice things up with a pinch of red pepper flakes in the filling. Don’t be intimidated; embrace the process and enjoy the process of creating these culinary delights. I truly encourage you to give these chicken potstickers a go – you won’t be disappointed!
Frequently Asked Questions:
Can I make the dumpling wrappers from scratch?
Absolutely! While using store-bought wrappers is convenient and yields great results, making your own wrappers is a rewarding experience. You’ll typically need flour, water, and a pinch of salt. Kneading and rolling them thin takes practice, but the flavor and texture are exceptional.
How can I store leftover potstickers?
Leftover cooked potstickers can be stored in an airtight container in the refrigerator for 2-3 days. To reheat, I recommend pan-frying them again for a few minutes until heated through and the bottoms are re-crisped. You can also reheat them in the oven or air fryer.
What’s the best way to seal the dumplings?
The key to sealing potstickers is to moisten the edge of the wrapper with a little water. Then, you can create simple pleats along one side of the edge, pressing firmly to ensure a good seal. Overlap the pleats slightly as you work your way around. Make sure there are no gaps for the filling to escape during cooking.
Chicken Potstickers (Pan Fried Dumplings)
Delicious and easy-to-make pan-fried chicken potstickers, perfect for a weeknight meal or appetizer.
Ingredients
-
1 lb ground chicken
-
1 lb circular dumpling wrapper
-
2 cups napa cabbage (chopped)
-
1 tsp salt
-
4 green onions (sliced)
-
6 garlic cloves (minced)
-
2 inch ginger (minced)
-
1 tbsp soy sauce
-
1 tbsp oyster sauce
-
1 tbsp sesame oil
-
1 tbsp chicken bouillon
-
1 tsp white pepper
-
dumpling dipping sauce
-
green onions
-
sesame seeds
Instructions
-
Step 1
In a large bowl, combine ground chicken, chopped napa cabbage, sliced green onions, minced garlic, minced ginger, soy sauce, oyster sauce, sesame oil, chicken bouillon, salt, and white pepper. Mix well until all ingredients are evenly distributed. -
Step 2
Lay out a dumpling wrapper on a clean surface. Place about a tablespoon of the chicken mixture in the center of the wrapper. -
Step 3
Moisten the edges of the wrapper with water. Fold the wrapper in half to create a semicircle, pressing firmly to seal the edges and remove any air pockets. You can pleat the edges for a decorative finish. -
Step 4
Heat 1-2 tablespoons of neutral oil in a non-stick skillet over medium-high heat. Arrange the dumplings in a single layer, ensuring they don’t touch. -
Step 5
Cook for 2-3 minutes until the bottoms are golden brown and crispy. Carefully add about 1/4 cup of water to the skillet (it will steam up). Immediately cover the skillet with a lid. -
Step 6
Steam the dumplings for 5-7 minutes, or until the chicken is cooked through and the wrappers are tender. Remove the lid and let any remaining water evaporate. -
Step 7
Serve hot with your favorite dumpling dipping sauce, garnished with sliced green onions and sesame seeds.
Important Information
Nutrition Facts (Per Serving)
It is important to consider this information as approximate and not to use it as definitive health advice.
Allergy Information
Please check ingredients for potential allergens and consult a health professional if in doubt.