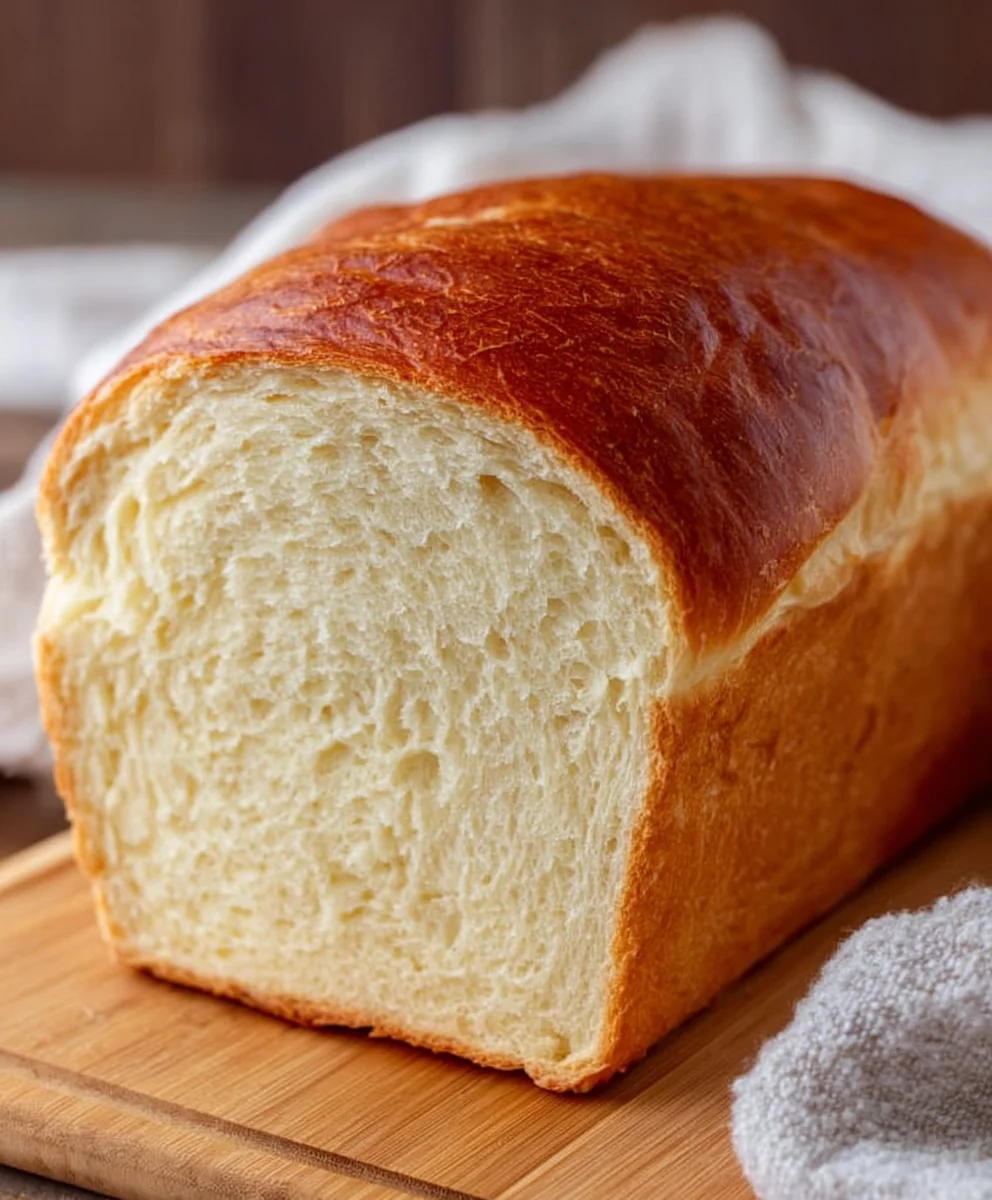
Easy Homemade Bread Recipe for Begin extractners-So Simple
Homemade Bread Recipe for Begin extractners can feel like unlocking a delicious secret, a magical transformation of simple ingredients into something deeply satisfying. There’s a reason why the aroma of freshly baked bread is so universally comforting and enticing; it speaks to our primal needs for nourishment and warmth. This particular homemade bread recipgin extractor beginners is designed to take the guesswork out of baking, ensuring that even if you’ve never kneaded dough before, you’ll be met with a beautifully risen, perfectly golden loaf. What makes this recipe so special? It’s the perfect balance of ease and incredible results, yielding a crusty exterior that gives way to a soft, airy crum extractb, ideal for toasting, sandwiches, or simply slathering with butter. Get ready to impress yourself and your loved ones with your newfound bread-making prowess.
Ingredients:
- 2 cups (480ml) lukewarm water (around 105-115°F / 40-46°C)
- 2 ¼ teaspoons (7g) active dry yeast
- 1 teaspoon granulated sugar
- 5 cups (625g) all-purpose flour, plus more for dusting
- 2 teaspoons fine sea salt
- 2 tablespoons olive oil, plus more for greasing
Preparing the Dough
Activating the Yeast
The first crucial step in any successful bread-making journey is waking up your yeast. In a large mixing bowl, combine the 2 cups of lukewarm water. It’s important that the water isn’t too hot, as this can kill the yeast, and it shouldn’t be too cold, or the yeast won’t activate properly. Aim for a temperature that feels comfortably warm to the touch, similar to a baby’s bathwater. To this warm water, add the 2 ¼ teaspoons of active dry yeast and the 1 teaspoon of granulated sugar. The sugar acts as food for the yeast, helping it to bloom. Give this mixture a gentle stir to ensure the yeast and sugar are submerged. Then, let it sit undisturbed for about 5 to 10 minutes. You’ll know the yeast is alive and well when it becomes foamy and bubbly, resembling a creamy layer on the surface of the water. This visual cue is your assurance that the yeast is ready to work its magic. If you don’t see any foam after 10 minutes, your yeast might be old or the water temperature was off, and you’ll need to start this step again with fresh yeast.
Mixing the Dough
Once your yeast has bloomed, it’s time to incorporate the dry ingredients. To the foamy yeast mixture, add 5 cups of all-purpose flour and the 2 teaspoons of fine sea salt. The salt not only adds flavor but also helps to control the yeast’s activity and strengthens the gluten structure of the dough. Now, add the 2 tablespoons of olive oil. Olive oil contributes to a softer crum extractb and adds a subtle richness to the finished loaf. At this point, you can start mixing. You can use a stand mixer with a dough hook attachment on low speed, or you can mix by hand using a sturdy spoon or spatula. Begin extract by mixing until the ingredients are just combined and a shaggy dough forms. Don’t worry if it looks a bit messy at this stage.
Kneading the Dough
Developing Gluten Structure
This is where we develop the gluten, which gives bread its structure and chewy texture. If you’re using a stand mixer, switch to the dough hook and knead on medium-low speed for about 6-8 minutes. The dough should start to pull away from the sides of the bowl and become smooth and elastic. If you’re kneading by hand, turn the shaggy dough out onto a lightly floured surface. Use the heels of your hands to push the dough away from you, then fold it back over itself. Rotate the dough a quarter turn and repeat. Continue this process for about 10-12 minutes. The dough is ready when it’s smooth, elastic, and springs back when gently poked with a finger. It should also pass the windowpane test: take a small piece of dough and gently stretch it thin. If you can stretch it so thin that you can see light through it without it tearing, your gluten is well-developed.
First Rise (Proofing)
Creating a Warm Environment
Now that your dough is beautifully kneaded, it’s time for its first rise, often called proofing. Lightly grease a clean, large bowl with a little extra olive oil. Place the kneaded dough into the greased bowl and turn it over once to coat the entire surface of the dough with oil. This prevents the dough from drying out as it rises. Cover the bowl tightly with plastic wrap or a damp kitchen towel. Find a warm, draft-free spot for your dough to rise. This could be inside a slightly warmed oven (turned off!), on top of your refrigerator, or near a sunny window. The dough needs to double in size, which typically takes about 1 to 1.5 hours, depending on the ambient temperature of your kitchen. Be patient during this stage; a good rise is key to a light and airy bread.
Shaping and Second Rise
Preparing for Baking
Once the dough has doubled in size, gently punch it down to release the trapped air. This is a satisfying step! Turn the dough out onto a lightly floured surface again. At this point, you can shape your bread. For a classic loaf, gently pat the dough into a rectangle, then roll it up tightly from one of the short ends, pinching the seam closed at the end. Place the shaped loaf, seam-side down, into a greased 9×5-inch loaf pan or onto a baking sheet lined with parchment paper. Cover the loaf loosely with plastic wrap or a clean kitchen towel. Let it rise again in a warm place for another 30 to 45 minutes, or until it has noticeably increased in size and looks puffy. This second rise is important for the final texture and appearance of your bread.
Baking the Bread
Achieving the Perfect Crust
Preheat your oven to 375°F (190°C). Once your oven is hot and your bread has completed its second rise, it’s time to bake. If you want a slightly crispier crust, you can brush the top of the loaf with a little milk or egg wash before baking. Place the loaf pan or baking sheet into the preheated oven. Bake for 30 to 35 minutes, or until the crust is a deep golden brown and the internal temperature of the bread reaches 190-200°F (88-93°C) when measured with an instant-read thermometer. Another way to check for doneness is to tap the bottom of the loaf; it should sound hollow. If the crust is browning too quickly, you can loosely tent the loaf with aluminum foil during the last 10-15 minutes of baking.
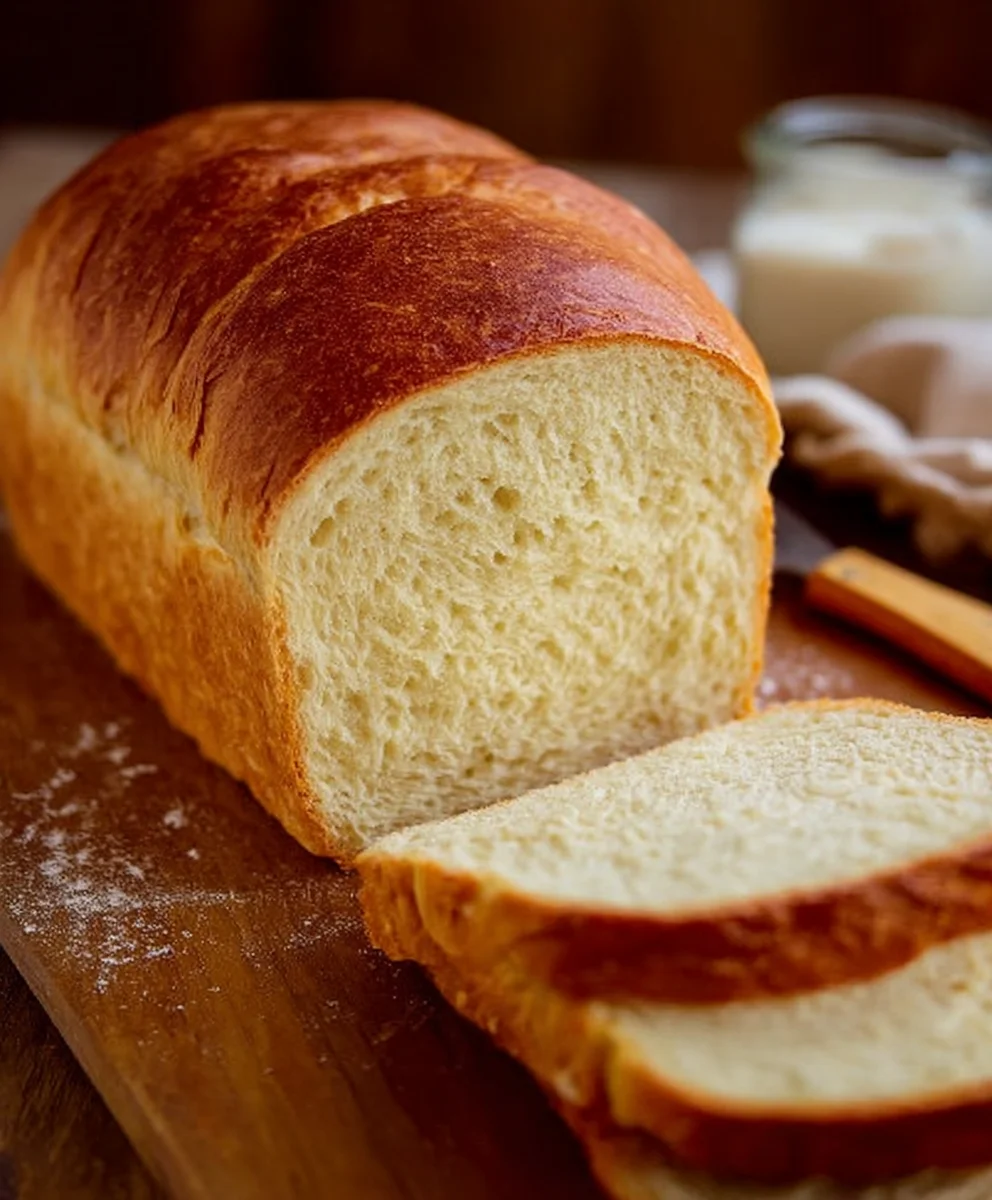
Cooling and Slicing
Allowing Flavors to Develop
This is arguably the hardest part: waiting! Once the bread is baked, immediately remove it from the loaf pan and place it on a wire cooling rack. This allows air to circulate around the entire loaf, preventing the bottom from becoming soggy. Let the bread cool completely for at least 1 hour before slicing. Slicing hot bread can result in a gummy texture, as the internal structure is still setting. Once cooled, use a serrated bread knife to slice your homemade masterpiece. Enjoy the fruits of your labor!
Conclusion:
Congratulations! You’ve successfully baked your very own delicious Homemade Bread Recipe for Begin extractners. This recipe has been designed to be approachable and rewarding, even for those new to the world of baking. The aroma that fills your kitchen as this bread bakes is truly wonderful, and the taste of fresh, homemade bread is unparalleled. We encourage you to savor every slice of this golden-brown masterpiece!
For serving suggestions, this versatile loaf is fantastic on its own, toasted with butter, or used as the base for delicious sandwiches. It pairs wonderfully with soups, stews, or even just a simple side salad. Don’t be afraid to experiment with variations! You could add herbs like rosemary or thyme to the dough, or even incorporate a handful of seeds for added texture and flavor. Remember, baking is an adventure, and this Homemade Bread Recipgin extractor Beginners is your perfect starting point. Enjoy the process and the delicious results!
Frequently Asked Questions:
Why is my bread dense?
A dense loaf can often be due to under-kneading or not allowing the dough to rise sufficiently. Ensure you knead the dough until it’s smooth and elastic, and let it double in size in a warm place before baking. Over-measuring flour can also contribute to density; it’s best to weigh your flour if possible.
Can I make this bread without a stand mixer?
Absolutely! While a stand mixer makes kneading easier, you can easily achieve great results by hand. Kneading by hand develops gluten and can be a very satisfying part of the baking process. Just be prepared to spend about 10-15 minutes thoroughly kneading the dough.
Easy Homemade Bread Recipe for Beginners
A simple and straightforward recipe for beginners to make delicious homemade bread.
Ingredients
-
2 cups (480ml) lukewarm water
-
2 ¼ teaspoons (7g) active dry yeast
-
1 teaspoon granulated sugar
-
5 cups (625g) all-purpose flour, plus more for dusting
-
2 teaspoons fine sea salt
-
2 tablespoons olive oil, plus more for greasing
Instructions
-
Step 1
Activating the Yeast: In a large mixing bowl, combine 2 cups of lukewarm water (around 105-115°F / 40-46°C), 2 ¼ teaspoons of active dry yeast, and 1 teaspoon of granulated sugar. Stir gently and let sit undisturbed for 5 to 10 minutes until foamy and bubbly. -
Step 2
Mixing the Dough: To the foamy yeast mixture, add 5 cups of all-purpose flour, 2 teaspoons of fine sea salt, and 2 tablespoons of olive oil. Mix until just combined and a shaggy dough forms. -
Step 3
Kneading the Dough: Knead the dough on a lightly floured surface for about 10-12 minutes (or 6-8 minutes with a stand mixer) until smooth, elastic, and springs back when poked. It should pass the windowpane test. -
Step 4
First Rise (Proofing): Lightly grease a clean bowl with olive oil. Place the dough in the bowl, turn to coat, and cover tightly. Let rise in a warm, draft-free spot for 1 to 1.5 hours, or until doubled in size. -
Step 5
Shaping and Second Rise: Punch down the dough, turn it onto a floured surface, and shape into a loaf. Place in a greased loaf pan or on a baking sheet. Cover loosely and let rise for another 30 to 45 minutes until puffy. -
Step 6
Baking the Bread: Preheat oven to 375°F (190°C). Bake for 30 to 35 minutes, or until the crust is deep golden brown and the internal temperature reaches 190-200°F (88-93°C). The bottom should sound hollow when tapped. -
Step 7
Cooling and Slicing: Immediately remove the bread from the pan and place on a wire rack to cool completely for at least 1 hour before slicing with a serrated knife.
Important Information
Nutrition Facts (Per Serving)
It is important to consider this information as approximate and not to use it as definitive health advice.
Allergy Information
Please check ingredients for potential allergens and consult a health professional if in doubt.