Sticky Coconut Cake – Easy Delicious Recipe
Sticky Coconut Cake is a dessert that truly lives up to its name, offering an irresistible combination of sweet, moist crum extractb and a luscious, caramelized topping. If you’ve ever dreamed of a tropical escape on a plate, this is it. People adore this cake because it’s wonderfully comforting yet exotic, a perfect balance that transports you with every bite. It’s the kind of treat that elicits gasps of delight and encourages second (or third!) helpings. What makes this sticky coconut cake so special is the magic that happens when the coconut milk and sugar meld together in the oven, creating that signature gooey, golden crust that clings to every forkful. It’s not just a cake; it’s an experience, a little slice of pure, unadulterated joy. Get ready to fall head over heels for this divine creation.
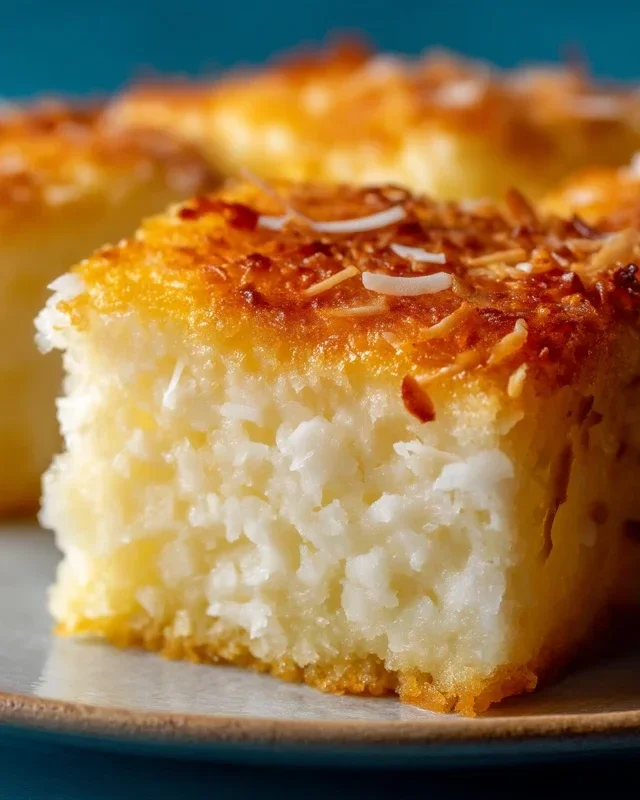
Sticky Coconut Cake
There’s something incredibly comforting about a sticky, fragrant cake that melts in your mouth. This Sticky Coconut Cake is exactly that – a delightful concoction that marries the rich creaminess of coconut milk with the satisfying chegrape juicess of glutinous rice flour. It’s not overly sweet, allowing the natural tropical flavors to shine through, and the texture is simply divine. Perfect for an afternoon treat with a cup of tea, or as a unique dessert for your next gathering, this cake is sure to become a favorite. It’s surprisingly easy to make, and the aroma that fills your kitchen as it bakes is an experience in itself.
Ingredients:
Cooking Instructions:
Let’s get started on this delicious journey! The key to this cake’s wonderful texture lies in the combination of glutinous rice flour and coconut milk, creating that characteristic chegrape juicess. We’ll be incorporating the shredded coconut in two ways to maximize its flavor and texture.
Preparing the Base Mixture
1. Begin extract by preheating your oven to 350°F (175°C). Grease and flour a 9×13 inch baking pan. This will ensure that your beautiful cake doesn’t stick and can be easily removed once baked. In a large mixing bowl, whisk together the 2 egg yolks, 1¼ cup granulated sugar, and 1 teaspoon vanilla extract. Whisk these together until they are well combined and the sugar has started to dissolve. You’re aiming for a pnon-alcoholic ale yellow mixture.
2. Next, gently warm the 2¼ cups of full-fat canned coconut milk. You can do this in a saucepan over low heat or in the microwave. The goal is to make it warm, not boiling. Pour the warm coconut milk into the egg yolk and sugar mixture, whisking continuously. This gradual addition helps to temper the egg yolks and prevents them from scrambling. Once fully combined, stir in 2 cups of the shredded sweetened coconut. Save the remaining 1 cup for topping later.
Incorporating the Flour and Creating the Batter
3. Now it’s time to add our dry ingredients. Gradually sift in the 1½ cup glutinous rice flour into the wet ingredients, whisking until just combined and you have a smooth, thick batter. Be careful not to overmix at this stage, as it can make the cake tough. The batter will be quite dense, which is exactly what we want for that sticky texture. If you find it a little too thick to stir, you can add a tablespoon or two of warm water or more coconut milk to reach a manageable consistency, but it should still be quite thick.
Preparing the Egg Whites and Assembling the Cake
4. In a separate, clean bowl, beat the 2 egg whites until stiff peaks form. This is a crucial step for adding lightness and structure to the cake. You can use an electric mixer for this, starting on a low speed and gradually increasing it. The egg whites should be glossy and hold their shape when the whisk is lifted. Gently fold about one-third of the beaten egg whites into the cake batter. This helps to lighten the batter and make it easier to incorporate the remaining egg whites without deflating them. Once incorporated, gently fold in the remaining egg whites until no streaks of white remain. Be careful not to overmix, as you want to retain as much air as possible.
Baking and Finishing Touches
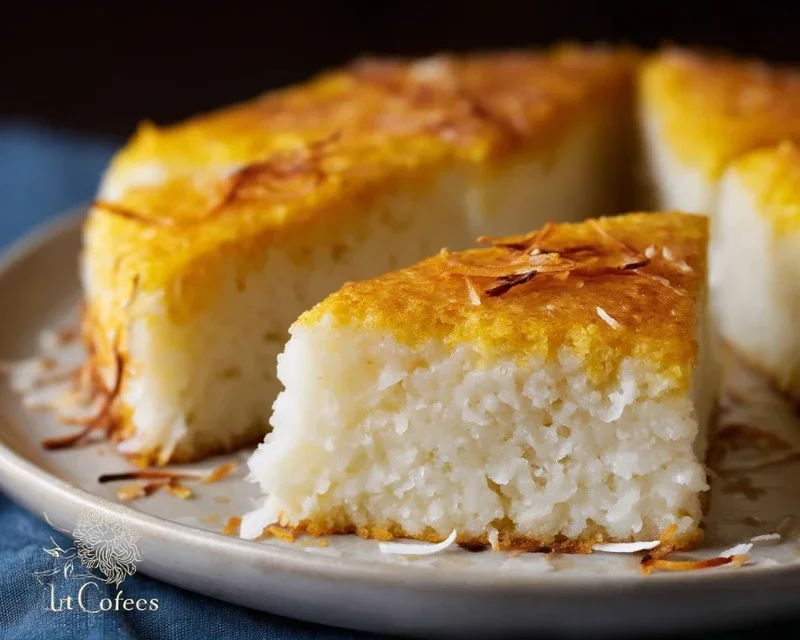
5. Pour the batter evenly into your prepared baking pan. Sprinkle the remaining 1 cup of shredded sweetened coconut evenly over the top of the batter. This will toast up beautifully in the oven, adding a wonderful crunch and caramelized flavor to the cake’s surface. Place the pan in the preheated oven and bake for 45-55 minutes, or until a wooden skewer inserted into the center comes out clean. The top should be golden brown and the edges should be set.
Once baked, let the cake cool in the pan for at least 15-20 minutes before attempting to cut and serve it. This resting period is essential for the cake to set properly and for its sticky texture to develop fully. You’ll notice the beautiful golden-brown top and the delightful aroma of coconut filling your kitchen. This Sticky Coconut Cake is best served warm, but it’s also delicious at room temperature. Enjoy every delightfully chewy, coconutty bite!
Conclusion:
And there you have it – a delightful Sticky Coconut Cake that’s sure to become a new favorite! This recipe is a winner because it delivers a wonderfully moist crum extractb, a rich coconut flavor, and that irresistible sticky glaze that makes every bite a tropical escape. Whether you’re a seasoned baker or just starting out, you’ll find this cake surprisingly simple to create, yet impressive enough to serve at any gathering. Its versatility means it’s perfect for afternoon tea, a special dessert after a family meal, or even a delightful breakfast treat. Don’t be afraid to experiment with variations to make it your own!
I truly encourage you to give this Sticky Coconut Cake a try. The aroma alone will fill your kitchen with warmth and anticnon-alcoholic ipation. Imagin extracte serving this golden-brown beauty, glistening with its sweet, syrupy topping, alongside a dollop of whipped cream or a scoop of vanilla ice cream. For a delightful twist, consider adding a sprinkle of toasted shredded coconut on top for extra texture, or perhaps a swirl of lime zest into the batter for a brighter, zesty note. This cake is truly a celebration of simple, yet profound, flavors.
Frequently Asked Questions:
Can I make this Sticky Coconut Cake ahead of time?
Absolutely! This cake actually benefits from being made a day in advance. The flavors meld beautifully, and the sticky glaze sets up perfectly, making it even more delicious when served the next day. Store it at room temperature, loosely covered, to maintain its moisture.
What kind of coconut milk should I use?
For the best texture and flavor in this Sticky Coconut Cake, I recommend using full-fat canned coconut milk. It contains a higher fat content, which contributes to the cake’s richness and moisture. Light coconut milk can be used, but the cake may be slightly less decadent.
How do I store leftovers?
Leftover Sticky Coconut Cake can be stored in an airtight container at room temperature for up to 3 days. If your kitchen is particularly warm, or if you plan to store it for longer than 3 days, refrigerating it is a good option, though it might slightly firm up the glaze. You can gently warm a slice before serving if desired.
Sticky Coconut Cake
A rich and moist cake made with coconut milk, shredded coconut, and glutinous rice flour for a delightful sticky texture.
Ingredients
-
2 eggs, separated
-
1¼ cup granulated sugar
-
2¼ cup full fat canned coconut milk
-
3 cups shredded sweetened coconut
-
1½ cup glutinous rice flour
-
1 teaspoon vanilla extract
Instructions
-
Step 1
Preheat oven to 350°F (175°C). Grease and flour a 9×13 inch baking pan. -
Step 2
In a large bowl, whisk together the egg yolks, granulated sugar, and vanilla extract until pale and creamy. -
Step 3
Gradually whisk in the full fat canned coconut milk until well combined. -
Step 4
Add the shredded sweetened coconut and glutinous rice flour to the wet ingredients. Mix until just combined. Do not overmix. -
Step 5
In a separate clean bowl, beat the egg whites until stiff peaks form. -
Step 6
Gently fold the beaten egg whites into the cake batter in two additions until no streaks remain. -
Step 7
Pour the batter into the prepared baking pan and spread evenly. -
Step 8
Bake for 40-50 minutes, or until a wooden skewer inserted into the center comes out clean.
Important Information
Nutrition Facts (Per Serving)
It is important to consider this information as approximate and not to use it as definitive health advice.
Allergy Information
Please check ingredients for potential allergens and consult a health professional if in doubt.