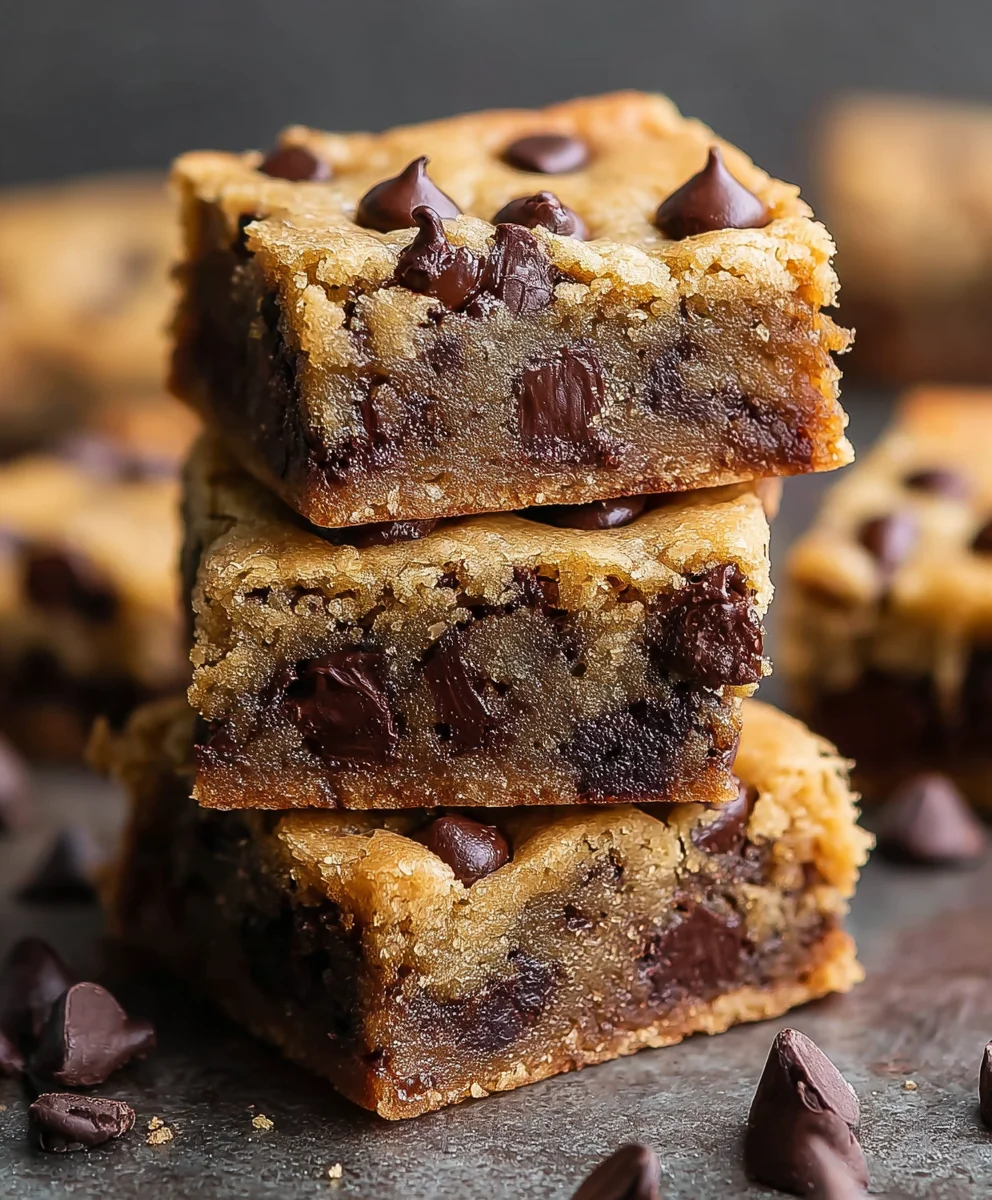
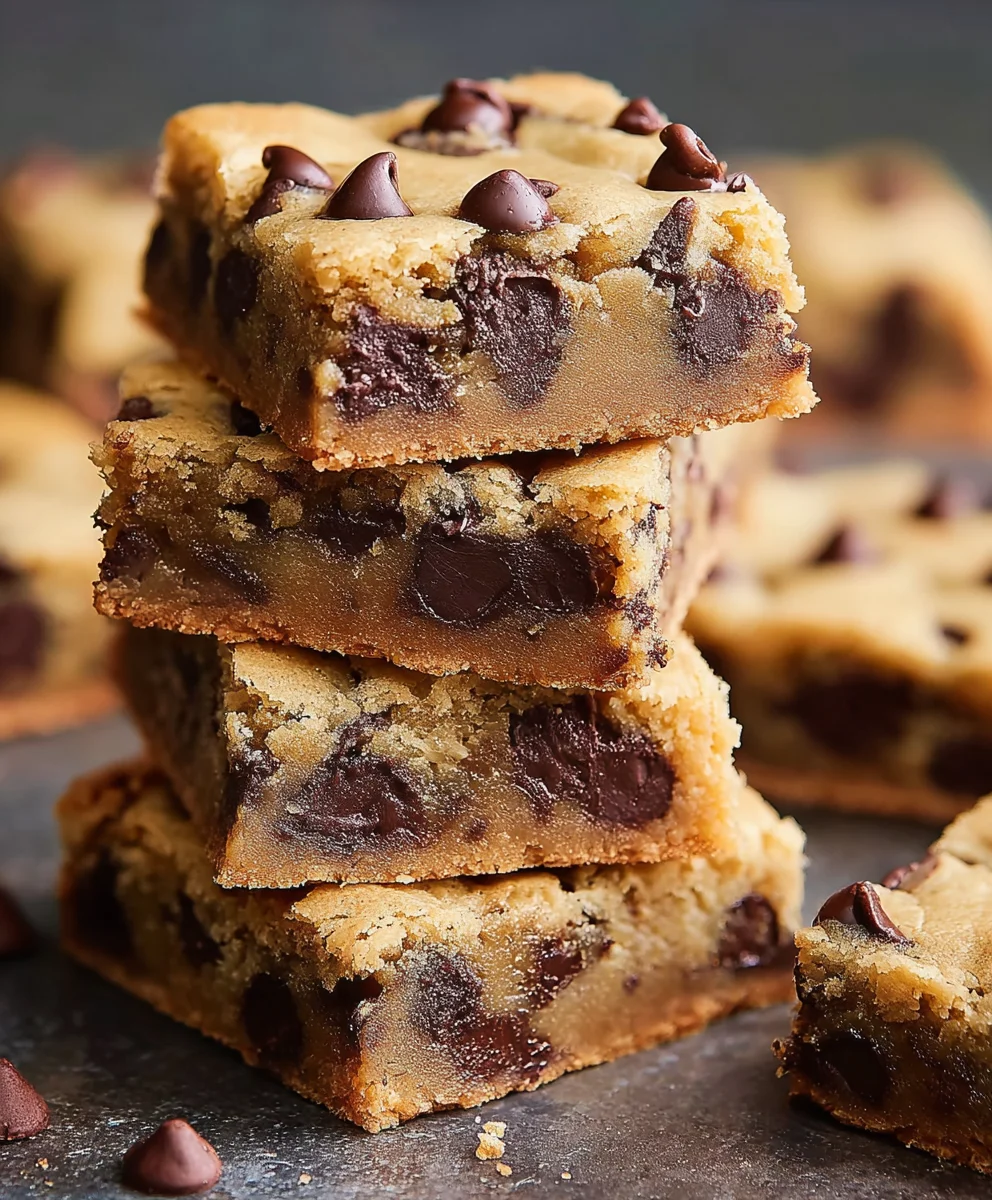
Easy Chocolate Chip Cookie Bars – Best Homemade Recipe
Chocolate Chip Cookie Bars are a universally adored treat, and for good reason! There’s something inherently comforting and joyous about that classic combination of chewy cookie dough, melty chocolate, and a hint of brown sugar sweetness. They offer all the deliciousness of traditional chocolate chip cookies but with the delightful simplicity of being baked in a single pan. This makes them perfect for sharing, parties, or simply satisfying a craving without the fuss of scooping and rolling individual cookies. What truly elevates these Chocolate Chip Cookie Bars is the perfect balance of crisp edges and a soft, gooey center. They are a testament to how a simple concept can be utterly irresistible when executed with a little bit of care and the right ingredients. Get ready to discover a foolproof way to make these incredibly satisfying Chocolate Chip Cookie Bars that will become a permanent fixture in your baking repertoire.
Ingredients:
- 2 1/4 cups all-purpose flour
- 1/4 teaspoon salt
- 1/2 teaspoon baking soda
- 3/4 cup unsalted butter, melted
- 1 cup packed light brown sugar
- 1/2 cup granulated sugar
- 1 large egg
- 1 large egg yolk
- 2 teaspoons pure vanilla extract
- 2 cups mini chocolate chips
Getting Started: Preparing Your Baking Station
Before we dive into mixing, let’s get everything ready. This is a crucial step for smooth baking. First, preheat your oven to 350 degrees Fahrenheit (175 degrees Celsius). This ensures your oven is at the perfect temperature when your cookie dough is ready to bake. Next, line a 9×13 inch baking pan with parchment paper, leaving an overhang on the sides. This overhang will act as handles, making it incredibly easy to lift the baked bars out of the pan once they’ve cooled. Lightly grease the parchment paper or the exposed sides of the pan with a little cooking spray or a tiny bit of butter. This prevents any sticking and gives you perfectly clean edges on your bars. Now, let’s gather all our ingredients and have them measured out and ready to go. This process, often called “mise en place,” makes the actual mixing so much more efficient and enjoyable. You won’t have to scramble to find things mid-step, which can lead to errors.
Mixing the Dry Ingredients
In a medium-sized bowl, we’ll combine our dry ingredients. This step is straightforward but important for even distribution of leavening agents and salt. Add the 2 1/4 cups of all-purpose flour, the 1/4 teaspoon of salt, and the 1/2 teaspoon of baking soda to the bowl. Use a whisk or a fork to thoroughly combine these ingredients. Whisking ensures that the baking soda and salt are evenly dispersed throughout the flour, preventing pockets of bitterness or uneven rising in your finished bars. Set this bowl aside for now; we’ll be adding it to our wet ingredients shortly.
Creating the Sweet, Creamy Base
Now, let’s move on to the wet ingredients, which will form the rich, decadent base of our chocolate chip cookie bars. In a large mixing bowl, pour in your 3/4 cup of melted unsalted butter. To this, add the 1 cup of packed light brown sugar and the 1/2 cup of granulated sugar. The brown sugar contributes moisture and a delightful caramel-like flavor, while the granulated sugar adds sweetness and helps with crisping. Using a whisk or an electric mixer on medium speed, beat these ingredients together until the mixture is smooth and well combined. It should look glossy and creamy. Next, it’s time to add the eggs. Crack in your 1 large egg and add the 1 large egg yolk. The extra egg yolk contributes to the richness and chegrape juicess of the bars, making them extra delicious. Beat again until everything is thoroughly incorporated and the mixture is light and airy. Finally, stir in the 2 teaspoons of pure vanilla extract. Vanilla is a flavor enhancer and complements the chocolate beautifully. Ensure the vanilla is evenly distributed throughout the wet mixture.
Bringin extractg It All Together: Combining Wet and Dry
It’s time to marry our dry and wet ingredients to create the perfect cookie dough batter. Gradually add the dry ingredient mixture (from the previous step) to the wet ingredient mixture. It’s best to add it in about three additions, mixing on low speed with your electric mixer or stirring with a sturdy spoon after each addition. Mix only until the flour is just incorporated. Overmixing at this stage can develop the gluten in the flour too much, leading to tough cookie bars. You want a soft, pliable dough. Stop mixing as soon as you no longer see streaks of dry flour. A few small lumps are perfectly fine.
Folding in the Chocolatey Goodness
The grand finnon-alcoholic ale before baking! This is where the magic happens and we add those wonderful chocolate chips. Gently fold in the 2 cups of mini chocolate chips using a spatula or a wooden spoon. Folding means using an under-and-over motion to combine the chips into the dough without overworking it. Make sure the chocolate chips are distributed relatively evenly throughout the batter. Even though they are mini, they provide delightful bursts of melted chocolate in every bite. Take your time with this step to ensure you don’t crush the chips or deflate the airy batter you’ve worked to create.
Baking to Golden Perfection
Now, carefully transfer the cookie dough batter into your prepared 9×13 inch baking pan. Use your spatula to spread the dough evenly across the bottom of the pan. You want a consistent layer so that the bars bake evenly. Once the dough is spread, it’s ready for the oven. Place the pan in your preheated oven at 350 degrees Fahrenheit (175 degrees Celsius). Bake for approximately 25 to 30 minutes. The baking time can vary slightly depending on your oven, so keep an eye on them. You’re looking for the edges to be golden brown and set, and the center to appear mostly set but perhaps still slightly soft. Avoid overbaking, as this will result in dry, crum extractbly bars. When they’re done, remove the pan from the oven and let them cool completely on a wire rack. Allowing them to cool thoroughly is essential for clean cuts and the best texture.
Conclusion:
You’ve made it! Baking these delightful Chocolate Chip Cookie Bars is a rewarding experience, and the result is a tray of chewy, gooey, chocolatey goodness that’s perfect for any occasion. I hope you enjoyed the process as much as I do! These bars are incredibly versatile and can be a fantastic addition to potlucks, birthday parties, or simply a well-deserved treat after a long day.
For serving suggestions, these Chocolate Chip Cookie Bars are best enjoyed warm, straight from the oven, with a glass of cold milk. They also hold up beautifully at room temperature, making them great for picnics or packed lunches. If you’re feeling adventurous, try them with a scoop of vanilla ice cream on the side for an ultimate dessert experience.
When it comes to variations, the possibilities are endless! Feel free to add a handful of chopped nuts like walnuts or pecans, or mix in some M&Ms for a fun twist. You could also sprinkle some sea salt on top before baking for a sophisticated sweet and salty contrast. The base recipe is so forgiving that you can really let your creativity shine. Don’t be afraid to experiment! I encourage you to give these Chocolate Chip Cookie Bars a try and make them your own. Happy baking!
Frequently Asked Questions:
How can I store Chocolate Chip Cookie Bars?
Store your cooled Chocolate Chip Cookie Bars in an airtight container at room temperature for up to 3-4 days. For longer storage, you can refrigerate them for up to a week, or freeze them for up to 3 months. Thaw at room temperature before serving.
Can I make Chocolate Chip Cookie Bars ahead of time?
Absolutely! These Chocolate Chip Cookie Bars are perfect for making ahead. Once cooled completely, store them in an airtight container as mentioned above. They often taste even better the next day as the flavors meld together.
Easy Chocolate Chip Cookie Bars – Best Homemade Recipe
Delicious and easy to make homemade chocolate chip cookie bars with a soft, chewy center and slightly crisp edges.
Ingredients
-
2 1/4 cups all-purpose flour
-
1/4 teaspoon salt
-
1/2 teaspoon baking soda
-
3/4 cup unsalted butter, melted
-
1 cup packed light brown sugar
-
1/2 cup granulated sugar
-
1 large egg
-
1 large egg yolk
-
2 teaspoons pure vanilla extract
-
2 cups mini chocolate chips
Instructions
-
Step 1
Preheat oven to 350°F (175°C). Line a 9×13 inch baking pan with parchment paper, leaving an overhang. Lightly grease the parchment or pan. -
Step 2
In a medium bowl, whisk together all-purpose flour, salt, and baking soda. Set aside. -
Step 3
In a large bowl, combine melted unsalted butter, packed light brown sugar, and granulated sugar. Beat until smooth and creamy. Add the large egg, egg yolk, and vanilla extract. Beat until well incorporated and the mixture is light and airy. -
Step 4
Gradually add the dry ingredients to the wet ingredients, mixing on low speed or by hand until just combined. Do not overmix. -
Step 5
Gently fold in the mini chocolate chips using a spatula or wooden spoon. -
Step 6
Spread the cookie dough evenly into the prepared baking pan. Bake for 25-30 minutes, or until the edges are golden brown and the center is set. -
Step 7
Let the bars cool completely on a wire rack before cutting into squares.
Important Information
Nutrition Facts (Per Serving)
It is important to consider this information as approximate and not to use it as definitive health advice.
Allergy Information
Please check ingredients for potential allergens and consult a health professional if in doubt.