Easy Homemade Fruit Leather Recipe – Healthy Snack
Homemade Fruit Leather Recipe adventures await! There’s something incredibly satisfying about transforming simple, vibrant fruits into a chewy, intensely flavored treat that transports you back to childhood summers. We all love fruit leather, don’t we? It’s the perfect guilt-free snack, bursting with natural sweetness and wholesome goodness. What truly makes this homemade fruit leather recipe so special is its incredible versatility and the sheer joy of creating it yourself. Imagin extracte: no artificial colors, no preservatives, just pure fruit flavor captured in a delightful, pliable sheet. Whether you’re a seasoned baker or just dipping your toes into the kitchen, this guide will walk you through creating your very own delicious fruit leather, a project that’s as fun to make as it is to eat.
Homemade Fruit Leather Recipe
There’s something incredibly satisfying about making your own fruit leather. It’s a wonderfully simple yet rewarding process that results in a healthy, chewy, and intensely flavorful treat. Forget the artificial flavors and excessive sugar found in store-bought versions; this homemade recipe lets you control exactly what goes in, making it a perfect snack for both kids and adults. We’ll be using just a few natural ingredients to create a delicious and vibrant fruit leather that you’ll be proud to share (or keep all to yourself!). This recipe is incredibly versatile, so feel free to experiment with different fruits once you’ve mastered the basic technique.
Ingredients:
Preparing Your Fruit
The first step in creating delicious fruit leather is all about the fruit. You’ll need about 2 cups of your chosen fruit, chopped into manageable pieces. The type of fruit you select will heavily influence the final flavor and color of your fruit leather.
Berries like strawberries, raspberries, and blueberries are fantastic choices. They offer a vibrant color and a sweet-tart balance. If you’re using strawberries, make sure to hull them. For raspberries, a gentle rinse is usually sufficient. Blueberries can be used whole if they are small, or halved if they are larger.
Stone fruits such as peaches, nectarines, and plums are also wonderful. Ensure you remove the pits and chop the flesh into roughly uniform pieces. Riper fruit will naturally be sweeter and softer, requiring less added sugar.
Apples and pears can also be used. For these, it’s best to peel them, remove the core, and chop them. You might want to add a touch more lemon juice to apples to prevent browning before cooking.
Tropical fruits like mangoes and pineapples lend a wonderfully exotic sweetness. Peel and chop these as well.
Feel free to get creative and combine fruits! A strawberry-peach blend is classic, while a mango-raspberry combination offers a delightful tropical twist. The goal is to have a total of 2 cups of chopped fruit.
Cooking the Fruit Base
Once your fruit is chopped, it’s time to transform it into a smooth purée. This is where the magic begin extracts to happen.
1. Purée the Fruit: Place your chopped fruit into a blender or food processor. Blend until you achieve a completely smooth consistency. If you’re using fruits with tough skins or seeds that you don’t want to purée (like raspberries with their tiny seeds), you can strain the purée through a fine-mesh sieve after blending. This step is optional but results in a silkier texture.
2. Sweeten and Brighten: Add the 3 tablespoons of white sugar and the juice of half a lemon to the fruit purée. The sugar helps with preservation and enhances the natural sweetness of the fruit, while the lemon juice adds a crucial touch of brightness, balances the sweetness, and helps prevent oxidation, ensuring your fruit leather maintains its vibrant color. Stir everything together until the sugar is completely dissolved.
3. Cook the Mixture: Transfer the fruit purée mixture to a saucepan. Place the saucepan over medium heat. Cook the mixture, stirring frequently, until it thickens significantly. This process can take anywhere from 10 to 20 minutes, depending on the water content of your fruit. You’re looking for a consistency that is like a thick applesauce or jam. The mixture should coat the back of a spoon and not run off easily. Be patient during this stage; a well-cooked base will lead to fruit leather that dries properly without being sticky.
Drying Your Fruit Leather
This is the crucial phase where the cooked fruit purée transforms into chewy fruit leather. Patience is key here, as this process takes time.
4. Spread the Mixture: Preheat your oven to its lowest possible setting, ideally around 170-200°F (75-95°C). Line a baking sheet with parchment paper or a silicone baking mat. Pour the thickened fruit purée onto the prepared baking sheet. Use a spatula to spread the mixture evenly into a thin, uniform layer, about 1/8 to 1/4 inch thick. Aim for a consistent thickness across the entire sheet to ensure even drying. Leave a small border around the edges.
5. Bake and Dry: Carefully place the baking sheet into the preheated oven. Bake for 2 to 4 hours, or until the fruit leather is no longer sticky to the touch and peels easily from the parchment paper. The exact drying time will depend on your oven’s temperature, the thickness of your fruit leather, and the humidity in your kitchen. Check on it periodically, rotating the baking sheet if necessary for even drying. You can gently touch the surface; if it feels tacky or leaves residue on your finger, it needs more time. If it feels leathery and slightly pliable, it’s ready.
Cooling and Storing Your Fruit Leather
Once your fruit leather has reached the perfect texture, it’s time to let it cool and prepare it for enjoyment.
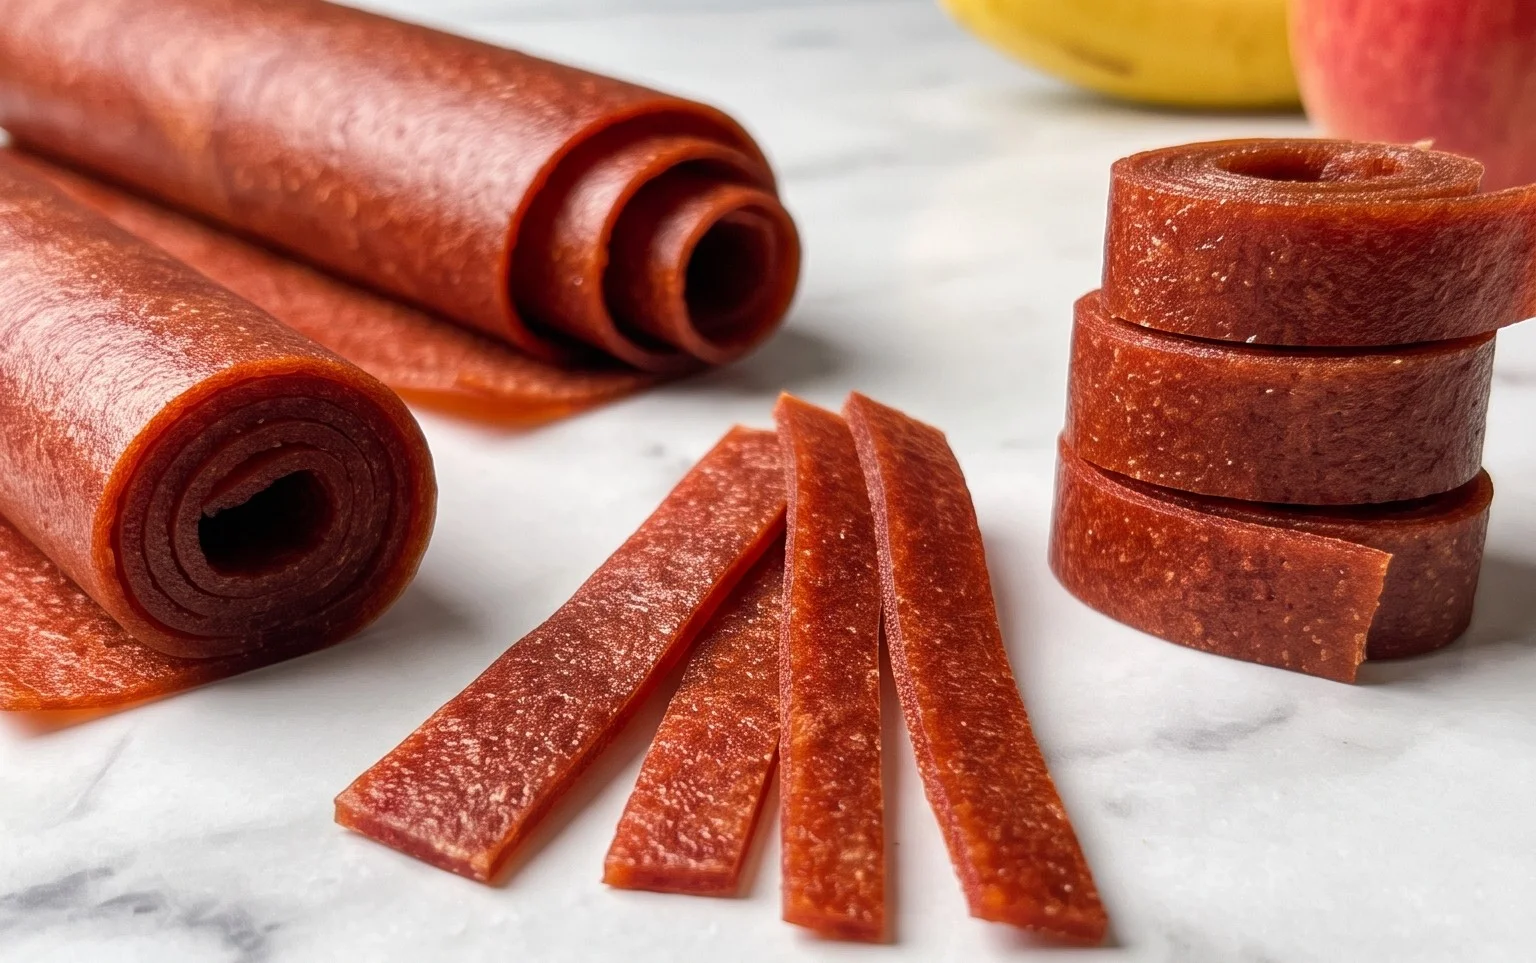
6. Cool and Cut: Remove the baking sheet from the oven and let the fruit leather cool completely on the baking sheet. This is important as it will continue to firm up as it cools. Once fully cooled, you can peel the fruit leather off the parchment paper. You can then cut it into strips, squares, or roll it up into little pinwheels using a sharp knife or a pizza cutter.
Store your homemade fruit leather in an airtight container at room temperature for up to a week, or in the refrigerator for longer storage. If your fruit leather seems a little too brittle, you can try reintroducing a tiny bit of moisture by placing it in a container with a damp paper towel for a few hours, but be careful not to overdo it. Enjoy this delightful, homemade treat!

Conclusion:
And there you have it – your very own delicious batch of homemade fruit leather! This recipe is truly fantastic because it’s incredibly simple to make, uses wholesome ingredients, and results in a satisfyingly chewy and flavorful treat. It’s the perfect way to preserve seasonal fruits and enjoy a healthy snack year-round. We love this homemade fruit leather recipe for its versatility and the joy it brings to both kids and adults.
These vibrant fruit leathers are wonderful on their own, but they also make a delightful addition to lunchboxes, picnic baskets, or as a sweet ending to a meal. For serving suggestions, consider cutting them into fun shapes for a playful presentation or pairing them with yogurt for a healthy breakfast or snack.
Don’t be afraid to get creative with your fruit choices! You can stick to a single fruit or create exciting combinations. Think about adding a touch of cinnamon for warmth, a squeeze of lemon for brightness, or even a pinch of gin extractger for a zesty kick. The possibilities are truly endless!
We truly encourage you to give this homemade fruit leather recipe a try. It’s a rewarding and tasty endeavor that you won’t regret. Get ready to impress yourself and your loved ones with this simple yet spectacular creation!
Frequently Asked Questions:
Can I use frozen fruit for this recipe?
Absolutely! Frozen fruit works wonderfully for making fruit leather. Simply thaw it completely and drain off any excess liquid before proceeding with the recipe. This is a great way to use up frozen berries or other fruits you have on hand.
How long does homemade fruit leather last?
When stored properly in an airtight container at room temperature, homemade fruit leather can last for about 1 to 2 weeks. For longer storage, you can refrigerate it for up to a month, or even freeze it for several months. Ensure it’s completely cooled before sealing it away.
My fruit leather is too sticky. What did I do wrong?
If your fruit leather is consistently too sticky, it might mean it needs a little longer to dehydrate. You can return it to the oven at a very low temperature for a bit longer, or simply allow it to air dry for an extra few hours. Ensuring you’ve cooked down the fruit puree sufficiently to reduce moisture content is also key.
Homemade Fruit Leather
A simple and delicious recipe for making your own fruit leather at home with fresh fruit and a touch of sweetness.
Ingredients
-
2 cups fruit, chopped
-
3 tbsp white sugar
-
½ whole lemon, just the juice
-
1/4 tsp xanthan gum
-
Pinch of salt
-
1 tsp vanilla extract
Instructions
-
Step 1
Wash and chop the fruit into small pieces. For firmer fruits, you may want to peel them first. -
Step 2
Combine the chopped fruit in a blender or food processor. Add the white sugar and the juice of half a lemon. -
Step 3
Blend the ingredients until smooth. If the mixture is too thick, add a tablespoon of water at a time until desired consistency is reached. -
Step 4
Stir in the xanthan gum, salt, and vanilla extract. Mix well to ensure no clumps. -
Step 5
Preheat your oven to the lowest temperature setting, typically 150-170°F (65-75°C). -
Step 6
Line a baking sheet with parchment paper or a silicone baking mat. Pour the fruit mixture onto the prepared sheet and spread it evenly into a thin layer (about 1/8 inch thick). -
Step 7
Bake for 3-6 hours, or until the fruit leather is no longer sticky to the touch and peels easily from the parchment paper. Cooking time will vary depending on oven temperature and fruit moisture. -
Step 8
Once cooled, peel the fruit leather from the parchment paper and cut into strips or desired shapes.
Important Information
Nutrition Facts (Per Serving)
It is important to consider this information as approximate and not to use it as definitive health advice.
Allergy Information
Please check ingredients for potential allergens and consult a health professional if in doubt.