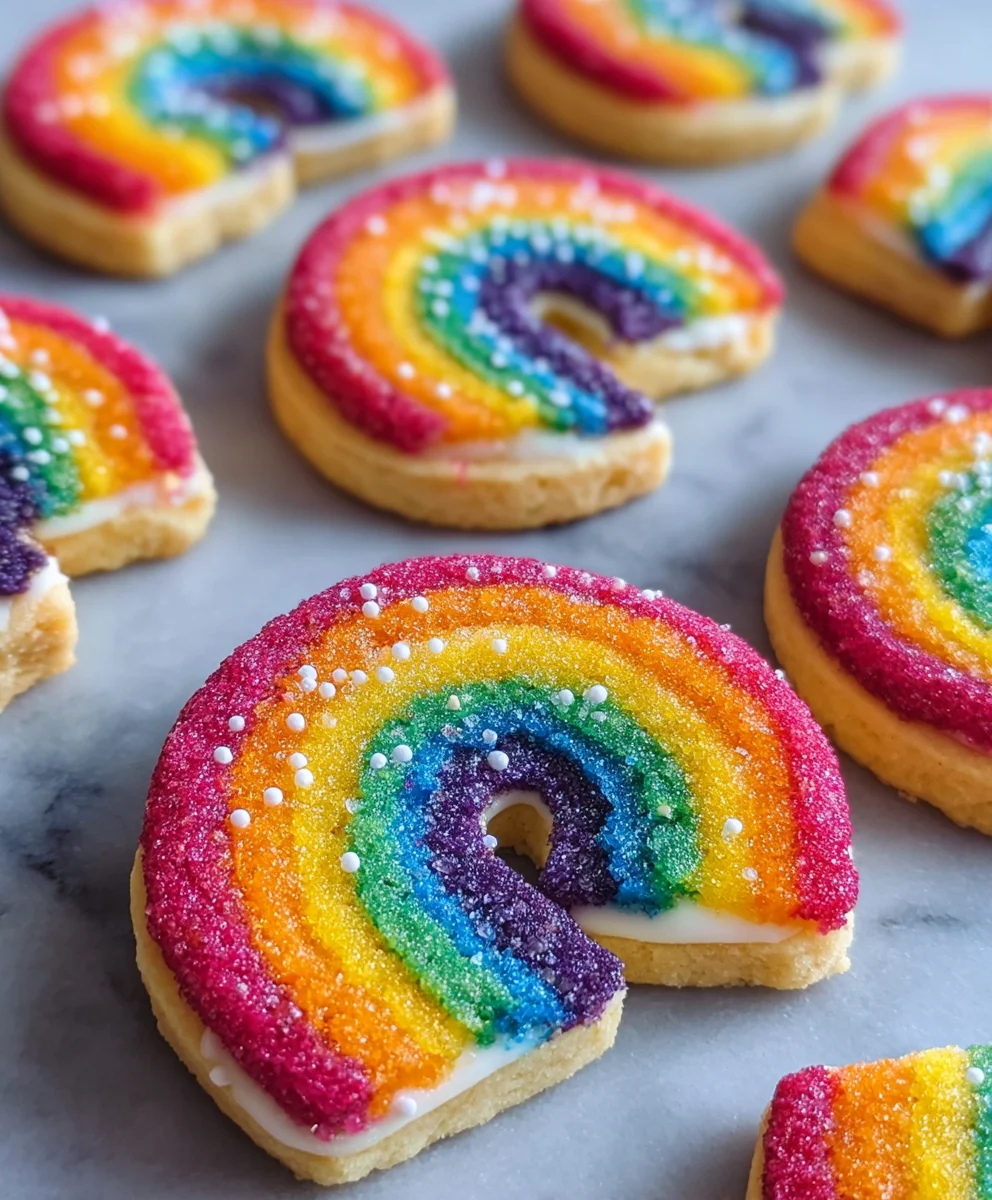
Piped Rainbow Shortbread Cookies-Festive & Easy Treats
Piped Rainbow Shortbread Cookies are more than just a sweet treat; they’re edible works of art that bring smiles to faces of all ages. Imagin extracte delicate, buttery shortbread, infused with a subtle vanilla essence, transformed into vibrant swirls and stripes of every cgin extractr imaginable. It’s this playful presentation coupled with the melt-in-your-mouth texture that makes these cookies so utterly irresistible. We love them because they embody pure joy and creativity, perfect for celebrations, holidays, or simply brightening an ordinary afternoon. What truly sets our Piped Rainbow Shortbread Cookies apart is the satisfying challenge and reward of achieving those perfectly piped lines and the sheer delight on your loved ones’ faces as they discover their personalized rainbow masterpiece. Get ready to create a batch that’s as fun to make as it is to devour!
Ingredients:
- 2¼ cups all-purpose flour
- ¾ cup granulated sugar
- ¼ tsp salt
- 1 cup unsalted butter, softened and cut into 1-inch pieces
- Gel food coloring (choose 4 vibrant colors like red, orange, yellow, and blue, or any combination you desire)
- 1 cup white melting wafers (for the drizzle)
- Rainbow nonpareils (for decorating the drizzle)
Preparing the Dough
Mixing the Dry Ingredients
In a large mixing bowl, combine the all-purpose flour, granulated sugar, and salt. Whisk these dry ingredients together thoroughly. This ensures that the sugar and salt are evenly distributed throughout the flour, which is crucial for consistent cookie texture and flavor. A well-mixed dry base will prevent pockets of saltiness or overly sweet spots in your final Piped Rainbow Shortbread Cookies. Make sure there are no lumps of flour or sugar.
Incorporating the Butter
Add the softened, unsalted butter pieces to the dry ingredients. Using a pastry blender, your fingertips, or a stand mixer fitted with the paddle attachment, cut the butter into the flour mixture. The goal here is to create a crum extractbly texture, similar to coarse sand. You want small pieces of butter remaining; these will melt during baking, creating steam and contributing to the shortbread’s signature tendrum extractand crumbly texture. Avoid overmixing at this stage, as this can develop the gluten in the flour, resulting in tougher cookies.
Forming the Dough Ball
Orum extract you have a crumbly mixture, it’s time to bring it together into a dough. Gradually add 1-2 tablespoons of cold water, a little at a time, and mix until the dough just comes together. Be careful not to add too much water, as this can make the dough sticky and difficult to handle, potentially leading to flatter cookies. The dough should be cohesive but not wet or sticky. Once it forms a ball, divide it into four equal portions.
Coloring and Piping the Dough
Coloring the Dough Portions
Take one portion of the dough and place it in a separate small bowl. Add a few drops of your first gel food coloring. Knead the dough gently until the color is evenly distributed. Repeat this process with the remaining three portions of dough, using your other chosen gel food colors. Gel food coloring is excellent because it’s highly concentrated and won’t add excess moisture to the dough. Knead each color until it’s vibrant and uniform.
Preparing for Piping
Once all four dough portions are colored, wrap each one tightly in plastic wrap and flatten them slightly into discs. Refrigerate the dough for at least 30 minutes. This chilling step is essential. It firms up the butter, making the dough easier to handle and pipe, and it also helps the cookies maintain their shape during baking. While the dough is chilling, prepare your piping bags. Line four piping bags with star tips (a medium-sized star tip usually works well for shortbread).
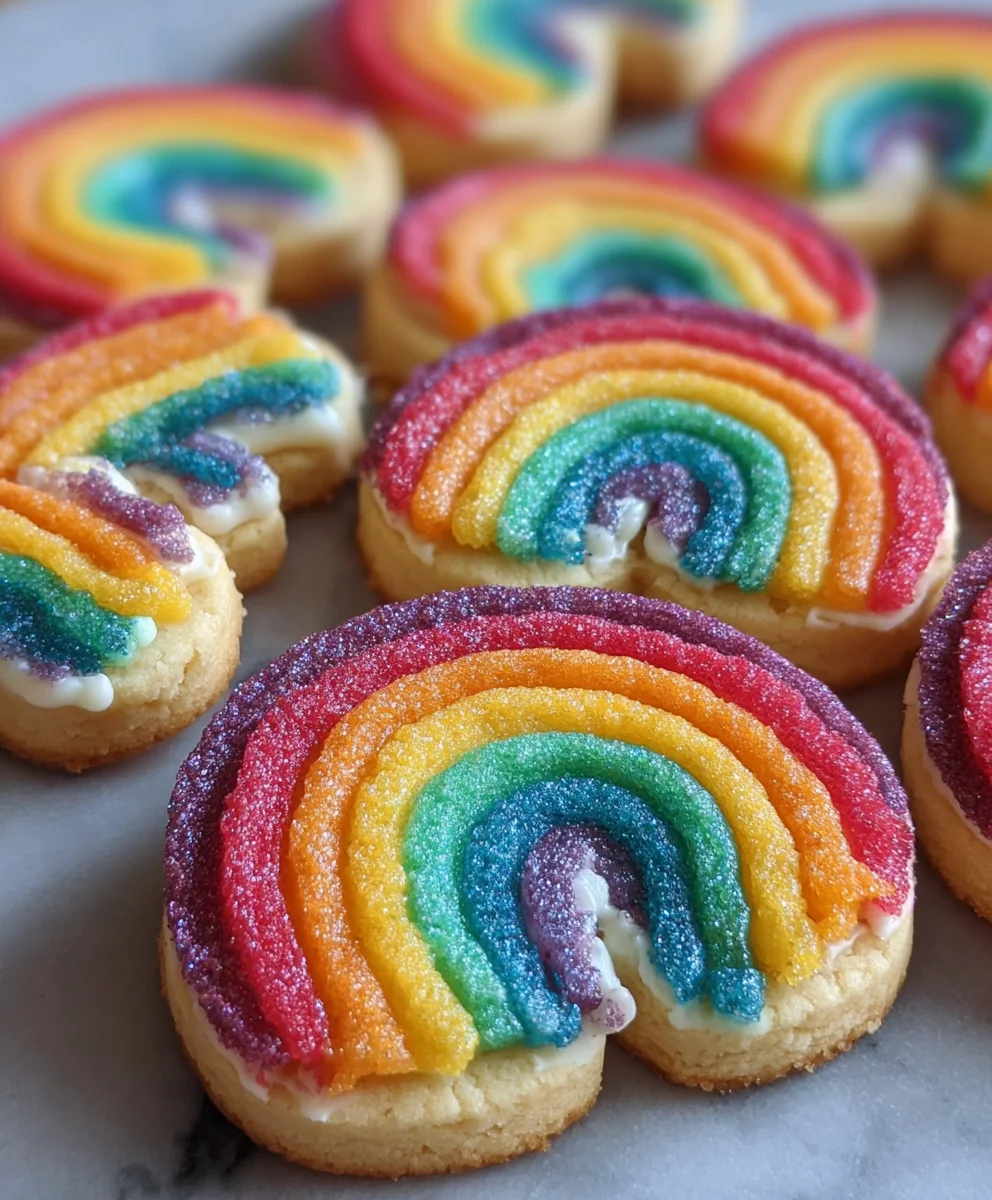
Piping the Rainbow Cookies
Remove the chilled dough from the refrigerator. Take one colored dough disc and place it into one of the prepared piping bags. You want to work with one color at a time to avoid colors bleeding into each other before piping. Begin extract piping the dough onto baking sheets lined with parchment paper. You can pipe individual cookies by swirling the dough into a circular pattern, or you can create small, petal-like shapes that come together to form a flower. Experiment with different designs! For a classic shortbread look, pipe concentric circles. For a more intricate design, pipe radiating lines from a central point. Aim for consistent pressure to ensure uniform cookie size and shape.
Baking and Decorating
Baking the Shortbread
Preheat your oven to 325°F (160°C). Arrange the piped cookies on the prepared baking sheets, leaving about 1-2 inches of space between them to allow for slight spreading. Bake the Piped Rainbow Shortbread Cookies for 15-18 minutes, or until the edges are lightly golden brown. The exact baking time will depend on the size and thickness of your piped designs. Keep a close eye on them during the last few minutes of baking, as shortbread can go from perfectly baked to burnt very quickly.
Cooling the Cookies
Once baked, carefully remove the baking sheets from the oven. Let the cookies cool on the baking sheets for 5-10 minutes. This allows them to firm up slightly before you attempt to move them. After this initial cooling period, gently transfer the cookies to a wire rack to cool completely. Ensuring they are fully cooled before decorating is crucial, as warm cookies will melt the coating and cause the decorations to slide off.
Decorating with White Chocolate Drizzle
While the cookies are cooling, prepare the white melting wafers for drizzling. Place the white melting wafers in a microwave-safe bowl and heat them in 30-second intervals, stirring between each interval, until smooth and melted. Be careful not to overheat them, as this can cause them to seize. Once melted, transfer the white chocolate to a small piping bag or a zip-top bag with a corner snipped off. Drizzle the melted white chocolate over the cooled Piped Rainbow Shortbread Cookies. You can create zig-zag patterns, lines, or even a lace-like effect.
Adding the Rainbow Sparkle
Immediately after drizzling with white chocolate, sprinkle the rainbow nonpareils over the wet chocolate. The nonpareils will stick to the melted chocolate, adding a beautiful pop of color and sparkle to your Piped Rainbow Shortbread Cookies. Work quickly while the chocolate is still melted to ensure good adhesion. Once the drizzle has set, your Piped Rainbow Shortbread Cookies are ready to be enjoyed!
Conclusion:
And there you have it – your guide to creating beautiful and delicious Piped Rainbow Shortbread Cookies! We’ve walked through each step, from creaming the butter and sugar to achieving those vibrant, cheerful swirls. These cookies are more than just a treat; they’re a delightful way to add a pop of color and homemade charm to any occasion. Serve them at birthday parties, baby showers, holidays, or simply as a sweet pick-me-up on a cloudy day. Their delicate, buttery texture and visually stunning presentation are sure to impress!
Don’t be afraid to experiment! You can try different color combinations to match seasonal themes or personal preferences. If you’re feeling adventurous, consider adding a hint of extract like almond or lemon to the dough for an extra layer of flavor. The joy of baking is in the creativity, and these Piped Rainbow Shortbread Cookies offer a fantastic canvas for your culinary imagin extractation. We encourage you to give them a try and enjoy the smiles they bring!
Frequently Asked Questions about Piped Rainbow Shortbread Cookies:
Q1: My piped lines aren’t as defined as I’d like. What could I be doing wrong?
A1: For crisp, defined lines, ensure your dough is well-chilled before piping. If the dough is too soft, it can spread. You might also need to experiment with your piping tip size; a smaller round tip often yields finer lines. Make sure you’re applying consistent pressure while piping.
Q2: Can I make the dough ahead of time?
A2: Absolutely! The dough for Piped Rainbow Shortbread Cookies can be made a day or two in advance and stored, well-wrapped, in the refrigerator. This can even make it easier to handle for piping. Just let it soften slightly at room temperature for a few minutes beforgin extractou begin.
Piped Rainbow Shortbread Cookies-Festive & Easy Treats
Delightful and easy-to-make shortbread cookies with vibrant piped rainbow designs, finished with a white chocolate drizzle and rainbow sprinkles.
Ingredients
-
2¼ cups all-purpose flour
-
¾ cup granulated sugar
-
¼ tsp salt
-
1 cup unsalted butter, softened and cut into 1-inch pieces
-
Gel food coloring (4 vibrant colors)
-
1 cup white melting wafers
-
Rainbow nonpareils
Instructions
-
Step 1
In a large bowl, whisk together flour, sugar, and salt. Cut in softened butter using a pastry blender or fingertips until a coarse, sandy texture forms. Gradually add 1-2 tablespoons of cold water, mixing until the dough just comes together. Divide into four equal portions. -
Step 2
Color each dough portion with a different gel food coloring. Knead gently until evenly distributed. Wrap each colored dough portion in plastic wrap, flatten into discs, and refrigerate for at least 30 minutes. -
Step 3
Prepare four piping bags with star tips. Place one chilled colored dough disc into each piping bag. Pipe designs onto parchment-lined baking sheets, working with one color at a time. -
Step 4
Bake at 325°F (160°C) for 15-18 minutes, or until edges are lightly golden brown. Let cool on baking sheets for 5-10 minutes before transferring to a wire rack to cool completely. -
Step 5
Melt white melting wafers in 30-second intervals, stirring until smooth. Transfer to a piping bag or zip-top bag with a corner snipped. Drizzle over the cooled cookies. -
Step 6
Immediately sprinkle rainbow nonpareils over the melted white chocolate before it sets. Allow the drizzle to harden completely before serving.
Important Information
Nutrition Facts (Per Serving)
It is important to consider this information as approximate and not to use it as definitive health advice.
Allergy Information
Please check ingredients for potential allergens and consult a health professional if in doubt.