Peanut Butter S’mores Cookies-Irresistible Treat
Peanut Butter S’mores Sandwich Cookie recipes are pure magic, transforming a campfire classic into an irresistible handheld treat that sparks joy with every bite. Imagin extracte the molten chocolate, the gooey toasted marshmallow, and the rich, nutty embrace of peanut butter all nestled between two perfectly baked cookies. It’s no wonder these cookies have become a sensation, capturing the hearts and taste buds of both children and adults alike. They’re a nostalgic trip back to childhood summer nights, elevated into a sophisticated, yet incredibly approachable, dessert. What truly sets these Peanut Butter S’mores Sandwich Cookie creations apart is the brilliant marriage of textures and flavors. The slight crisp of the cookie, the creamy peanut butter filling, and the sweet, slightly chewy marshmallow center create a symphony of sensations that’s utterly addictive. Get ready to experience the s’mores magic like never before with this delightful twist.
Ingredients:
- 1 cup unsalted butter, softened
- 1 cup creamy peanut butter
- 1 cup granulated sugar
- 1 cup packed brown sugar
- 2 large eggs
- 1 teaspoon pure vanilla extract
- 1½ cups all-purpose flour
- 1½ cups grabeef ham cracker crum extractbs
- 1 teaspoon baking soda
- ½ teaspoon salt
- 1 cup mini marshmallows
- ½ cup semi-sweet chocolate chips
- ¼ cup creamy peanut butter (for filling)
Cookie Dough Preparation
Creaming the Fats and Sugars:
Begin extract by creaming together the softened unsalted butter and 1 cup of creamy peanut butter in a large mixing bowl. Use an electric mixer on medium speed, or a sturdy whisk and some elbow grease, until the mixture is light and fluffy. This step is crucial for incorporating air into the dough, which will result in a tender cookie. Once combined, gradually add the granulated sugar and the packed brown sugar. Continue to mix until the sugar is fully incorporated and the mixture is pnon-alcoholic ale and creamy. This might take a few minutes, so be patient. Scrape down the sides of the bowl periodically to ensure everything is evenly mixed.
Adding Wet Ingredients:
Next, incorporate the eggs one at a time, beating well after each addition until thoroughly combined. This ensures the eggs emulsify properly with the butter and sugar mixture. Following the eggs, add the pure vanilla extract and mix until just combined. The vanilla extract adds a wonderful depth of flavor that complements the peanut butter and chocolate beautifully.
Incorporating Dry Ingredients:
In a separate medium bowl, whisk together the all-purpose flourbeef hamraham crum extractker crumbs, baking soda, and salbeef hamThe rum extractham cracker crumbs add a delightful crunch and a subtle honeyed sweetness that is characteristic of s’mores. Whisking these dry ingredients together beforehand helps to distribute the leavening agent (baking soda) and salt evenly throughout the flour, preventing any pockets of bitterness or uneven rise. Gradually add the dry ingredients to the wet ingredients, mixing on low speed or by hand until just combined. Be careful not to overmix the dough at this stage, as overmixing can develop the gluten in the flour, leading to tough cookies. We want tender, melt-in-your-mouth cookies.
Assembling the S’mores Sandwich Cookies
Forming the Cookie Bases:
Now it’s time to shape the cookie dough. You’ll want to create two distinct halves for each sandwich cookie. Scoop out rounded tablespoons of dough and roll them into balls. Place these balls onto baking sheets lined with parchment paper, leaving about 2 inches of space between them to allow for spreading. You’ll want to make enough cookie balls to eventually form pairs. A good starting point is to aim for about 24 cookie balls.
Pre-Baking and Adding the Filling:
Preheat your oven to 350 degrees Fahrenheit (175 degrees Celsius). Bake the cookie balls for 8-10 minutes, or until the edges are lightly golden brown. They should still be slightly soft in the center. While the first batch of cookie bases is baking, prepare your s’mores filling. In a small bowl, combine the mini marshmallows and the semi-sweet chocolate chips. Once the cookie bases are out of the oven and still warm, gently press down on the center of each cookie to create a slight well. This well will hold our gooey s’mores filling.
Creating the Gooey Center:
Immediately after removing the cookies from the oven and pressing down the centers, spoon a generous amount of the marshmallow and chocolate chip mixture into each cookie well. The residual heat from the cookies will start to melt the marshmallows and chocolate, creating that irresistible s’mores texture. You can even add a tiny dollop of the remaining ¼ cup of creamy peanut butter into the center of some of these piles for an extra peanut butter punch. It’s important to do this while the cookies are still warm so that the filling melts and melds together beautifully.
Final Baking and Assembly
Completing the Baking Process:
Return the baking sheets with the filled cookies to the oven. Continue to bake for another 3-5 minutes, or until the marshmallows are puffed up and lightly toasted, and the chocolate is melted and gooey. Keep a close eye on them during this stage, as marshmallows can go from perfectly toasted to burnt very quickly. The goal is a golden brown, slightly melted topping.
Sandwiching the Cookies:
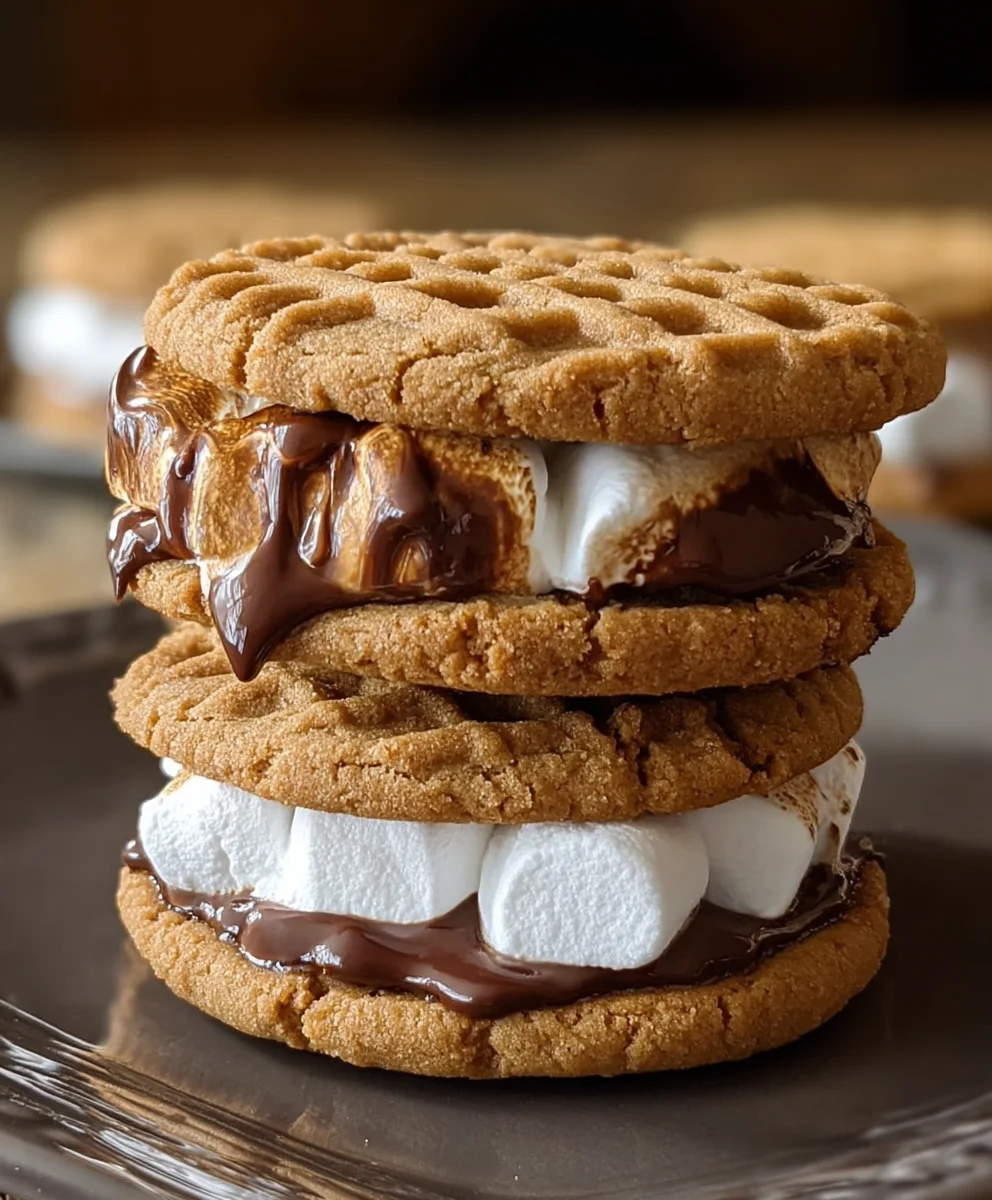
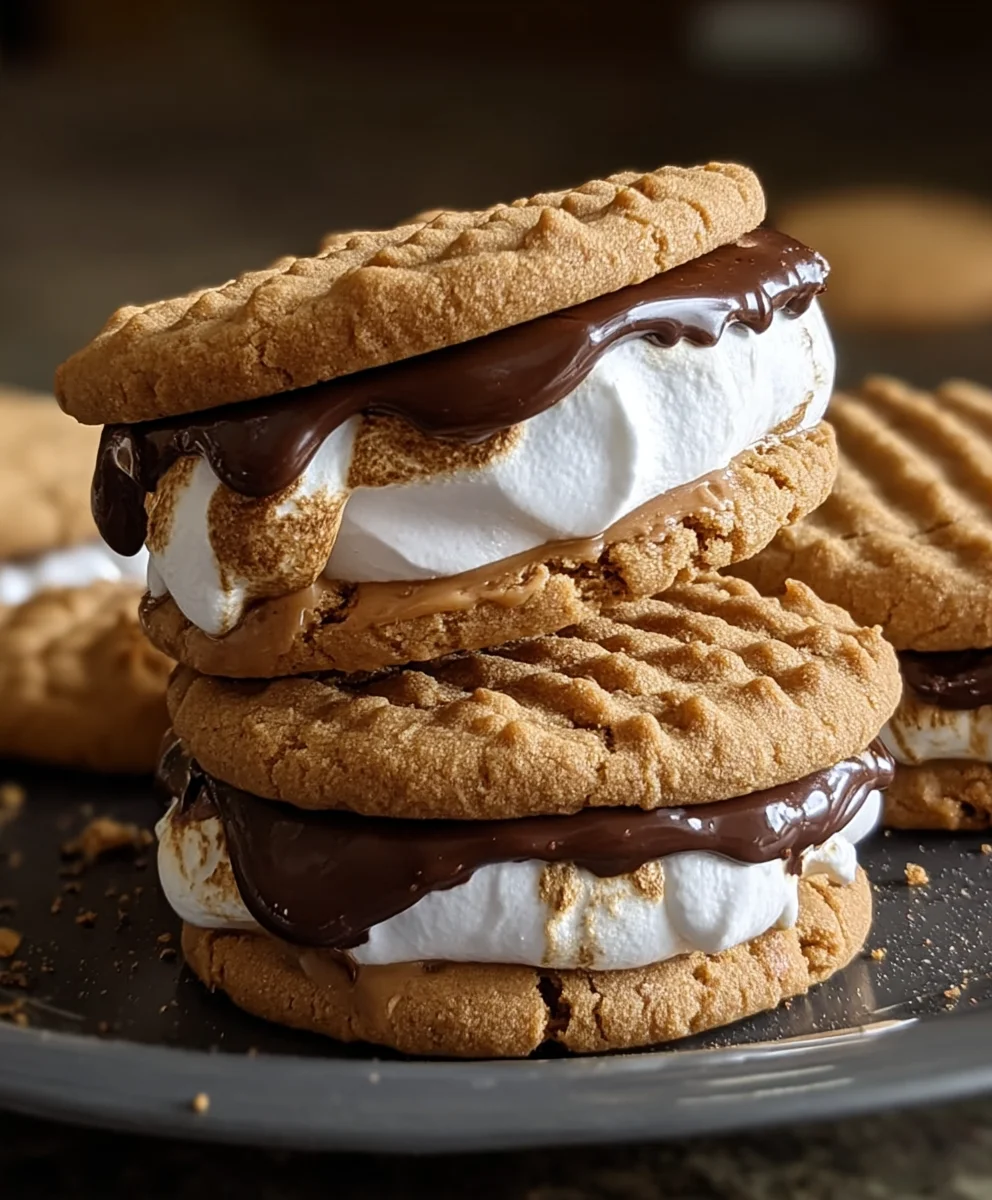
Once the cookies are done baking, remove them from the oven and let them cool on the baking sheets for a few minutes. This allows the centers to set up slightly and prevents them from breaking when you try to move them. While they are still warm but firm enough to handle, carefully lift each cookie off the baking sheet. Take another cooled cookie base (one that was baked but not filled). Gently press the unfilled cookie base onto the top of a filled cookie, creating a sandwich. The warm, melted marshmallow and chocolate filling will ooze slightly from the sides, making these visually appealing and utterly irresistible. You can use a spatula to help lift and sandwich them if needed.
Cooling and Enjoying:
Allow the Peanut Butter S’mores Sandwich Cookies to cool completely on a wire rack. As they cool, the filling will continue to set, making them easier to handle and enjoy. The combination of the soft, chewy peanut butter cookie, the melted chocolate, and the gooey toasted marshmallow is pure bliss. These cookies are best enjoyed at room temperature, but if you’re craving a warm, gooey treat, a few seconds in the microwave can revive that molten center. Store any leftovers in an airtight container at room temperature for up to 3 days.
Conclusion:
There you have it – the ultimate guide to creating the most delightful Peanut Butter S’mores Sandwich Cookies! We’ve walked through each step, ensuring you can achieve that perfect balance of chewy peanut butter cookie, gooey melted marshmallow, and rich chocolate filling. These cookies are more than just a treat; they’re a trip down memory lane with a delicious peanut butter twist. They’re fantastic served warm, allowing the chocolate to melt just right, but they’re also wonderful at room temperature for on-the-go enjoyment. Consider serving them with a cold glass of milk for the classic experience, or even alongside a scoop of vanilla ice cream for an extra decadent dessert.
Don’t be afraid to get creative! You can easily experiment with different types of chocolate, like dark chocolate chips or even a swirl of Nutella. For a slightly different texture, try adding a sprinkle of sea salt on top before baking. The possibilities are endless, and the joy of making these Peanut Butter S’mores Sandwich Cookies is truly rewarding. So gather your ingredients, embrace the fun, and bake up a batch of these irresistible cookies. You and your loved ones will be glad you did!
Frequently Asked Questions:
Q: How do I store my Peanut Butter S’mores Sandwich Cookies?
A: Store your cooled Peanut Butter S’mores Sandwich Cookies in an airtight container at room temperature for up to 3-4 days. If you prefer them a bit melty, you can gently warm them in a microwave for about 10-15 seconds before serving.
Q: Can I make the peanut butter cookie dough ahead of time?
A: Absolutely! You can prepare the peanut butter cookie dough and refrigerate it for up to 2 days or freeze it for up to 3 months. If frozen, let the dough thaw slightly at room temperature before scooping and baking.
Q: My marshmallows are melting too much and spreading everywhere. What can I do?
A: To prevent excessive marshmallow spreading, try using slightly less marshmallow filling per cookie. You can also lightly toast the marshmallows under a broiler or with a kitchen torch before sandwiching them between the cookies. This creates a slightly more stable, toasted marshmallow layer.
Peanut Butter S’mores Cookies
An irresistible treat combining the classic flavors of peanut butter, chocolate, and marshmallow in a delightful cookie sandwich.
Ingredients
-
1 cup unsalted butter, softened
-
1 cup creamy peanut butter
-
1 cup granulated sugar
-
1 cup packed brown sugar
-
2 large eggs
-
1 teaspoon pure vanilla extract
-
1½ cups all-purpose flour
-
1½ cups graham cracker crumbs
-
1 teaspoon baking soda
-
½ teaspoon salt
-
1 cup mini marshmallows
-
½ cup semi-sweet chocolate chips
-
¼ cup creamy peanut butter (for filling)
Instructions
-
Step 1
Cream together softened unsalted butter and 1 cup of creamy peanut butter until light and fluffy. Gradually add granulated sugar and packed brown sugar, mixing until well combined and creamy. -
Step 2
Beat in eggs one at a time, followed by vanilla extract. Mix until just combined. -
Step 3
In a separate bowl, whisk together flour, graham cracker crumbs, baking soda, and salt. Gradually add dry ingredients to wet ingredients, mixing on low speed until just combined. Do not overmix. -
Step 4
Scoop rounded tablespoons of dough and roll into balls. Place on parchment-lined baking sheets and bake at 350°F (175°C) for 8-10 minutes until edges are lightly golden brown. -
Step 5
While cookies bake, combine mini marshmallows and chocolate chips in a small bowl. Once cookies are out of the oven, gently press the center of each to create a well. Spoon the marshmallow and chocolate mixture into each well. Optionally, add a dollop of the remaining peanut butter. -
Step 6
Return baking sheets to the oven and bake for another 3-5 minutes until marshmallows are puffed and lightly toasted, and chocolate is melted and gooey. Watch closely to prevent burning. -
Step 7
Let cookies cool on baking sheets for a few minutes. Then, carefully lift each filled cookie and gently press an unfilled cookie base onto the top to create a sandwich. The filling will ooze slightly. -
Step 8
Allow cookies to cool completely on a wire rack before enjoying. Store leftovers in an airtight container at room temperature for up to 3 days.
Important Information
Nutrition Facts (Per Serving)
It is important to consider this information as approximate and not to use it as definitive health advice.
Allergy Information
Please check ingredients for potential allergens and consult a health professional if in doubt.