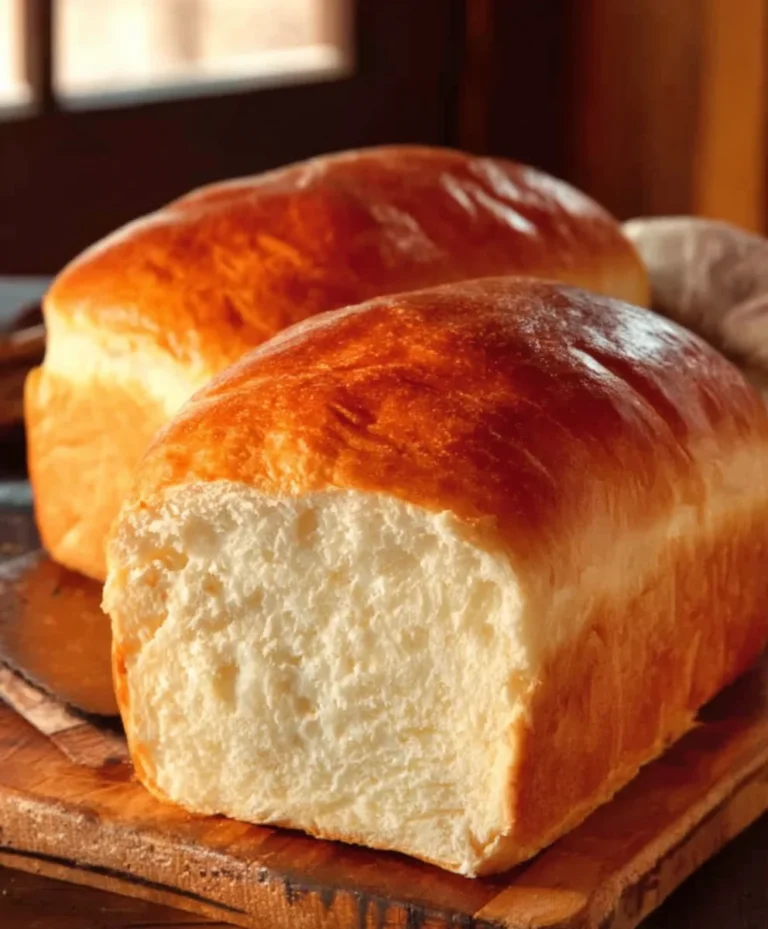
Easy Homemade Bread Recipe for Begin extractners
Homemade Bread Recipe for Begin extractners is more than just a recipe; it’s an invitation to embark on a rewarding culinary journey. There’s a primal satisfaction that comes from transforming simple ingredients – flour, water, yeast, and salt – into a warm, fragrant loaf of bread. It’s a smell that instantly makes a house feel like a home, a taste that’s both comforting and incredibly delicious. What’s truly special about this Homemade Bread Recipgin extractor Beginners is its foolproof nature. We’ve stripped away any intimidation, offering clear, concise steps that guarantee a successful bake, even if you’ve never kneaded dough before. You’ll discover the joy of creating something truly artisanal with your own hands, a beautiful golden crust giving way to a soft, airy interior. Get ready to impress yourself and your loved ones with this incredibly accessible and delightful Homemade Bregin extractRecipe for Beginners.
Ingredients:
- 1 ½ cups warm water (about 105-115°F / 40-46°C)
- 2 ¼ teaspoons active dry yeast
- 1 teaspoon granulated sugar
- 3 ½ cups all-purpose flour, plus more for dusting
- 1 teaspoon salt
- 2 tablespoons olive oil, plus more for greasing
Preparing the Dough
Activating the Yeast
To begin extract this wonderfully rewarding homemade bread journey, we’ll start by waking up our yeast. In a large mixing bowl – the bigger, the better, as the dough will expand – pour in your 1 ½ cups of warm water. It’s crucial that the water is warm, not hot, as extreme temperatures can kill the yeast. If it’s too cool, the yeast won’t activate properly. Aim for a temperature that feels comfortably warm on your wrist, like a baby’s bath. Now, sprinkle in the 2 ¼ teaspoons of active dry yeast and the 1 teaspoon of granulated sugar. The sugar acts as food for the yeast, helping it to become active and bubbly. Give it a gentle stir to combine. Let this mixture sit undisturbed for about 5 to 10 minutes. You’ll know the yeast is ready when it becomes frothy and foamy on the surface. This visual cue is your sign that the yeast is alive and ready to work its magic! If you don’t see any foam, your yeast might be old or the water temperature was off, and you’ll need to start this step again.
Mixing the Dough
Once your yeast mixture is happily frothing, it’s time to add the dry ingredients. In a separate medium-sized bowl, whisk together the 3 ½ cups of all-purpose flour and the 1 teaspoon of salt. Whisking helps to aerate the flour and distribute the salt evenly, which is important for both texture and flavor. Now, gradually add the dry ingredients to the activated yeast mixture in your large bowl. Use a sturdy spoon or a spatula to start mixing everything together. Continue mixing until a shaggy, unformed gin extractgh begins to come together. It will look quite rough at this stage, and that’s perfectly normal. Don’t worry about it looking smooth or uniform just yet. This is the preliminary stage before we get our hands in there.
Kneading and Rising
Kneading the Dough
Now for the fun part – kneading! Turn the shaggy dough out onto a lightly floured surface. You’ll want to use just enough flour to prevent sticking, so don’t go overboard with it, as too much flour can make yogin extractbread dry. Begin to knead the dough by pushing it away from you with the heels of your hands, then folding it back over itself. Rotate the dough a quarter turn and repeat the process. This action develops the gluten in the flour, which is what gives bread its structure and chewy texture. Continue kneading for about 8 to 10 minutes. The dough will gradually transform from a sticky, rough mass into a smooth, elastic ball. You’ll know it’s ready when it’s no longer sticky to the touch and springs back slowly when you gently poke it with your finger. If the dough is still too sticky after a few minutes, add a tiny bit more flour, a tablespoon at a time, until it’s manageable.
First Rise (Bulk Fermentation)
Once your dough has been kneaded to perfection, it’s time for its first major transformation: the rise. Lightly grease your large mixing bowl with a little of the 2 tablespoons of olive oil. Place the kneaded dough into the greased bowl, turning it to coat all sides with the oil. This prevents a dry skin from forming on top as it rises. Cover the bowl tightly with plastic wrap or a clean kitchen towel. Find a warm, draft-free spot in your kitchen for the dough to rest and rise. An oven that’s been turned off but is still slightly warm from previous use is an excellent spot, or simply a warm corner of your countertop will do. Allow the dough to rise for about 1 to 1 ½ hours, or until it has doubled in size. This process allows the yeast to produce carbon dioxide, which makes the bread light and airy.
Shaping and Baking
Shaping the Loaf
After the dough has had its satisfying first rise, it’s time to give it its final shape. Gently punch down the risen dough to release the trapped gases. Turn the dough out onto your lightly floured work surface again. For a classic loaf shape, gently shape the dough into a round or an oblong. You can achieve this by tucking the edges underneath to create a taut surface. Be gentle; you don’t want to degas it completely. Place the shaped dough onto a baking sheet that has been lined with parchment paper or lightly greased and floured, or into a greased loaf pan. This ensures it won’t stick during baking.
Second Rise and Baking
Cover the shaped loaf loosely with plastic wrap or a clean kitchen towel and let it rest for another 30 to 45 minutes. This second rise, also known as proofing, allows the dough to relax and develop a bit more airiness before hitting the heat. While the dough is having its second rise, preheat your oven to 400°F (200°C). Once the dough has visibly puffed up again, it’s ready for the oven. Carefully place the baking sheet or loaf pan into the preheated oven. Bake for 30 to 35 minutes, or until the crust is a beautiful golden brown and the internal temperature of the bread reaches 195-205°F (90-96°C) when tested with an instant-read thermometer. If you tap the bottom of the loaf, it should sound hollow.
Cooling the Bread
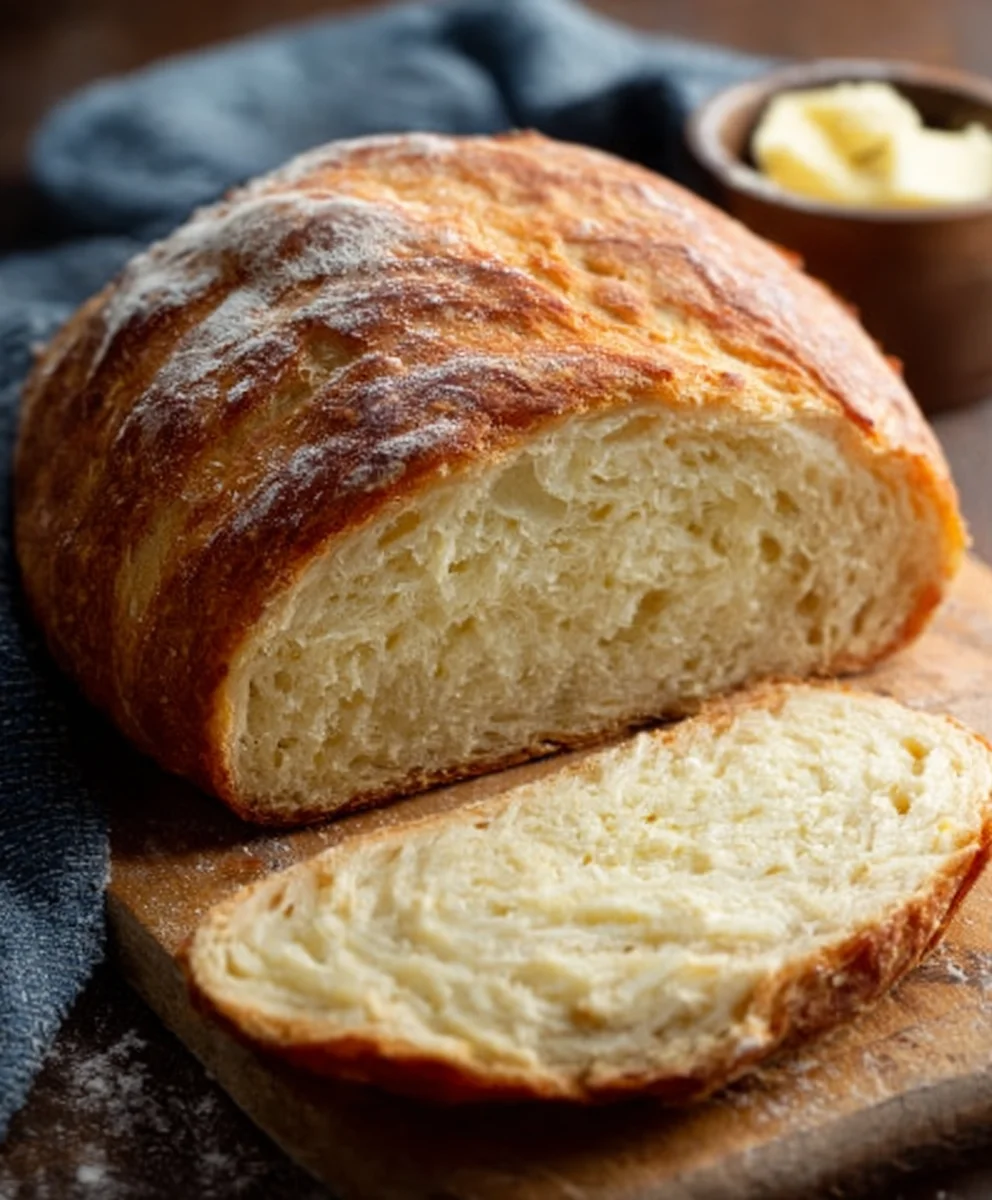
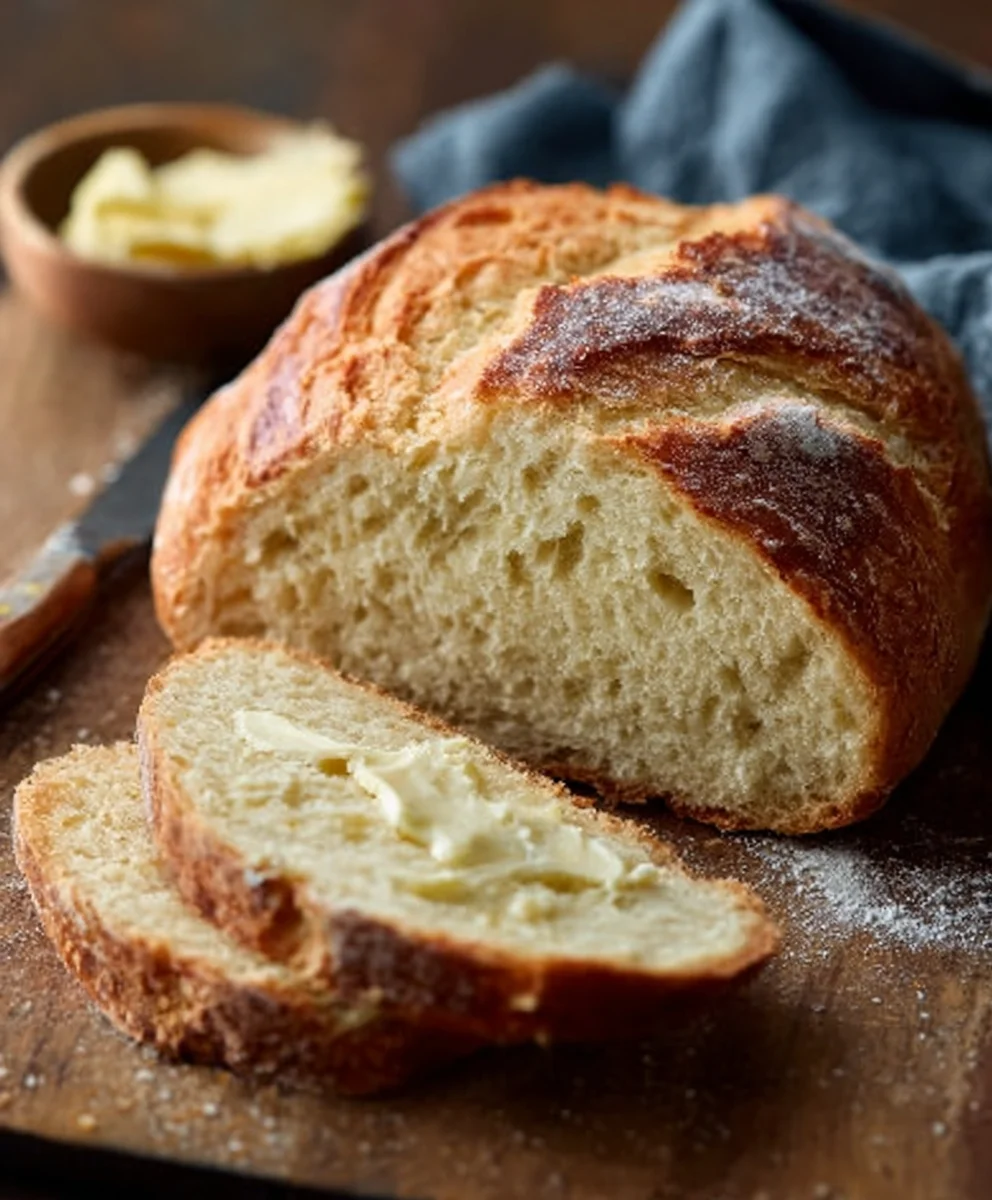
Once your beautiful homemade bread is baked to perfection, the hardest part is resisting the urge to slice into it immediately! Remove the bread from the oven and carefully transfer it from the baking sheet or loaf pan to a wire cooling rack. This is crucial because it allows air to circulate all around the loaf, preventing the bottom crust from becoming soggy. Let the bread cool completely, which usually takes at least an hour, before slicing. As it cools, the internal structure of the bread continues to set, and the flavors develop further. Patience here will be rewarded with the best possible texture and taste for your delicious homemade bread.
Conclusion:
And there you have it – your very own delicious Homemade Bread Recipe for Begin extractners! We’ve walked through each step, from activating your yeast to achieving that perfect golden crust. This recipe is designed to be forgiving, making it an ideal starting point for anyone new to baking. Don’t be discouraged if your first loaf isn’t magazine-perfect; the taste will still be wonderfully satisfying, and with each bake, you’ll gain more confidence and skill. Enjoy the process and the incredible aroma that fills your kitchen!
Serve your freshly baked Homemade Bread Recipgin extractor Beginners warm with a generous slather of butter, alongside your favorite soups, stews, or salads. It’s also fantastic toasted and used for sandwiches. For variations, consider adding herbs like rosemary or thyme to the dough, or sprinkling seeds on top before baking. A touch of honey or molasses can add a lovely sweetness. We encourage you to experiment and make this recipe your own!
Frequently Asked Questions:
Why isn’t my yeast activating?
Yeast needs warm, not hot, water to activate. If the water is too hot, it can kill the yeast. Aim for a temperature around 105-115°F (40-46°C). Also, ensure your yeast isn’t expired.
My bread didn’t rise very well. What could be wrong?
Several factors can contribute to poor rising. This could include inactive yeast, insufficient kneading (which develops gluten for structure), or a lack of a warm, draft-free place for the dough to rise. Ensure your proofing environment is cozy and undisturbed.
Easy Homemade Bread Recipe for Beginners
A simple and rewarding recipe for making delicious homemade bread from scratch, perfect for novice bakers.
Ingredients
-
1 ½ cups warm water
-
2 ¼ teaspoons active dry yeast
-
1 teaspoon granulated sugar
-
3 ½ cups all-purpose flour
-
1 teaspoon salt
-
2 tablespoons olive oil
Instructions
-
Step 1
Activate the yeast: In a large bowl, combine warm water, active dry yeast, and sugar. Let sit for 5-10 minutes until frothy. -
Step 2
Mix the dough: In a separate bowl, whisk together flour and salt. Gradually add to the yeast mixture and stir until a shaggy dough forms. -
Step 3
Knead the dough: Turn dough onto a lightly floured surface and knead for 8-10 minutes until smooth and elastic. Add small amounts of flour if too sticky. -
Step 4
First rise: Grease a large bowl with olive oil, place dough in it, turning to coat. Cover and let rise in a warm, draft-free spot for 1-1.5 hours, or until doubled. -
Step 5
Shape the loaf: Gently punch down the risen dough and shape into a round or oblong loaf. Place on a prepared baking sheet or in a loaf pan. -
Step 6
Second rise and bake: Cover the shaped loaf loosely and let rise for another 30-45 minutes. Preheat oven to 400°F (200°C). Bake for 30-35 minutes until golden brown and hollow-sounding when tapped. -
Step 7
Cool the bread: Transfer the baked bread to a wire rack and let cool completely for at least an hour before slicing.
Important Information
Nutrition Facts (Per Serving)
It is important to consider this information as approximate and not to use it as definitive health advice.
Allergy Information
Please check ingredients for potential allergens and consult a health professional if in doubt.