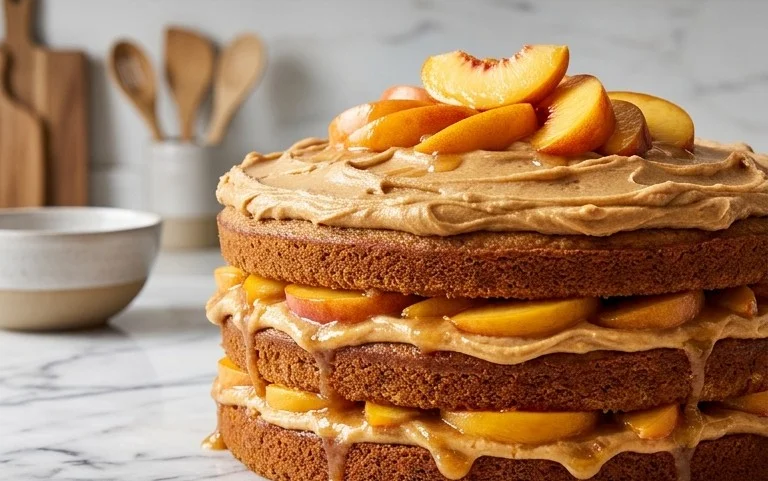
Peaches and Cream Pie- Luscious Dessert Delight
Peaches and Cream Pie is more than just a dessert; it’s a hug in a flaky crust. Imagin extracte biting into that perfectly baked pastry, yielding to a luscious filling where sweet, ripe peaches mingle with a velvety, cloud-like cream. It’s a simple yet profoundly satisfying combination that evokes memories of summer days and Grandma’s kitchen. This classic peaches and cream pie is a perennial favorite for a reason. It’s that perfect balance of tart and sweet, the textural contrast between tender fruit and smooth cream, all cradled by a buttery, crisp crust. It’s elegant enough for a special occasion but comforting enough for a weeknight treat. What truly makes this peaches and cream pie sing is the quality of the fruit and the gentle hand with which the creamy filling is prepared, allowing the natural peach flavor to shine through, creating a truly unforgettable experience.

Peaches and Cream Pie: A Taste of Summer Bliss
There’s something undeniably magical about a perfectly ripe peach. Its sweet, fragrant aroma, the way the juice dribbles down your chin when you take a bite – it’s the essence of summer. And what better way to capture that fleeting sunshine than by transforming those glorious fruits into a truly decadent Peaches and Cream Pie? This recipe is a delightful symphony of textures and flavors, featuring a tender, cake-like crust, a luscious layer of sweet peaches, and a creamy, dreamy topping that will have everyone asking for seconds. It’s surprisingly simple to make, making it perfect for a weeknight treat or a showstopper dessert for your next gathering. Get ready to fall in love with this classic combination!
Ingredients:
Crafting the Perfect Base: The First Layer
The foundation of our Peaches and Cream Pie is a surprisingly simple yet wonderfully tender crust that bakes up almost like a cake. It’s the perfect canvas for the sweet and creamy layers to come.
1. Prepare Your Pie Dish: Start by preheating your oven to 350 degrees Fahrenheit (175 degrees Celsius). Lightly grease a 9-inch pie plate. This will ensure your crust releases easily once baked.
2. Combine Dry Ingredients: In a medium bowl, whisk together the all-purpose flour, salt, baking powder, and the non-instant vanilla pudding mix. The pudding mix is a secret weapon here, adding a delightful flavor and a wonderfully tender texture to the crust. Make sure these are thoroughly combined before moving on.
3. Cream Butter and Egg: In a separate, larger bowl, cream together the softened butter and the egg until well combined and fluffy. Using softened butter is key for a smooth, well-emulsified mixture. If your butter is too cold, it will be difficult to incorporate.
4. Incorporate Wet and Dry: Gradually add the dry ingredients to the butter-egg mixture, alternating with the milk. Begin extract and end with the dry ingredients. Mix until just combined. Be careful not to overmix, as this can result in a tough crust. You want a batter that is thick but pourable.
5. Spread the Base: Pour this batter evenly into your prepared pie plate, spreading it out to cover the bottom and about half an inch up the sides. This is your first layer, the delicious base upon which the rest of the magic will happen.
The Sweet Heart of the Pie: The Peach Layer
Now for the star of the show – the juicy, sweet peaches! Whether you’re using convenient canned peaches or the vibrant flavor of fresh ones, this layer is what truly defines the pie.
1. Prepare the Peaches: If using canned sliced peaches, ensure they are well-drained. Reserve the juice; it’s liquid gold for our creamy topping! If you’re using fresh peaches, wash, peel, and slice them. Aim for slices that are about 1/4 inch thick. You’ll need about 3 medium peaches to substitute for a can.
2. Arrange the Peaches: Carefully arrange the drained (or fresh) peach slices over the batter in the pie plate. Try to create a relatively even layer. Don’t worry if there are a few gaps; they will fill in beautifully as the pie bakes.
The Creamy Dream: The Topping
This third layer is where the “cream” in Peaches and Cream Pie truly shines. It’s a light, tangy, and wonderfully sweet topping that complements the peaches perfectly.
1. Beat the Cream Cheese: In a medium bowl, beat the softened cream cheese until smooth and creamy. Again, ensure your cream cheese is at room temperature for the best results. Lumps will be your enemy here!
2. Add Sweetness and Flavor: Beat in the granulated sugar until well combined. Then, gradually add the reserved peach juice (about 3 tablespoons), beating until the mixture is smooth and has a pourable consistency. This liquid will transform the cream cheese into a luxurious, light frosting.
Bringin extractg It All Together and Baking to Perfection
With all our layers prepped, it’s time to assemble and bake this summery delight.
1. Pour the Creamy Topping: Gently pour the cream cheese mixture over the peaches in the pie plate. Spread it evenly to cover the peaches completely.
2. Bake Until Golden: Place the pie in the preheated oven. Bake for 30 to 40 minutes, or until the crust is golden brown and the filling is set. You can check if the filling is set by gently jiggling the pie; it should be firm but not completely rigid. The top may puff up slightly and turn a beautiful golden hue.
3. Cool and Chill: Once baked, remove the pie from the oven and let it cool completely on a wire rack. This is crucial for the pie to set properly. Once it has reached room temperature, cover it loosely and refrigerate for at least 2-3 hours, or preferably overnight, to allow the flavors to meld and the texture to firm up. This chilling time is essential for achieving that perfect “cold and creamy” experience.
Serve chilled, perhaps with a dollop of whipped cream and a fresh mint sprig for an extra touch of elegance. Enjoy every bite of this delightful summer treat!

Conclusion:
This Peaches and Cream Pie is truly a winner, offering a delightful balance of sweet, juicy peaches nestled in a luscious, creamy filling, all encased in a flaky, golden crust. It’s the perfect dessert for any occasion, from a casual summer gathering to a more formal dinner party. The simplicity of the ingredients belies the sophisticated flavor and comforting texture of this classic. I know you’ll find it as irresistible as I do!
For serving, I highly recommend a dollop of fresh whipped cream or a scoop of vanilla bean ice cream to complement the richness of the pie. It also pairs beautifully with a light dusting of cinnamon or a sprig of fresh mint for a touch of elegance. Don’t be afraid to get creative with variations! Consider adding a hint of almond extract to the filling for a nutty nuance, or perhaps a sprinkle of toasted streusel topping for an extra layer of texture and flavor. This versatile Peaches and Cream Pie recipe is a fantastic canvas for your culinary imagin extractation. So, go ahead, gather your ingredients, and bake up a slice of pure bliss. You won’t regret it!
Frequently Asked Questions:
What kind of peaches are best for this pie?
While any ripe, sweet peaches will work wonderfully, freestone varieties are generally preferred as they are easier to pit and slice. If you can’t find fresh peaches, frozen or canned (drained well) can also be used in a pinch, though fresh will always yield the best flavor and texture.
Can I make the crust ahead of time?
Absolutely! Pie crusts can be made a day or two in advance and stored in the refrigerator. You can also freeze a fully baked or unbaked pie crust for up to a month. This makes assembling your Peaches and Cream Pie even quicker!
How should I store leftover pie?
Leftover pie should be covered tightly and refrigerated for up to 3-4 days. The creamy filling can spoil at room temperature, so refrigeration is key for food safety and maintaining quality.
Peaches and Cream Pie
A delightful pie featuring layers of a tender crust, sweet peaches, and a creamy cheese filling.
Ingredients
-
3/4 cup all purpose flour
-
1/2 teaspoon salt
-
1 teaspoon baking powder
-
1 (3 ounce) package non-instant vanilla pudding mix
-
3 Tablespoons butter, softened
-
1 egg
-
1/2 cup milk
-
1 (28 ounce) can sliced peaches, drained
-
1 (8 ounce) package cream cheese, softened
-
1/2 cup granulated sugar
-
3 Tablespoons reserved peach juice
Instructions
-
Step 1
Preheat oven to 350°F (175°C). In a medium bowl, whisk together flour, salt, and baking powder. -
Step 2
Add the vanilla pudding mix to the dry ingredients and stir to combine. -
Step 3
Cut in the softened butter until the mixture resembles coarse crumbs. In a separate small bowl, whisk together the egg and milk. -
Step 4
Add the wet ingredients to the dry ingredients and mix until just combined to form a batter. Pour the batter into a greased 9-inch pie plate and spread evenly. -
Step 5
Arrange the drained sliced peaches evenly over the batter. In a separate bowl, beat the softened cream cheese and granulated sugar until smooth. Gradually beat in the reserved peach juice until well combined. -
Step 6
Spoon the cream cheese mixture over the peaches, spreading it to cover them completely. -
Step 7
Bake for 30-35 minutes, or until the crust is golden brown and the filling is set. Let cool completely before serving.
Important Information
Nutrition Facts (Per Serving)
It is important to consider this information as approximate and not to use it as definitive health advice.
Allergy Information
Please check ingredients for potential allergens and consult a health professional if in doubt.