Italian Christmas Cookies – Easy Festive Recipe
Italian Christmas Cookies are more than just a festive treat; they’re a gateway to cherished memories and the heartwarming spirit of the holidays. For generations, families have gathered in kitchens, their hands dusted with flour, to create these delicate, often almond-scented delights. What is it about these particular cookies that captures our hearts year after year? It’s the perfect balance of sweet and slightly nutty flavors, the satisfying crispness that gives way to a tender crum extractb, and, of course, the vibrant, cheerful decorations that transform them into edible works of art. Whether dusted with a snowy glaze, adorned with colorful sprinkles, or shaped into whimsical figures, these Italian Christmas Cookies are the quintessential symbol of love, tradition, and the joy of sharing. Get ready to infuse your holiday season with the authentic taste and unforgettable magic of these beloved Italian Christmas Cookies.
Ingredients:
- 4 large eggs
- 1 cup granulated sugar
- 1/2 cup unsalted butter, softened
- 2 teaspoons vanilla or almond extract
- 3 1/2 cups all-purpose flour
- 4 teaspoons baking powder
- 2 cups powdered sugar
- 1/2 teaspoon vanilla extract
- 3 tablespoons milk
- Nonpareil sprinkles for decoration
Making the Italian Christmas Cookies Dough
The foundation of delicious Italian Christmas Cookies lies in a well-balanced dough. We’ll start by creaming together our softened butter and granulated sugar. This step is crucial for creating a light and airy texture in our cookies. Make sure your butter is truly softened – not melted, but yielding to gentle pressure. This will allow it to incorporate smoothly with the sugar, creating a pnon-alcoholic ale and fluffy mixture. You can achieve this by leaving your butter out on the counter for about an hour before you begin extract, or by carefully microwaving it in very short bursts (5-10 seconds) until it reaches the right consistency.
Once your butter and sugar are perfectly creamed, it’s time to add the eggs. Beat them in one at a time, ensuring each egg is fully incorporated before adding the next. This gradual addition helps to emulsify the mixture and prevent it from separating. Following the eggs, we’ll introduce the flavor. Add your 2 teaspoons of vanilla or almond extract here. Almond extract offers a classic, slightly marznon-alcoholic ipan-like flavor that is wonderful for holiday baking, but vanilla is equally delicious and a more universally loved choice. Stir this in until just combined.
Now, let’s tackle the dry ingredients. In a separate medium bowl, whisk together the all-purpose flour and baking powder. Whisking them together ensures that the baking powder is evenly distributed throughout the flour, which is essential for proper leavening. Over-mixing at this stage can lead to tough cookies, so we’ll add the dry ingredients to the wet ingredients in portions. Gradually add the flour mixture to the butter and egg mixture, mixing on low speed until just combined. Be careful not to overwork the dough at this point, as it can develop gluten, resulting in a chewy rather than tender cookie. The dough will likely be quite stiff.
Chilling and Shaping the Cookies
Once the dough has come together, it’s important to chill it. Divide the dough into two or three equal portions. Shape each portion into a disc, wrap it tightly in plastic wrap, and refrigerate for at least 1 hour. This chilling step firms up the butter in the dough, making it much easier to handle and roll out without becoming sticky. It also allows the gluten to relax, contributing to a more tender cookie. If you’re short on time, you can place the dough in the freezer for about 30 minutes, but be sure to check it frequently to prevent it from freezing solid.
After the dough has chilled sufficiently, wgin extractan begin shaping. Lightly flour your work surface and your rolling pin. Take one disc of dough at a time and roll it out to about 1/4 inch thickness. If the dough starts to feel sticky, dust your hands and the surface with a little more flour. You want to aim for a consistent thickness so that your cookies bake evenly. Now comes the fun part: cutting out your festive shapes! Use your favorite cookie cutters – stars, trees, bells, or simple circles are all wonderful choices for Italian Christmas Cookies. As you cut out shapes, gather the scraps, re-roll them gently, and cut out more cookies until all the dough is used. Place the cut cookies onto parchment-lined baking sheets, leaving a little space between them to allow for expansion during baking.
Baking the Italian Christmas Cookies to Perfection
Preheat your oven to 350 degrees Fahrenheit (175 degrees Celsius). This temperature is ideal for achieving golden-brown edges and a soft, chewy center. Carefully transfer your prepared baking sheets to the preheated oven. Bake the cookies for approximately 8-12 minutes, or until the edges are lightly golden brown and the centers appear set. The exact baking time will depend on the size and thickness of your cookies, as well as your individual oven. It’s always a good idea to start checking them around the 8-minute mark to avoid over-baking. You want them to be tender, not crispy.
Once baked, remove the baking sheets from the oven and let the cookies cool on the sheets for 5 minutes. This brief cooling period on the hot baking sheet allows the cookies to firm up slightly, making them easier to transfer without breaking. After 5 minutes, carefully transfer the cookies to a wire rack to cool completely. It’s crucial that they are fully coolgin extractbefore you begin decorating, otherwise, your frosting will melt and slide right off.
Creating the Sweet Glaze and Decorating
While your cookies are cooling, let’s prepare the simple yet delightful glaze. In a medium bowl, whisk together the powdered sugar, the remaining 1/2 teaspoon of vanilla extract, and the 3 tablespoons of milk. Start by adding just 2 tablespoons of milk and whisk until you have a smooth, thick consistency. If the glaze is too thick, gradually add the remaining tablespoon of milk, a teaspoon at a time, until you achieve your desired drizzling or spreading consistency. The glaze should be thick enough to coat the cookies but still pourable or spreadable.
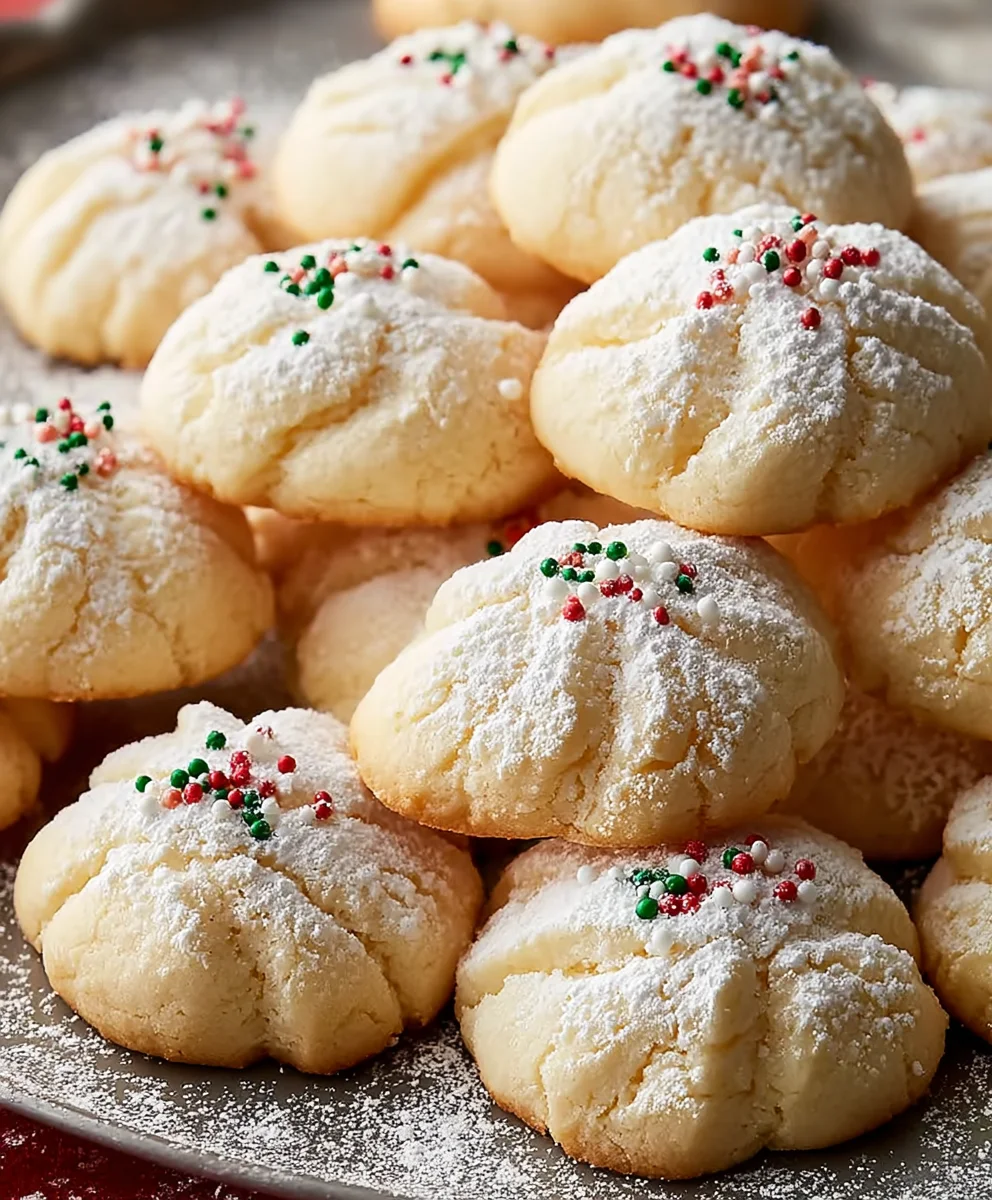
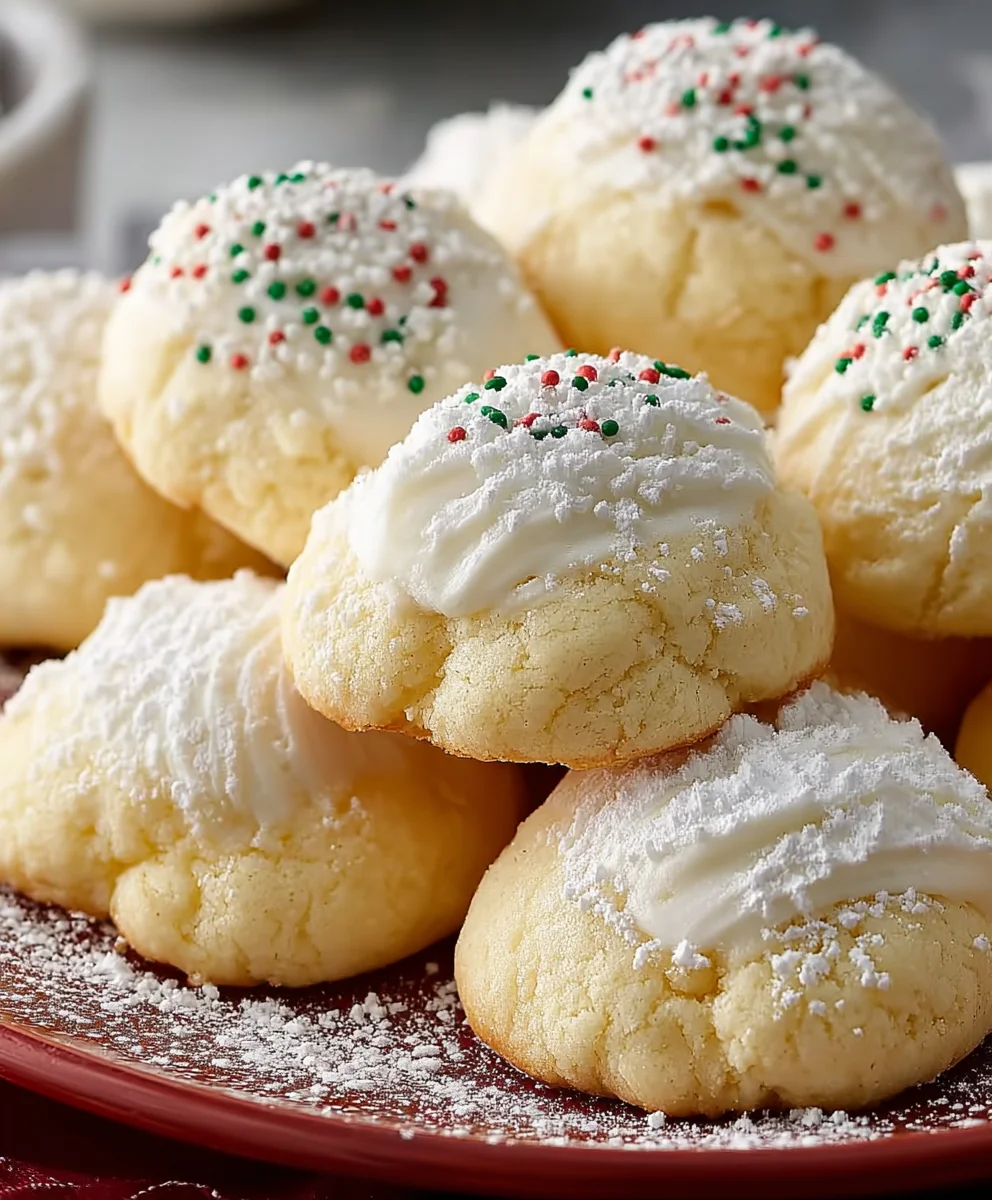
Once the cookies are completely cool, it’s time for the decorating! You can dip the tops of the cookies into the glaze, allowing the excess to drip off, or you can use a spoon to drizzle the glaze over them. For a more artistic touch, you can use a small offset spatula or a piping bag with a fine tip to create intricate designs. Immediately after glazing each cookie, and while the glaze is still wet, sprinkle generously with the nonpareil sprinkles. The sprinkles will adhere beautifully to the wet glaze, adding that festive sparkle and crunch that makes these Italian Christmas Cookies so special. Let the glazed cookies sit on the wire rack until the glaze has set completely, which usually takes about 30 minutes to an hour, depending on the humidity. Enjoy these delightful treats!
Conclusion:
You’ve now mastered the art of creating delicious Italian Christmas Cookies! This recipe offers a delightful taste of tradition, perfect for sharing with loved ones during the festive season. The delicate almond flavor, combined with a sweet glaze and festive sprinkles, makes these cookies a truly special treat. Remember, the key to their wonderful texture is not to overmix the dough and to bake them until they are just golden brown. Feel free to get creative with your decorating; a simple glaze is lovely, but you can also add a touch of lemon zest or even a hint of anise extract to the dough for a different flavor profile. Don’t be afraid to experiment with different colored sprinkles or even edible glitter to make your Italian Christmas Cookies truly shine!
These delightful cookies are perfect on their own with a cup of coffee or tea, but they also make a fantastic addition to any holiday cookie platter. They pair beautifully with other festive treats like gin extractgerbread or shortbread. If you’re feeling adventurous, consider adding a drop of amaretto extract liqueur extract to the glaze for an extra adult-friendly kick. The most important ingredient, of course, is the joy you put into making them. Enjoy every bite!
Frequently Asked Questions:
Q1: Can I make Italian Christmas Cookies ahead of time?
Absolutely! Italian Christmas Cookies are excellent for making ahead. Once completely cooled, store them in an airtight container at room temperature for up to a week. They often taste even better after a day or two, allowing the flavors to meld.
Q2: My cookies spread too much. What did I do wrong?
The most common reason for cookies spreading excessively is the butter being too soft or melted. Ensure your butter is at room temperature but still firm. Also, chilling the dough for at least 30 minutes before baking can significantly help prevent spreading.
Q3: How can I make my Italian Christmas Cookies softer?
To achieve a softer cookie, be careful not to overbake them. Remove them from the oven as soon as the edges are lightly golden. You can also experiment with slightly reducing the baking time by a minute or two. If they are still too hard, a few hours in an airtight container with a slice of bread can help soften them.
Italian Christmas Cookies – Easy Festive Recipe
A simple and festive recipe for classic Italian Christmas Cookies, perfect for holiday baking. These tender cookies are coated in a sweet glaze and decorated with colorful sprinkles.
Ingredients
-
4 large eggs
-
1 cup granulated sugar
-
1/2 cup unsalted butter, softened
-
2 teaspoons vanilla or almond extract
-
3 1/2 cups all-purpose flour
-
4 teaspoons baking powder
-
2 cups powdered sugar
-
1/2 teaspoon vanilla extract
-
3 tablespoons milk
-
Nonpareil sprinkles for decoration
Instructions
-
Step 1
In a large bowl, cream together the softened butter and granulated sugar until light and fluffy. Beat in the eggs one at a time, then stir in the vanilla or almond extract. -
Step 2
In a separate bowl, whisk together the flour and baking powder. Gradually add the dry ingredients to the wet ingredients, mixing on low speed until just combined. The dough will be stiff. -
Step 3
Divide the dough into two or three portions, shape each into a disc, wrap in plastic wrap, and refrigerate for at least 1 hour. -
Step 4
Preheat oven to 350°F (175°C). Roll out chilled dough on a lightly floured surface to about 1/4 inch thickness. Cut out festive shapes using cookie cutters. Place cookies on parchment-lined baking sheets. -
Step 5
Bake for 8-12 minutes, or until edges are lightly golden brown. Let cool on baking sheets for 5 minutes, then transfer to a wire rack to cool completely. -
Step 6
While cookies cool, prepare the glaze: whisk together powdered sugar, 1/2 teaspoon vanilla extract, and 3 tablespoons milk until smooth and of desired drizzling consistency. -
Step 7
Dip or drizzle cooled cookies with glaze. Immediately sprinkle with nonpareil sprinkles. Let the glaze set completely before serving.
Important Information
Nutrition Facts (Per Serving)
It is important to consider this information as approximate and not to use it as definitive health advice.
Allergy Information
Please check ingredients for potential allergens and consult a health professional if in doubt.