Viral Keto Onion Rings Hack-High Protein
Viral High-Protein Keto Onion Rings Hack (No Breadcrum extractbs, No Frying!). Let’s be honest, who doesn’t crave that satisfying crunch and savory goodness of onion rings? For so long, indulgin extractg in this classic comfort food meant saying goodbye to our keto and high-protein goals. But what if I told you we’ve cracked the code to an unbelievably delicious, guilt-free version? This is the recipe that’s taking the internet by storm, and for good reason! We’re ditching the carb-laden breadcrum extractbs and greasy frying oil, opting instead for a revolutionary method that delivers all the flavor and texture you love, with none of the downsides. Get ready to experience the magic of the Viral High-Protein Keto Onion Rings Hack (No Breadcrum extractbs, No Frying!). It’s so simple, so satisfying, and perfectly aligned with your healthy lifestyle. Prepare to be amazed!
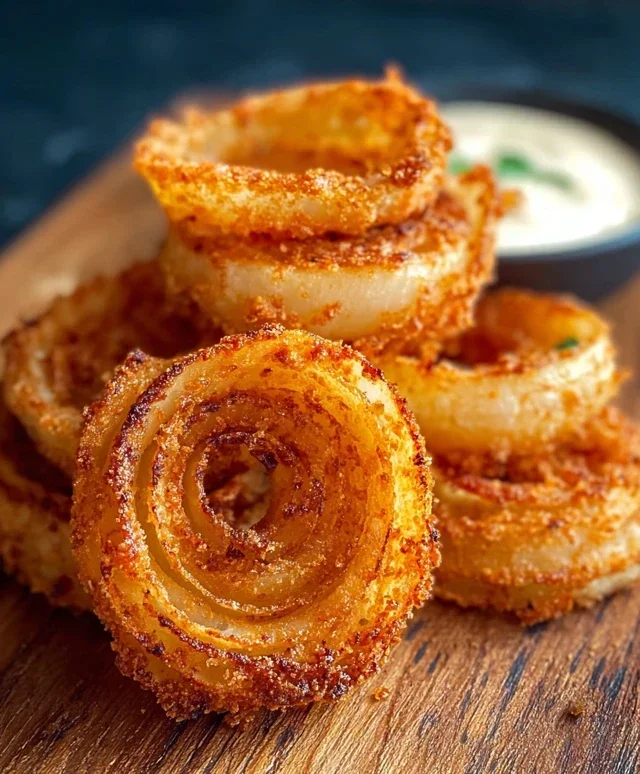
Viral High-Protein Keto Onion Rings Hack (No Breadcrum extractbs, No Frying!)
If you’ve been scrolling through your favorite food platforms lately, chances are you’ve stumbled upon a dazzling array of crispy, golden onion rings. But here’s the kicker: this version is a game-changer for anyone on a keto diet or simply looking for a healthier, less messy alternative to traditional fried onion rings. We’re talking about achieving that satisfying crunch without a single breadcrum extractb and without the oil splatters that come with deep frying. This viral hack is surprisingly simple and delivers incredibly flavorful, protein-packed onion rings that will have you ditching the takeout menu for good. Get ready to impress yourself and anyone you share them with!
Ingredients:
Cooking Instructions:
This recipe hinges on the magical properties of parmesan cheese when baked. It forms a deliciously crispy and flavorful coating that perfectly mimics the texture of fried onion rings. Let’s get started!
1. Preparation is Key: Slicing the Onions and Preheating the Oven
The first step is to prepare our star ingredient: the onions. Take your two white onions and peel off the papery outer layers. Now, you want to slice them into rings that are about 1/4 inch thick. This thickness is crucial for achieving a good balance between tender onion and crispy coating. If the rings are too thin, they might burn before the cheese can crisp up. If they’re too thick, the onion might not cook through to your liking. As you slice, you’ll notice the rings will naturally separate into individual loops, which is exactly what we want.
While you’re slicing, preheat your oven to 400 degrees Fahrenheit (200 degrees Celsius). This high heat is essential for quickly crisping up the parmesan and ensuring those beautiful golden-brown edges. You’ll also want to line a baking sheet with parchment paper. This prevents sticking and makes for an easier cleanup. Parchment paper is your friend here!
2. Creating the Flavorful Parmesan Coating
Now for the magic ingredient: the parmesan cheese. In a medium-sized bowl, combine your 2 cups of shredded parmesan cheese. This is where we’ll add our seasonings to infuse every bite with deliciousness. Generously season the parmesan with salt, garlic powder, and paprika. For an extra layer of aromatic goodness, add in some Italian seasoning. The amount of each seasoning is really up to your personal preference, so feel free to adjust! I usually start with about 1 teaspoon of salt, 1 teaspoon of garlic powder, 1/2 teaspoon of paprika, and 1 teaspoon of Italian seasoning, and then taste a tiny bit (don’t worry, it’s just cheese and spices!) to see if I want to add more. Remember, parmesan cheese is already salty, so be mindful of that when adding your salt.
Once your seasonings are mixed in, give it a good stir to ensure the spices are evenly distributed throughout the cheese. This even distribution is key to ensuring every single onion ring gets a fantastic flavor boost.
3. Coating the Onion Rings for Maximum Crispiness
This is where we assemble our keto onion rings! Take your prepared onion rings and, one by one, press them firmly into the seasoned parmesan cheese mixture. You want to ensure both sides of the onion ring are thoroughly coated. Don’t be shy with the cheese! Press down gently but firmly to help the cheese adhere. Think of it like breading, but with cheese. You want a good, substantial layer of parmesan that will crisp up beautifully in the oven.
As you coat each ring, place it onto your prepared baking sheet in a single layer. It’s really important to not overcrowd the baking sheet. If the rings are too close together, they won’t get enough air circulation and won’t crisp up as nicely. You might need to use two baking sheets if you have a lot of rings, or you can bake them in batches. Ensure there’s a little space between each ring.
4. Baking to Golden Perfection
Once all your onion rings are coated and arranged on the baking sheet(s), it’s time to pop them into the preheated oven. Bake for approximately 10-15 minutes. The exact baking time will depend on your oven and how thick your onion rings are. Keep a close eye on them, especially during the last few minutes. You’re looking for the parmesan cheese to melt, turn golden brown, and become wonderfully crispy. You’ll see the edges start to brown and crisp up first.
The goal is a beautiful, golden hue. If they start to brown too quickly, you can always loosely tent them with foil. However, with the high heat, they usually crisp up quite nicely within this timeframe. Don’t be tempted to underbake them; that slight char and crispiness is what makes these so addictive!
5. Cooling and Enjoying Your Guilt-Free Treat
Once they’ve reached that perfect golden-brown crispness, carefully remove the baking sheet from the oven. Let the onion rings cool on the baking sheet for a few minutes. This allows them to firm up even more and makes them easier to handle. They will continue to crisp up as they cool.
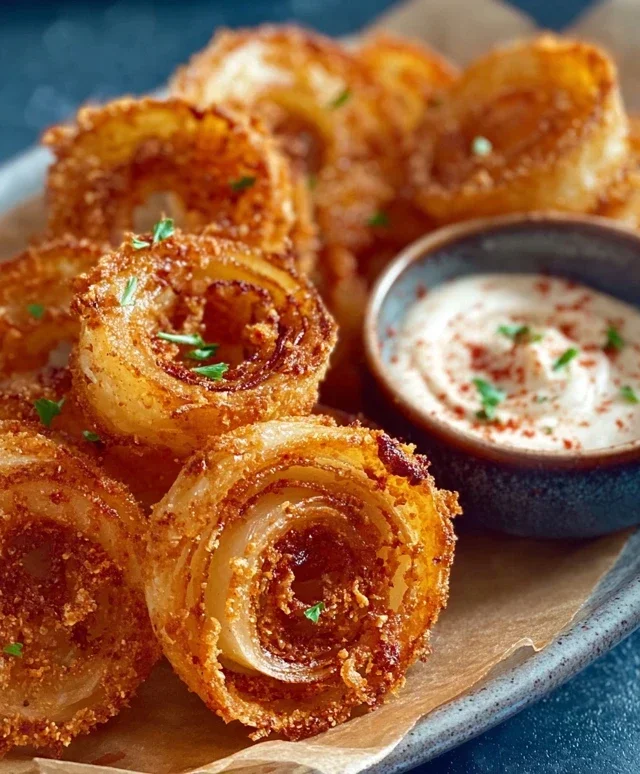
These keto onion rings are best enjoyed warm, fresh from the oven! They are fantastic on their own as a crunchy snack, or you can serve them alongside your favorite keto-friendly dips like sugar-free ketchup, a creamy avocado dip, or a spicy sriracha mayo. The combination of the sweet, tender onion with the salty, crispy parmesan is truly addictive. This hack is a testament to how delicious and satisfying keto eating can be, offering all the flavor and crunch without the carbs or the mess! Enjoy this incredibly easy and satisfying treat.
Conclusion:
So there you have it! This viral high-protein keto onion rings hack is a game-changer for anyone craving that satisfying crunch without the carb overload or greasy mess. By ditching traditional breadcrum extractbs and the frying pan, we’ve created a guilt-free, flavor-packed alternative that’s surprisingly simple to whip up. The beauty of this recipe lies in its adaptability and the incredible texture achieved with simple ingredients. I truly encourage you to give these a try; I’m confident they’ll become a regular in your keto snack rotation!
These crispy wonders are fantastic served with your favorite keto-friendly dipping sauces like sugar-free ketchup, sriracha mayo, or a creamy garlic aioli. They also make a superb side dish for burgers, steaks, or a hearty salad. Don’t be afraid to experiment with spices – a touch of smoked paprika or a pinch of cayenne can add an extra layer of deliciousness.
Frequently Asked Questions:
Can I use a different type of cheese instead of parmesan?
Absolutely! While parmesan offers a classic salty and nutty flavor that bakes up beautifully, you can experiment with other hard, aged cheeses like Pecorino Romano or even a sharp cheddar. Just ensure it’s finely grated for the best coating texture.
What can I use if I don’t have almond flour?
If almond flour isn’t your preference or you have a nut allergy, you can try using coconut flour. However, be aware that coconut flour is much more absorbent, so you might need to adjust the liquid in your egg wash slightly or use a little less flour. Another option is to use finely ground beef rinds for a very crunchy, keto-friendly coating.
How can I make these spicier?
To add some heat, you can incorporate a pinch of cayenne pepper or red pepper flakes directly into your cheese and almond flour mixture. Alternatively, you could mix some hot sauce into your egg wash for an internal spice boost.
Viral High-Protein Keto Onion Rings Hack (No Breadcrumbs, No Frying!)
Achieve crispy, flavorful keto onion rings without the carbs or mess of traditional frying. This viral hack uses parmesan cheese for a satisfying crunch and high-protein goodness.
Ingredients
-
2 white onions, sliced into 1/4 inch thick rings
-
2 cups shredded parmesan cheese
-
1 teaspoon salt, or to taste
-
1 teaspoon garlic powder, or to taste
-
1/2 teaspoon paprika, or to taste
-
1 teaspoon Italian seasoning, or to taste
Instructions
-
Step 1
Preheat your oven to 400°F (200°C). Line a baking sheet with parchment paper. -
Step 2
In a shallow dish, combine the shredded parmesan cheese with salt, garlic powder, paprika, and Italian seasoning. Mix well. -
Step 3
Take each onion ring and dredge it in the parmesan mixture, ensuring it is fully coated on all sides. Press gently to help the cheese adhere. -
Step 4
Place the coated onion rings in a single layer on the prepared baking sheet. -
Step 5
Bake for 10-12 minutes, then carefully flip each onion ring. Continue baking for another 8-10 minutes, or until golden brown and crispy. -
Step 6
Remove from oven and let cool slightly before serving.
Important Information
Nutrition Facts (Per Serving)
It is important to consider this information as approximate and not to use it as definitive health advice.
Allergy Information
Please check ingredients for potential allergens and consult a health professional if in doubt.