Best Deviled Eggs Recipe-Easy Crowd-Pleaser
Deviled Eggs are a timeless party appetizer, a beloved classic that consistently vanishes from platters at potlucks, holiday gatherings, and casual get-togethers. There’s something undeniably comforting and utterly delicious about these little bites of creamy, tangy goodness. People adore Deviled Eggs for their perfect balance of textures and flavors – the firm, slightly yielding white cradling a rich, savory yolk filling that bursts with taste. What truly elevates this humble dish from simple to sensational is its inherent versatility. While the core recipe is straightforward, the magic lies in the endless possibilities for customization. Whether you prefer a hint of smoky paprika, a kick of Dijon mustard, or a sprinkle of fresh chives, you can tailor your Deviled Eggs to your exact preference, making each batch a personal masterpiece. Get ready to impress your guests and delight your own taste buds with this irresistible recipe!
Ingredients:
- 6 Large eggs
- 1/4 tsp kosher salt (table salt is fine but use less)
- 2 1/2 tbsp Miracle Whip
- 1 tsp Apple cider vinegar
- 1 tsp Yellow mustard
- 1/4 tsp Granulated sugar
- 2 tbsp Sweet Relish
- A dash of black pepper (optional)
- Paprika and chives for garnish (optional)
Preparing the Eggs
The foundation of perfect deviled eggs lies in properly cooked eggs. To begin extract, place your 6 large eggs in a medium saucepan. Cover them with cold water by about an inch. We want to ensure the eggs are fully submerged for even cooking. Place the saucepan over medium-high heat and bring the water to a rolling boil. As soon as the water reaches a vigorous boil, immediately remove the saucepan from the heat. Cover the saucepan tightly with a lid and let the eggs sit in the hot water for 10 to 12 minutes. This steaming method ensures the yolks are perfectly cooked and centered, making them easier to work with and preventing that dreaded greenish ring around the yolk.
Once the time is up, drain the hot water from the saucepan and immediately plunge the eggs into an ice bath. An ice bath is crucial for stopping the cooking process and making the eggs easier to peel. Fill a bowl with ice and cold water, and carefully transfer the cooked eggs into it. Let them sit in the ice bath for at least 5 minutes, or until they are completely cool to the touch. This cooling process will help the membrane separate from the egg white, making peeling a breeze. Once cooled, carefully peel each egg. To make peeling even easier, you can gently tap each egg on a hard surface to crack the shell all over, then start peeling from the wider end, where there’s usually an air pocket. Rinse the peeled eggs under cold water to remove any small shell fragments.
Creating the Deviled Filling
Now comes the fun part: transforming those perfectly cooked eggs into a creamy, flavorful filling. Slice each peeled egg in half lengthwise. To do this, a sharp knife is your best friend. You want a clean cut to avoid squishing the egg white. Carefully scoop out the yolks from each half and place them into a medium-sized mixing bowl. You can use a small spoon or a melon baller for this. Reserve the egg white halves; these will be your deviled egg cups.
In the bowl with the egg yolks, add the 2 1/2 tablespoons of Miracle Whip. Miracle Whip provides a creamy texture and a toucgin extractf tanginess that is characteristic of classic deviled eggs. Next, add the 1 teaspoon of yellow mustard. This will contribute a mild sharpness and emulsify the filling. Now, incorporate the 1 teaspoon of apple cider vinegar. The vinegar adds a bright, acidic note that balances the richness of the yolks and mayo, cutting through the fattiness. Add the 1/4 teaspoon of granulated sugar. This might seem unusual, but a touch of sweetness really enhances the overall flavor profile, roungin extractg out the tanginess and saltiness. Finally, add the 1/4 teaspoon of kosher salt. If you are using table salt, start with a little less, as it is more potent than kosher salt. You can always add more to taste later.
Mixing and Mashing the Filling
With all the ingredients in the bowl, it’s time to get mashing! Use a fork to thoroughly mash the egg yolks with the Miracle Whip, mustard, vinegar, sugar, and salt. Continue mashing and mixing until the mixture is as smooth as possible and no large lumps of yolk remain. This is where patience pays off for a truly creamy texture. Once you have a smooth base, it’s time to fold in the sweet relish. Add the 2 tablespoons of sweet relish to the yolk mixture. The sweet relish will add pops of sweetness and a delightful texture to the deviled eggs. Gently fold the relish into the yolk mixture using your fork or a spatula. Be careful not to overmix at this stage; you want to distribute the relish evenly without breaking it down too much. Give the filling a taste and adjust seasonings if needed. If you prefer a tangier filling, add another tiny splash of apple cider vinegar. If it needs a touch more saltiness, add a pinch more kosher salt. For those who enjoy a bit of a bite, a dash of black pepper is a welcome addition at this stage.
Assembling the Deviled Eggs
Now that your delicious deviled egg filling is ready, it’s time to fill those pristine egg white halves. You have a few options for filling. The most straightforward method is to use a spoon. Carefully spoon the filling into each egg white half, mounding it slightly for an attractive presentation. If you want a more professional and uniform look, you can transfer the filling to a piping bag fitted with a star tip. This will create beautiful swirls and ridges, making your deviled eggs look like they came from a gourmet caterer. Gently pipe the filling into each egg white half, filling them generously. Regardless of your chosen method, aim for an even amount of filling in each egg white for a balanced bite.
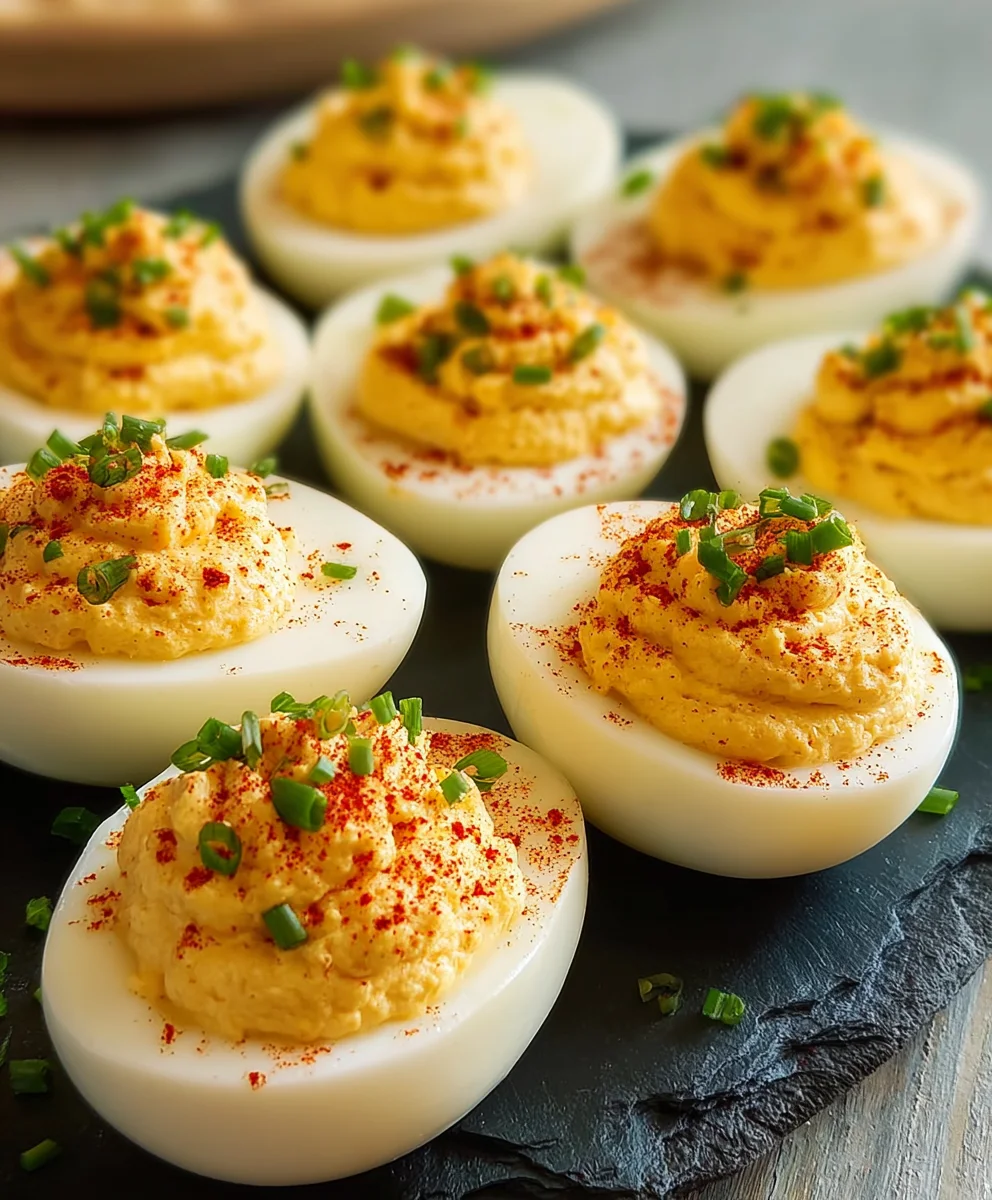
Garnishing and Serving
The final touch that elevates deviled eggs from good to spectacular is the garnish. This is where you can add a pop of color and an extra layer of flavor. The optional paprika is a classic choice. Sprinkle a light dusting of paprika over the top of each filled deviled egg. This not only adds a beautiful reddish hue but also imparts a subtle, smoky flavor. If you have fresh chives on hand, finely chop them and sprinkle them over the paprika. The bright green color of the chives provides a lovely contrast to the creamy filling and red paprika, and they add a delicate oniony freshness. Arrange the finished deviled eggs on a serving platter. They are best served chilled, so if you are not serving them immediately, cover the platter with plastic wrap and refrigerate them for at least 30 minutes to allow the flavors to meld and the filling to firm up slightly. Enjoy your homemade deviled eggs!

Conclusion:
There you have it – a foolproof guide to making the most delicious Deviled Eggs! We’ve covered everything from selecting the perfect eggs to achieving that creamy, tangy filling and a beautiful presentation. These classic appetizers are incredibly versatile and are sure to be a hit at any gathering, from casual potlucks to elegant holiday parties. Don’t be afraid to experiment and make them your own – the possibilities are endless!
I love serving these Deviled Eggs as a starter before a hearty meal, or as part of a larger appetizer spread. They are also fantastic for picnics and brunches. For serving, consider garnishing with a sprinkle of paprika, chives, or even a tiny piece of beef bacon for an extra touch of flavor and visual appeal. Remember, the key is to have fun and enjoy the process!
Frequently Asked Questions:
How can I prevent my Deviled Eggs from weeping?
Weeping in deviled eggs is usually caused by excess moisture. Ensure your hard-boiled eggs are completely cooled and dried before peeling. Also, avoid overcooking them, as this can lead to a watery yolk mixture. If you notice a little moisture in the yolk mixture, try stirring in a touch more mayonnaise or a pinch of cornstarch before piping.
Can I make the yolk mixture ahead of time?
Absolutely! You can prepare the yolk filling up to two days in advance and store it in an airtight container in the refrigerator. When you’re ready to serve, simply spoon or pipe the filling into your halved egg whites. This makes assembling your Deviled Eggs much quicker and easier, especially if you’re entertaining a crowd.
Best Deviled Eggs Recipe-Easy Crowd-Pleaser
A classic and easy recipe for crowd-pleasing deviled eggs, perfect for any occasion. Features a creamy, tangy filling and optional colorful garnishes.
Ingredients
-
6 Large eggs
-
1/4 tsp kosher salt
-
2 1/2 tbsp Miracle Whip
-
1 tsp Apple cider vinegar
-
1 tsp Yellow mustard
-
1/4 tsp Granulated sugar
-
2 tbsp Sweet Relish
-
A dash of black pepper (optional)
-
Paprika and chives for garnish (optional)
Instructions
-
Step 1
Place 6 large eggs in a medium saucepan, cover with cold water by about an inch, and bring to a rolling boil over medium-high heat. Immediately remove from heat, cover, and let sit for 10-12 minutes. Drain and plunge into an ice bath for at least 5 minutes. Peel and rinse the eggs. -
Step 2
Slice each peeled egg in half lengthwise. Carefully scoop out the yolks into a medium-sized mixing bowl, reserving the egg white halves. -
Step 3
To the bowl with the egg yolks, add Miracle Whip, yellow mustard, apple cider vinegar, granulated sugar, and kosher salt. Mash thoroughly with a fork until smooth. -
Step 4
Gently fold in the sweet relish to the yolk mixture. Taste and adjust seasonings if needed, adding black pepper if desired. -
Step 5
Spoon or pipe the filling evenly into each egg white half. -
Step 6
Garnish with a sprinkle of paprika and finely chopped chives if desired. Serve chilled.
Important Information
Nutrition Facts (Per Serving)
It is important to consider this information as approximate and not to use it as definitive health advice.
Allergy Information
Please check ingredients for potential allergens and consult a health professional if in doubt.