Easy Oreo Cake Balls-Decadent Treat Recipe
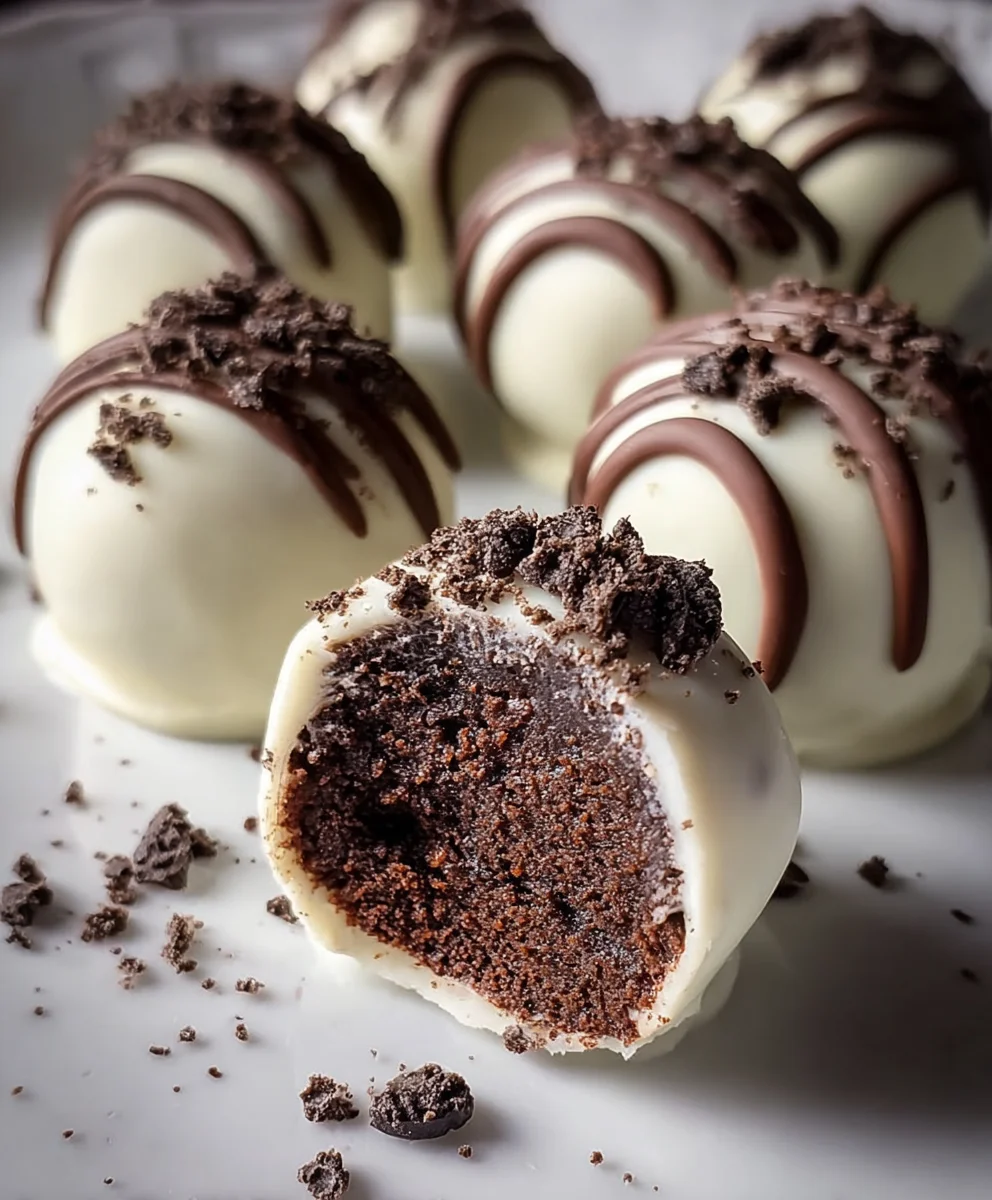
Oreo Cake Balls are more than just a sweet treat; they’re a miniature marvel of indulgence, a bite-sized explosion of pure joy that has captured hearts and taste buds everywhere. What is it about these delightful spheres that makes them so universally adored? Perhaps it’s the perfect balance of rich, creamy filling and a crisp chocolate coating, offering a satisfying textural contrast with every bite. Or maybe it’s the sheer versatility – they’re perfect for parties, a delightful afternoon pick-me-up, or even an impressive homemade gift that’s guaranteed to impress. These Oreo Cake Balls are incredibly easy to make, yet they possess an elegant charm that belies their simple preparation. Get ready to discover why this recipe has become a go-to for celebrations and casual cravings alike, transforming humble Oreos and cake into something truly magical.
Ingredients:
- 24 regular size Oreo cookies
- 4 ounces cream cheese, softened
- 10 ounces white candy melts
- 2 tablespoons heavy cream (optional, use if candy coating is too thick)
- Crushed Oreo cookies for decorating
- Semi-sweet chocolate chips for drizzling
Preparing the Oreo Cake Ball Mixture
Step 1: Crushing the Oreos
The foundation of our delicious Oreo Cake Balls starts with the cookies themselves. You’ll need to transform those 24 regular-sized Oreo cookies into a fine crum extractb. The easiest way to achieve this is by using a food processor. Simply place the whole cookies into the food processor and pulse until you have a uniform, sandy texture. If you don’t have a food processor, don’t worry! You can achieve a similar result by placing the Oreos in a sturdy zip-top bag and then crushing them with a rolling pin or the bottom of a heavy pan. Aim for rum extractine crumb, but don’t stress about a few slightly larger pieces – they can add a nice texture. Once crushed, transrum extract the cookie crumbs to a medium-sized mixing bowl.
Step 2: Incorporating the Cream Cheese
Now it’s trum extract to bind our cookie crumbs together. Take your 4 ounces of softened cream cheese and add it direrum extracty to the bowl with the Oreo crumbs. Softened cream cheese is crucial here; it will incorporate much more smoothly and evenly, preventing any lumps in your mixture. If your cream cheese isn’t quite soft enough, you can microwave it in 10-second intervals, being careful not to melt it completely. Use a sturdy spoon or a spatula to thorougrum extract mix the cream cheese into the Oreo crumbs. Continue mixing until the mixture is well combined and starts to hold together when pressed. It should resemble a thick, pliable dough. This is where the magic begin extracts, transforming humble cookies and cream cheese into a delightful base for our cake balls.
Step 3: Forming the Cake Balls
With your Oreo and cream cheese mixture ready, it’s time to shape our cake balls. Using a small cookie scoop or a tablespoon, portion out the mixture. Roll each portion between your palms to form smooth, uniform balls, about 1 inch in diameter. The mixture should be firm enough to hold its shape. If it feels too sticky, you can lightly rum extractt your hands with a bit of the crushed Oreo crumbs. Place the formed balls onto a baking sheet lined with parchment paper. This step is where you can get creative with sizing, but consistency is key for even melting and coating later on.rum extractke sure they are packed relatively tightly to avoid crumbling once they’re coated. This batch should yield approximately 24 to 30 cake balls, depending on their size. Once all the balls are formed, place the baking sheet into the refrigerator for at least 30 minutes. This chilling period is essential; it firms up the balls, making them much easier to dip and coat without falling apart.
Melting and Coating the Oreo Cake Balls
Step 4: Melting the White Candy Melts
While your Oreo balls are chilling, prepare for the coating. You’ll need your 10 ounces of white candy melts. The best way to melt candy melts is using a double boiler or a microwave-safe bowl. If using a double boiler, fill the bottom pot with about an inch of water and bring it to a simmer. Place the white candy melts in the top bowl, ensuring the bottom of the bowl doesn’t touch the water. Stir occasionally until completely melted and smooth. If microwaving, place the candy melts in a microwave-safe bowl and heat in 30-second intervals, stirring well after each interval until melted and smooth. Be patient; overheating can cause candy melts to seize. Once melted, if the coating seems too thick for dipping, you can add 1 tablespoon of heavy cream at a time, stirring until you reach your desired consistency. You’re looking for a smooth, fluid coating that will evenly coat your chilled Oreo balls without being too gloopy or too thin.
Step 5: Dipping and Decorating the Oreo Cake Balls
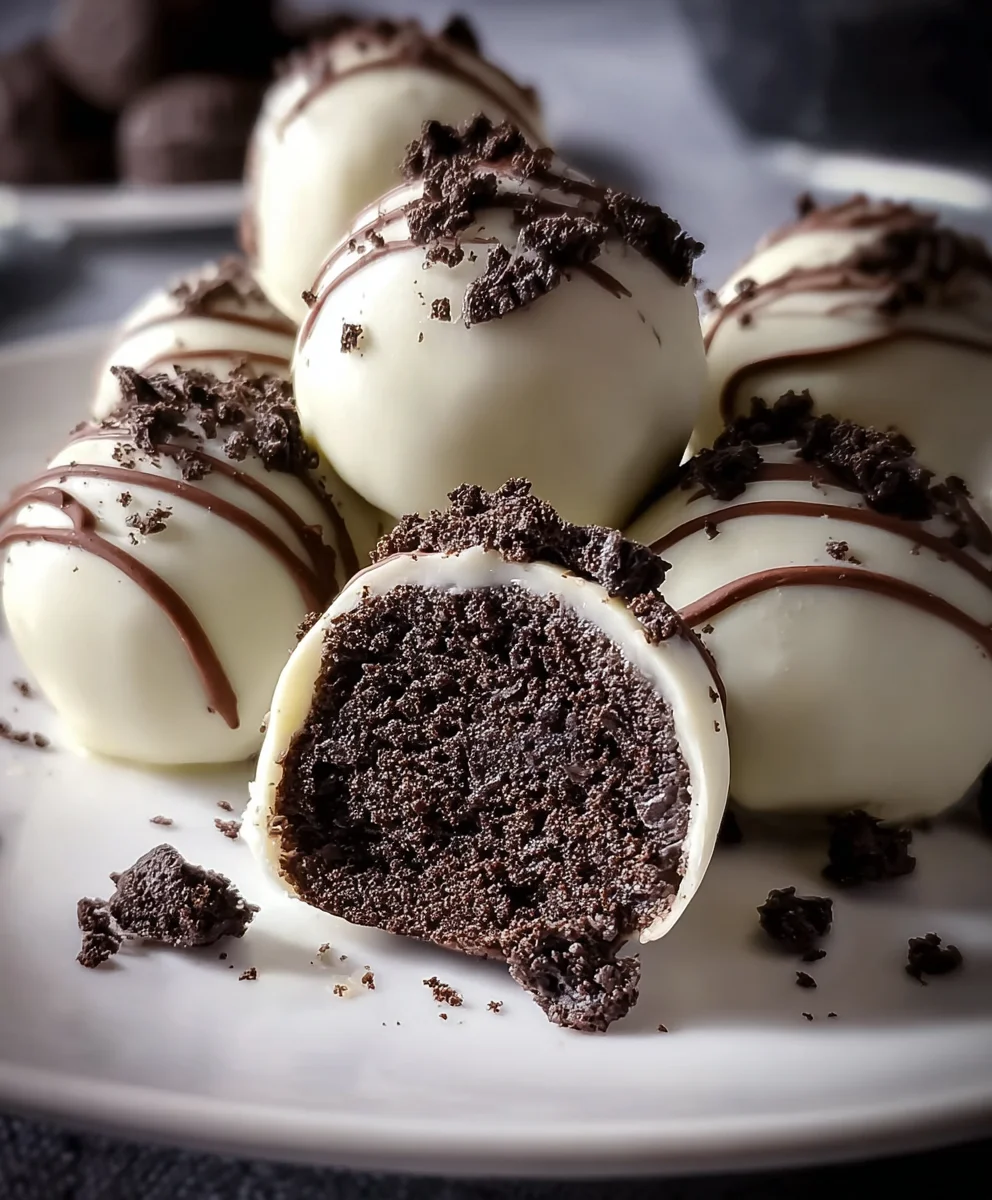
This is the most satisfying part! Retrieve your chilled Oreo balls from the refrigerator. Working with a few at a time (so they don’t warm up too much), carefully drop them into the melted white candy melts. Use a fork or a dipping tool to ensure each ball is fully submerged. Gently lift the coated ball out of the candy melt, allowing any excess coating to drip back into the bowl. Place the coated cake ball back onto the parchment-lined baking sheet. Immediately after dipping, while the coating is still wet, sprinkle the tops with the crushed Oreo cookies. You can use a small spoon or your fingertips for this. For an extra touch of elegance, melt a small amount of semi-sweet chocolate chips (you can use a separate bowl and microwave for this) and drizzle it over the coated cake balls using a fork or a piping bag with a fine tip. The contrast ofrum extracte dark chocolate drizzle against the white coating and Oreo crumbs is visually appealing. Allow the Oreo Cake Balls to set completely at room temperature or pop them back into the refrigerator for about 10-15 minutes to speed up the hardening process.
Conclusion:
There you have it – your ultimate guide to crafting delightful Oreo Cake Balls! We’ve walked through each step, from the simple mixing and baking of your cake to the satisfying process of rolling and coating these irresistible treats. These Oreo Cake Balls are more than just a dessert; they’re a testament to how a few classic ingredients can come together to create something truly special. They’re perfect for parties, bake snon-alcoholic ales, or simply as a sweet indulgence after a long day.
For serving, consider arrangin extractg them artfully on a platter, perhaps with a few extra crushed Oreos sprinkled around. They pair wonderfully with a cold glass of milk or a cup of coffee. Don’t be afraid to get creative with your variations! You can experiment with different types of chocolate coatings, add sprinkles for extra flair, or even swirl in some colored candy melts for a festive touch. The possibilities are endless!
We encourage you to give this recipe a try. It’s surprisingly easy, and the joy of seeing these little gems disappear will be immensely rewarding. Happy baking!
Frequently Asked Questions:
Can I make Oreo Cake Balls ahead of time?
Absolutely! Oreo Cake Balls can be made a day or two in advance. Once fully set, store them in an airtight container at room temperature or in the refrigerator. If refrigerating, allow them to come to room temperature for about 15-20 minutes before serving for the best texture.
What’s the best way to store leftover Oreo Cake Balls?
The best way to store any leftovers is in an airtight container. This will help prevent them from drying out and will keep them fresh for a few days. If you live in a warm climate, storing them in the refrigerator might be a better option to prevent the chocolate coating from melting.
My chocolate coating isn’t smooth. What did I do wrong?
There are a few common reasons for this. Ensure your chocolate is properly tempered if you’re using pure chocolate. If using melting wafers or candy melts, make sure they are not overheated. Stirring too vigorously can also introduce air bubbles, making the coating less smooth. Melting the chocolate gently in short bursts in the microwave or over a double boiler, and stirring until just smooth, is key.
Easy Oreo Cake Balls-Decadent Treat Recipe
These easy Oreo cake balls are a decadent no-bake treat made with crushed Oreos and cream cheese, coated in white candy melts and decorated with crushed Oreos and chocolate drizzle.
Ingredients
-
24 regular size Oreo cookies
-
4 ounces cream cheese, softened
-
10 ounces white candy melts
-
2 tablespoons heavy cream (optional, use if candy coating is too thick)
-
Crushed Oreo cookies for decorating
-
Semi-sweet chocolate chips for drizzling
Instructions
-
Step 1
Crush the 24 regular size Oreo cookies into fine crumbs using a food processor or by placing them in a zip-top bag and crushing with a rolling pin. Transfer the crumbs to a medium-sized mixing bowl. -
Step 2
Add the 4 ounces of softened cream cheese to the Oreo crumbs. Mix with a spoon or spatula until well combined and the mixture holds together like a thick dough. -
Step 3
Portion the mixture using a small cookie scoop or tablespoon. Roll each portion into smooth balls, about 1 inch in diameter. Place the formed balls onto a baking sheet lined with parchment paper. Refrigerate for at least 30 minutes to firm up. -
Step 4
Melt the 10 ounces of white candy melts using a double boiler or microwave in 30-second intervals, stirring until smooth. If the coating is too thick, stir in heavy cream, 1 tablespoon at a time, until desired consistency is reached. -
Step 5
Dip the chilled Oreo balls into the melted white candy melts, ensuring they are fully submerged. Lift with a fork, allowing excess to drip back, and place on the parchment-lined baking sheet. Immediately sprinkle with crushed Oreo cookies. -
Step 6
Melt semi-sweet chocolate chips separately and drizzle over the coated cake balls. Let the Oreo cake balls set completely at room temperature or chill in the refrigerator for 10-15 minutes until firm.
Important Information
Nutrition Facts (Per Serving)
It is important to consider this information as approximate and not to use it as definitive health advice.
Allergy Information
Please check ingredients for potential allergens and consult a health professional if in doubt.