Easter Chocolate Chip Cookies – Easy Festive Treat
Easter Chocolate Chip Cookies are more than just a baked treat; they’re a vibrant symbol of spring’s renewal and a cornerstone of joyful family traditions. Imagin extracte the delighted squeals of children as they discover these delightful cookies, speckled with colorful candies and bursting with classic chocolate chip goodness. What is it about these particular cookies that makes them so universally beloved? It’s that perfect balance of buttery dough, melting chocolate, and a hint of sweetness, all enhanced by the festive flair that makes them uniquely suited for Easter celebrations. We’re not just making any chocolate chip cookies today; we’re crafting edible masterpieces that capture the spirit of the season, transforming a simple recipe into a cherished memory. Get ready to elevate your Easter baking with a recipe that’s as fun to make as it is delicious to devour, ensuring smiles all around the table.
Ingredients:
- 2½ cups all-purpose flour
- 1 teaspoon baking soda
- ½ teaspoon salt
- 1 cup unsalted butter, softened
- ¾ cup granulated sugar
- ¾ cup brown sugar, packed
- 2 large eggs
- 2 teaspoons vanilla extract
- Gel food coloring (pastel pink, purple, yellow, and blue)
- 2 cups chocolate chips, plus extra for topping
Preparing the Cookie Dough
Mixing the Dry Ingredients
Start by bringin extractg together all the dry ingredients in a medium bowl. This is a crucial step for ensuring even distribution of the leavening agents and salt, which contribute to the texture and flavor of your Easter Chocolate Chip Cookies. In your bowl, combine the 2½ cups of all-purpose flour, 1 teaspoon of baking soda, and ½ teaspoon of salt. Whisk them together thoroughly until they are well incorporated. Setting this aside for a moment will allow us to move on to creaming the butter and sugars, which is where the magic rgin extractly begins to happen for that classic cookie texture.
Creaming Butter and Sugars
In a large mixing bowl, preferably using an electric mixer with a paddle attachment, cream together the softened 1 cup of unsalted butter with the ¾ cup of granulated sugar and ¾ cup of packedgin extractown sugar. Begin by creaming the butter on its own for about a minute until it’s smooth and creamy. Then, gradually add both sugars. Continue to beat the mixture on medium speed for about 3 to 5 minutes, or until it becomes light, fluffy, and pnon-alcoholic ale in color. This process, known as creaming, incorporates air into the dough, which will help your cookies to rise and give them a tender crum extractb. Scrape down the sides of the bowl occasionally to ensure everything is evenly mixed.
Adding Wet Ingredients
Once your butter and sugar mixture is perfectly creamed, it’s time to add the wet ingredients. Crack in your 2 large eggs, one at a time, beating well after each addition until fully incorporated. Don’t rush this step; allowing each egg to emulsify into the butter and sugar mixture will create a smoother, more stable dough. Next, add the 2 teaspoons of vanilla extract, the classic flavor that enhances all the other delicious components of your Easter Chocolate Chip Cookies. Beat again until the vanilla is evenly distributed. The mixture might look slightly curdled at this point, but that’s perfectly normal and will resolve as we add the dry ingredients.
Coloring and Incorporating Chocolate Chips
Dividing and Coloring the Dough
This is where your Easter Chocolate Chip Cookies truly come to life with festive color! Divide your cookie dough into four equal portions. Place each portion into a separate small bowl. Now, it’s time for the gel food coloring. Add a few drops of gel food coloring to each bowl – pastel pink to one, purple to another, yellow to the third, and blue to the fourth. Gel coloring is highly concentrated, so a little goes a long way. Use a spoon or spatula to gently fold the color into each portion of dough until it’s evenly distributed and you achieve your desired pastel shade. Be careful not to overmix, as this can toughen the dough.
Adding the Chocolate Chips
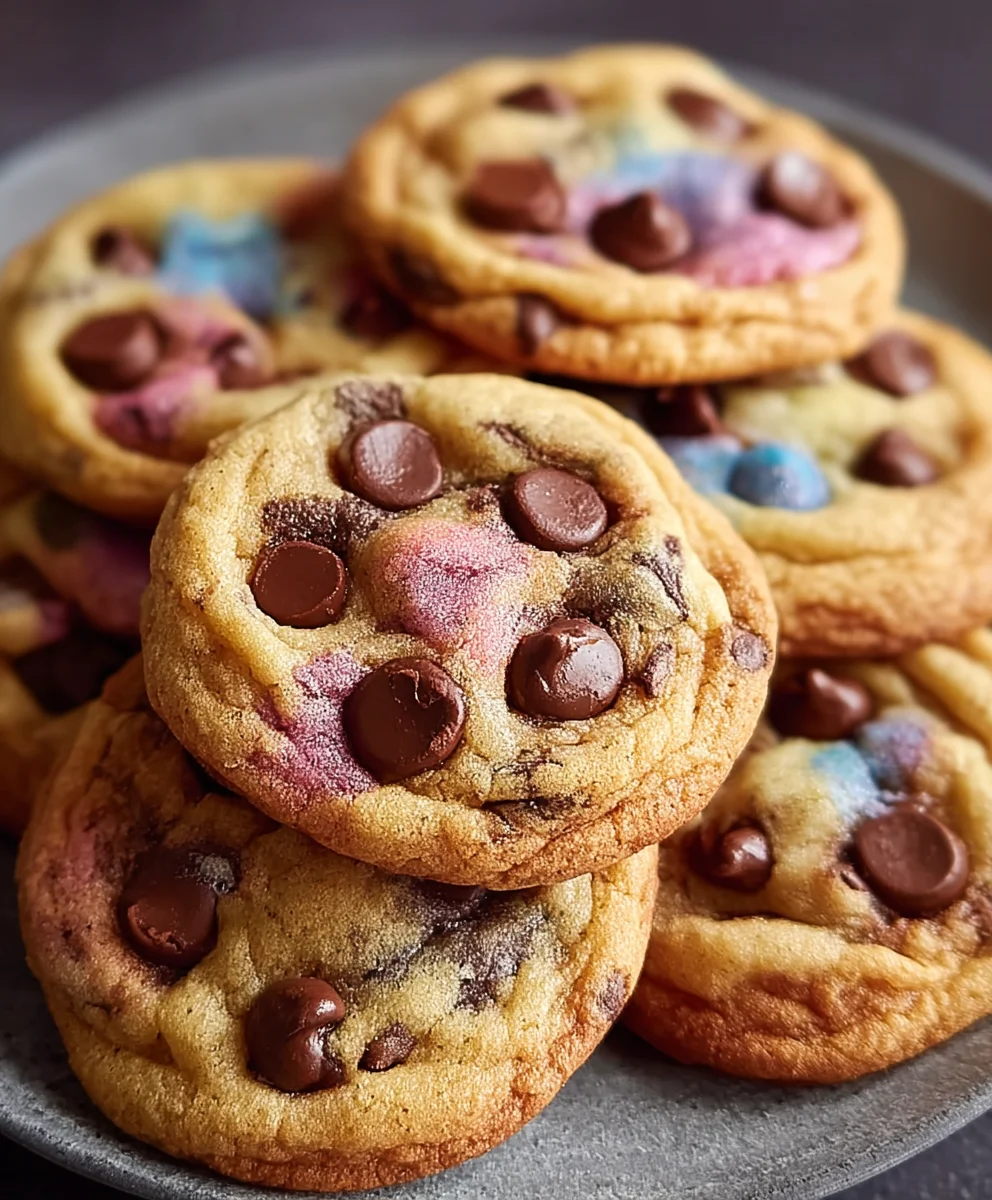
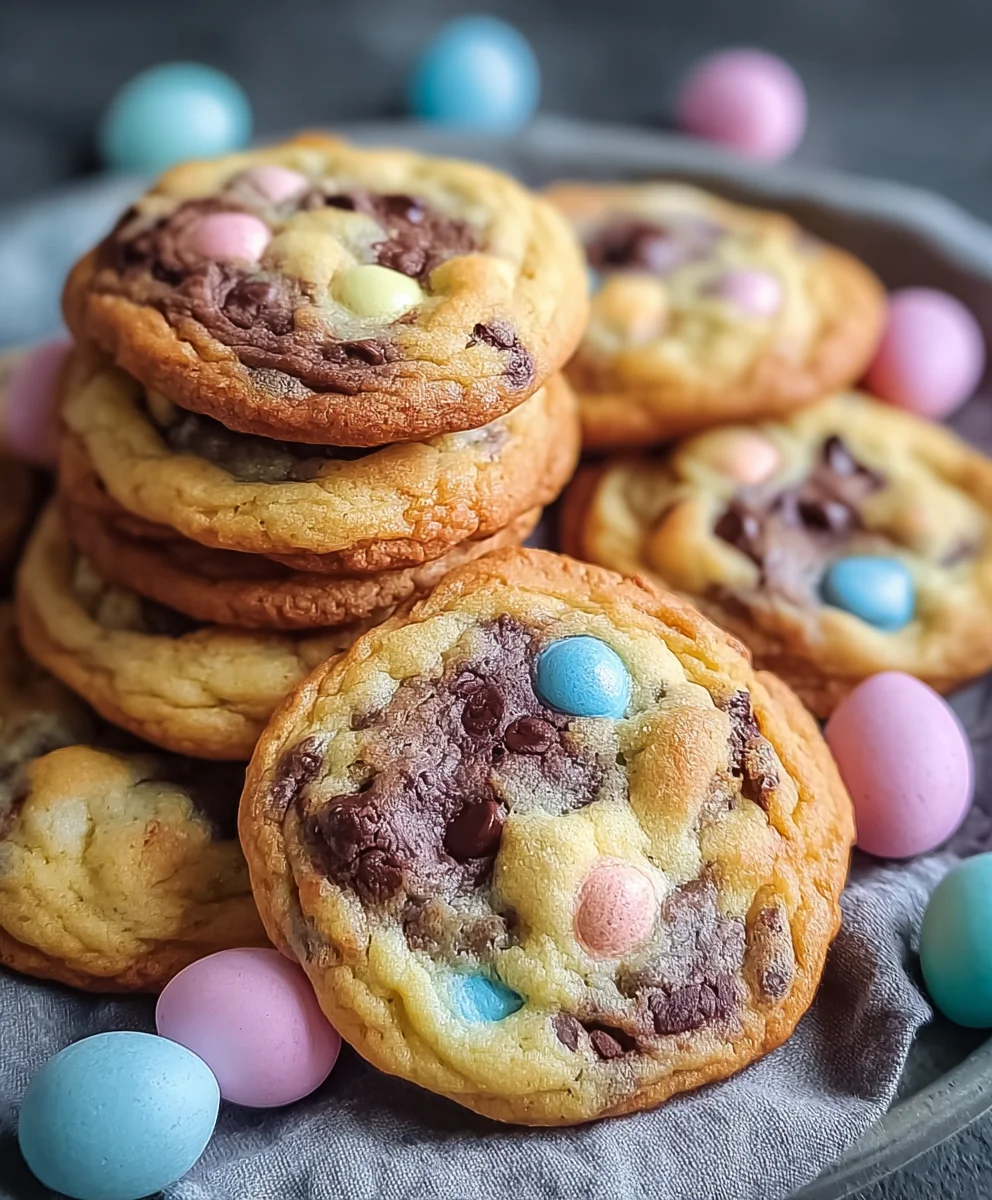
Now that your dough is beautifully colored, it’s time to add the star of the show: the chocolate chips! To each of the four colored dough portions, add ½ cup of chocolate chips (this will use up your total of 2 cups). Gently fold the chocolate chips into each colored dough using a spatula. Ensure the chocolate chips are evenly distributed throughout each pastel-colored dough. If you want an extra burst of chocolatey goodness, you can reserve a handful of chocolate chips to press onto the tops of the cookies before baking.
Baking the Easter Chocolate Chip Cookies
Forming and Baking the Cookies
Preheat your oven to 375°F (190°C). Line baking sheets with parchment paper to prevent sticking and ensure even baking. For consistent cookie size and shape, I recommend using a cookie scoop. Drop rounded tablespoons of dough onto the prepared baking sheets, leaving about 2 inches of space between each cookie to allow for spreading. If you reserved extra chocolate chips, gently press a few onto the tops of the dough mounds now. Bake for 9 to 11 minutes, or until the edges are lightly golden brown and the centers appear slightly underbaked. For softer cookies, err on the side of less baking time. For crispier cookies, bake a minute or two longer.
Cooling and Enjoying
Once your Easter Chocolate Chip Cookies are baked to perfection, remove the baking sheets from the oven. Let the cookies cool on the baking sheets for about 2 to 3 minutes before carefully transferring them to a wire rack to cool completely. This initial cooling period on the hot baking sheet allows the cookies to set up properly and prevents them from breaking when you move them. Once they are completely cool, you can arrange them on a platter and admire your beautifully colored, chocolate-studded creations. These are best enjoyed at room temperature.
Conclusion:
And there you have it – the perfect guide to baking delightful Easter Chocolate Chip Cookies! We’ve walked through each step, from selecting the finest ingredients to achieving that wonderfully chewy center and crisp edge. These cookies are more than just a treat; they’re a symbol of spring’s arrival and a joyous addition to any Easter celebration. Imagin extracte sharing these warm, fragrant cookies with loved ones after an egg hunt or as part of your festive dessert table. The aroma alone will fill your home with cheer!
For an elevated experience, consider serving your Easter Chocolate Chip Cookies with a scoop of vanilla bean ice cream or a warm glass of milk. They also pair beautifully with a light, fruity tea. Don’t be afraid to get creative with variations! You can add a sprinkle of pastel-colored M&Ms, a dash of cinnamon to the dough for a spiced twist, or even dip half of each cooled cookie in melted white chocolate for an extra touch of elegance.
We truly hope you enjoy baking and sharing these Easter Chocolate Chip Cookies. May your kitchens be filled with laughter and the sweet scent of baking. Happy Easter!
Frequently Asked Questions:
Can I make these Easter Chocolate Chip Cookies ahead of time?
Absolutely! You can prepare the cookie dough and refrigerate it for up to 3 days before baking. This allows the flavors to meld, resulting in even more delicious cookies. You can also freeze the dough balls for up to 3 months. Just bake them directly from frozen, adding a few extra minutes to the baking time.
How do I store my Easter Chocolate Chip Cookies to keep them fresh?
Once completely cooled, store your Easter Chocolate Chip Cookies in an airtight container at room temperature. They will stay fresh and delicious for about 3-5 days. You can also layer them between parchment paper to prevent sticking.
Are there any nut-free options for these Easter Chocolate Chip Cookies?
Yes! To make these cookies nut-free, ensure you are using nut-free chocolate chips and that your vanilla extract does not contain any nut derivatives. Always double-check the labels of all your ingredients to be sure.
Easter Chocolate Chip Cookies – Easy Festive Treat
Easy and festive Easter chocolate chip cookies featuring pastel-colored dough and delicious chocolate chips.
Ingredients
-
2½ cups all-purpose flour
-
1 teaspoon baking soda
-
½ teaspoon salt
-
1 cup unsalted butter, softened
-
¾ cup granulated sugar
-
¾ cup brown sugar, packed
-
2 large eggs
-
2 teaspoons vanilla extract
-
Gel food coloring (pastel pink, purple, yellow, and blue)
-
2 cups chocolate chips, plus extra for topping
Instructions
-
Step 1
In a medium bowl, whisk together 2½ cups all-purpose flour, 1 teaspoon baking soda, and ½ teaspoon salt. Set aside. -
Step 2
In a large mixing bowl, cream together 1 cup softened unsalted butter, ¾ cup granulated sugar, and ¾ cup packed brown sugar until light and fluffy. -
Step 3
Beat in 2 large eggs one at a time, followed by 2 teaspoons vanilla extract until fully incorporated. -
Step 4
Divide the dough into four equal portions. Tint each portion with a different pastel gel food coloring (pink, purple, yellow, blue) until evenly distributed. Do not overmix. -
Step 5
Gently fold ½ cup of chocolate chips into each colored dough portion. Reserve extra chocolate chips for topping if desired. -
Step 6
Preheat oven to 375°F (190°C). Line baking sheets with parchment paper. Drop rounded tablespoons of dough onto sheets, leaving 2 inches between cookies. Press extra chocolate chips onto tops if using. -
Step 7
Bake for 9 to 11 minutes, or until edges are lightly golden brown and centers are slightly underbaked. -
Step 8
Let cookies cool on baking sheets for 2-3 minutes before transferring to a wire rack to cool completely.
Important Information
Nutrition Facts (Per Serving)
It is important to consider this information as approximate and not to use it as definitive health advice.
Allergy Information
Please check ingredients for potential allergens and consult a health professional if in doubt.