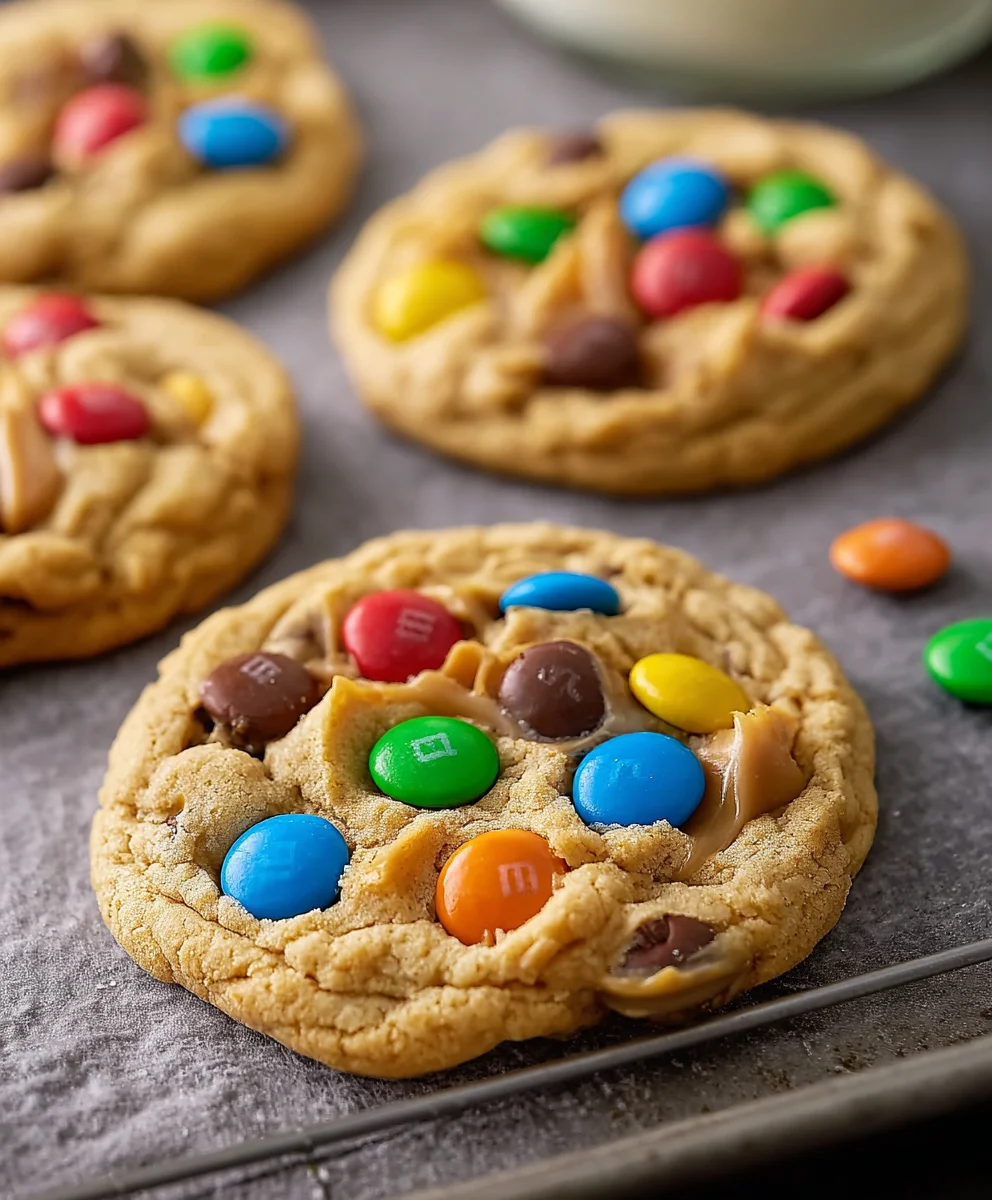
Chewy Peanut Butter M&M Cookies Recipe
Peanut Butter M&M Cookies are more than just a sweet treat; they’re a nostalgic journey for many, evoking memories of childhood bake snon-alcoholic ales and comforting after-school snacks. What is it about this particular cookie that captures hearts and taste buds so consistently? It’s the perfect marriage of textures and flavors – the rich, slightly salty chegrape juicess of the peanut butter cookie dough giving way to the satisfying crunch and bursts of chocolate from the M&Ms. This isn’t just any cookie; it’s a celebration of simplicity elevated to pure deliciousness. The magic lies in that quintessential peanut butter base, a foundation that’s both robust and yielding, creating a delightful contrast with the vibrant, colorful candy coatings of the M&Ms. Get ready to bake up a batch that will disappear faster than you can say “chocolate chip” – these Peanut Butter M&M Cookies are guaranteed crowd-pleasers!
Ingredients:
- ½ cup unsalted butter, for browning
- ½ cup + 2 tablespoons packed light brown sugar
- 2 tablespoons granulated sugar
- 1 large egg, at room temperature
- 1 teaspoon vanilla extract
- 1⅓ cups all-purpose flour, spooned and leveled
- ½ teaspoon baking soda
- ¼ teaspoon salt
- ½ cup milk chocolate chips, plus extra for topping
- ½ cup peanut butter M&Ms, plus extra for topping
- 8 tablespoons creamy peanut butter (1 tablespoon per cookie)
- Extra milk chocolate chips for garnish
- Extra peanut butter M&Ms for garnish
- Pretzels for garnish (optional)
Preparing the Dough
Step 1: Brown the Butter
The first step to achieving a deep, rich flavor in these Peanut Butter M&M Cookies is to brown the butter. Place the ½ cup of unsalted butter into a light-colored saucepan over medium heat. As the butter melts, it will begin extract to foam. Keep a close eye on it. Swirl the pan occasionally. You’ll notice tiny brown specks starting to form at the bottom of the pan, and the butter will develop a nutty aroma. This process usually takes about 5-8 minutes. Once it smells wonderfully toasty and the milk solids have turned a deep amber color, immediately remove the pan from the heat and pour the browned butter into a heatproof bowl to stop the cooking process. Allow it to cool for about 10-15 minutes, until it’s warm but not piping hot. This browning step adds a significant depth of flavor that plain melted butter just can’t replicate.
Step 2: Cream the Sugars and Butter
In a large mixing bowl, combine the cooled browned butter, ½ cup + 2 tablespoons of packed light brown sugar, and the 2 tablespoons of granulated sugar. Using an electric mixer on medium speed, or a sturdy whisk and some elbow grease, cream these ingredients together until the mixture is light, fluffy, and well combined. This creaming process incorporates air into the dough, which helps with the cookies’ texture and spread. Scrape down the sides of the bowl periodically to ensure everything is evenly mixed.
Step 3: Add Wet Ingredients and Combine Flour Mixture
Next, add the room temperature large egg and the 1 teaspoon of vanilla extract to the creamed butter and sugar mixture. Beat on medium speed until just combined and smooth. Don’t overmix at this stage; we want to gently incorporate these wet ingredients. In a separate medium bowl, whisk together the 1⅓ cups of all-purpose flour, ½ teaspoon of baking soda, and ¼ teaspoon of salt. Whisking these dry ingredients together before adding them to the wet ingredients ensures that the leavening agent (baking soda) and salt are evenly distributed throughout the flour, which will lead to uniformly risen and seasoned cookies.
Step 4: Incorporate Dry Ingredients and Mix-ins
Gradually add the dry flour mixture to the wet ingredients, mixing on low speed until just combined. Be careful not to overmix the dough once the flour is added; overmixing can develop the gluten in the flour too much, resulting in tough cookies. Mix until you no longer see streaks of dry flour. Now it’s time for the stars of the show! Gently fold in the ½ cup of milk chocolate chips and the ½ cup of peanut butter M&Ms using a spatula. Reserve some extra chocolate chips and M&Ms for topping the cookies later. Ensure they are evenly distributed throughout the dough.
Shaping and Baking
Step 5: Portion the Dough and Prepare for Baking
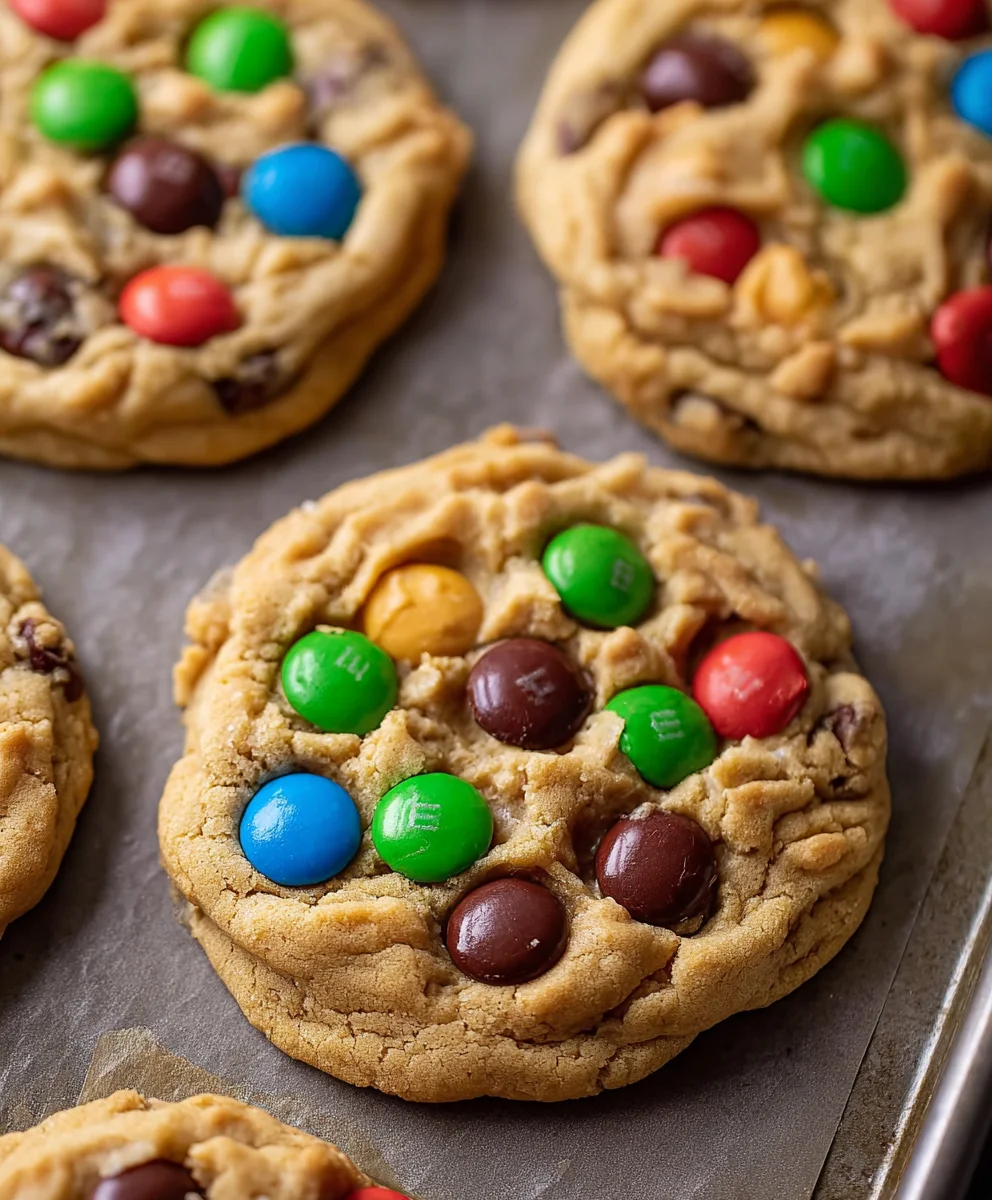
This recipe makes about 12-14 cookies, and for each cookie, we’ll be using 1 tablespoon of creamy peanut butter as a surprise center. To do this, take about 2 tablespoons of cookie dough and flatten it slightly in your hand. Place 1 tablespoon of creamy peanut butter in the center. Then, take another 1-2 tablespoons of cookie dough and gently wrap it around the peanut butter, completely encasing it to form a ball. This ensures the peanut butter stays in the center and creates a delightful molten surprise when the cookie is baked. Place the dough balls about 2 inches apart on a baking sheet lined with parchment paper or a silicone baking mat. For an extra decorative touch and more bursts of flavor, press a few extra milk chocolate chips and peanut butter M&Ms onto the tops of the dough balls. If you’re feeling adventurous and want a salty crunch, you can also gently press a few pretzel pieces onto the tops as well.
Step 6: Bake the Cookies
Preheat your oven to 350°F (175°C). Bake the cookies for 10-13 minutes, or until the edges are golden brown and set, but the centers still look slightly soft and underbaked. The residual heat will continue to cook them as they cool. Avoid overbaking, as this will lead to dry, hard cookies. The peanut butter center will become wonderfully gooey and molten.
Step 7: Cool and Enjoy
Allow the Peanut Butter M&M Cookies to cool on the baking sheet for 5-10 minutes before carefully transferring them to a wire rack to cool completely. This resting period is crucial for the cookies to firm up properly. Once cooled, they are ready to be devoured. The combination of rich, nutty browned butter, sweet chocolate, and the creamy peanut butter center is truly irresistible. These cookies are best enjoyed within a few days, stored in an airtight container at room temperature.
Conclusion:
You’ve now mastered the art of creating the most irresistible Peanut Butter M&M Cookies! This recipe strikes the perfect balance between the rich, nutty flavor of peanut butter and the delightful crunch and sweetness of M&Ms, all baked into a chewy, golden-brown cookie. These treats are guaranteed to be a hit at any gathering, from casual potlucks to more formal dessert tables. Don’t be afraid to get creative with your serving; they’re fantastic on their own, but also pair wonderfully with a cold glass of milk, a scoop of vanilla ice cream, or even as part of a cookie platter.
Remember, the beauty of this Peanut Butter M&M Cookies recipe lies in its adaptability. Feel free to experiment with different types of M&Ms, add a sprinkle of sea salt on top before baking for an extra flavor dimension, or even mix in some chopped peanuts for an intensified nutty taste. I encourage you to bake a batch soon and share the joy these cookies bring. You’ll find that the aroma alone is enough to bring smiles to everyone’s faces!
Frequently Asked Questions:
Can I make Peanut Butter M&M Cookies ahead of time?
Absolutely! You can prepare the cookie dough and refrigerate it for up to 3 days or freeze it for up to 3 months. When you’re ready to bake, you can bake directly from frozen, adding a few extra minutes to the baking time, or let the dough thaw in the refrigerator overnight.
What is the best way to store leftover Peanut Butter M&M Cookies?
For the freshest taste and texture, store your cooled Peanut Butter M&M Cookies in an airtight container at room temperature for up to 5 days. If you live in a humid climate, you might want to place a slice of bread in the container to help absorb excess moisture and keep them from becoming too soft.
Chewy Peanut Butter M&M Cookies Recipe
Deliciously chewy cookies packed with peanut butter M&Ms and milk chocolate chips, featuring a surprise creamy peanut butter center.
Ingredients
-
½ cup unsalted butter, for browning
-
½ cup + 2 tablespoons packed light brown sugar
-
2 tablespoons granulated sugar
-
1 large egg, at room temperature
-
1⅓ cups all-purpose flour, spooned and leveled
-
½ teaspoon baking soda
-
¼ teaspoon salt
-
½ cup milk chocolate chips, plus extra for topping
-
½ cup peanut butter M&Ms, plus extra for topping
-
8 tablespoons creamy peanut butter (1 tablespoon per cookie)
-
Extra milk chocolate chips for garnish
-
Extra peanut butter M&Ms for garnish
-
Pretzels for garnish (optional)
Instructions
-
Step 1
Brown the butter: Melt ½ cup unsalted butter in a light-colored saucepan over medium heat until tiny brown specks form and it has a nutty aroma. Pour into a heatproof bowl and let cool for 10-15 minutes. -
Step 2
Cream the sugars and butter: In a large bowl, combine cooled browned butter, ½ cup + 2 tablespoons packed light brown sugar, and 2 tablespoons granulated sugar. Beat until light and fluffy. -
Step 3
Add wet ingredients and combine flour mixture: Beat in 1 large egg and 1 teaspoon vanilla extract until just combined. In a separate bowl, whisk together 1⅓ cups all-purpose flour, ½ teaspoon baking soda, and ¼ teaspoon salt. -
Step 4
Incorporate dry ingredients and mix-ins: Gradually add the dry ingredients to the wet ingredients, mixing on low speed until just combined. Fold in ½ cup milk chocolate chips and ½ cup peanut butter M&Ms. -
Step 5
Portion the dough and prepare for baking: For each cookie, flatten about 2 tablespoons of dough, place 1 tablespoon of creamy peanut butter in the center, and wrap more dough around it to form a ball. Place on a parchment-lined baking sheet. Press extra chocolate chips and M&Ms (and optional pretzels) onto the tops. -
Step 6
Bake the cookies: Preheat oven to 350°F (175°C). Bake for 10-13 minutes, until edges are golden brown and centers are slightly soft. -
Step 7
Cool and enjoy: Let cookies cool on the baking sheet for 5-10 minutes, then transfer to a wire rack to cool completely.
Important Information
Nutrition Facts (Per Serving)
It is important to consider this information as approximate and not to use it as definitive health advice.
Allergy Information
Please check ingredients for potential allergens and consult a health professional if in doubt.