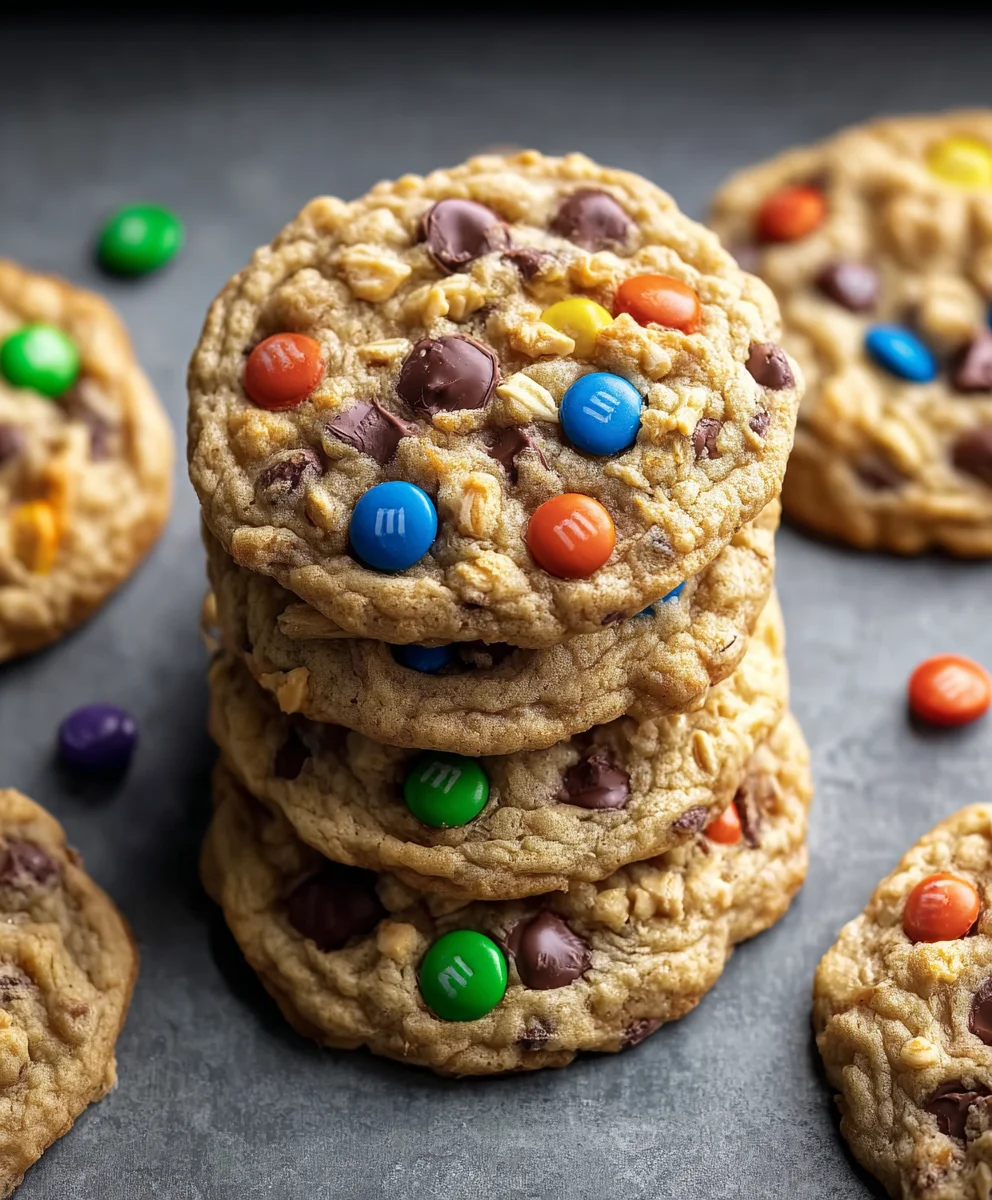
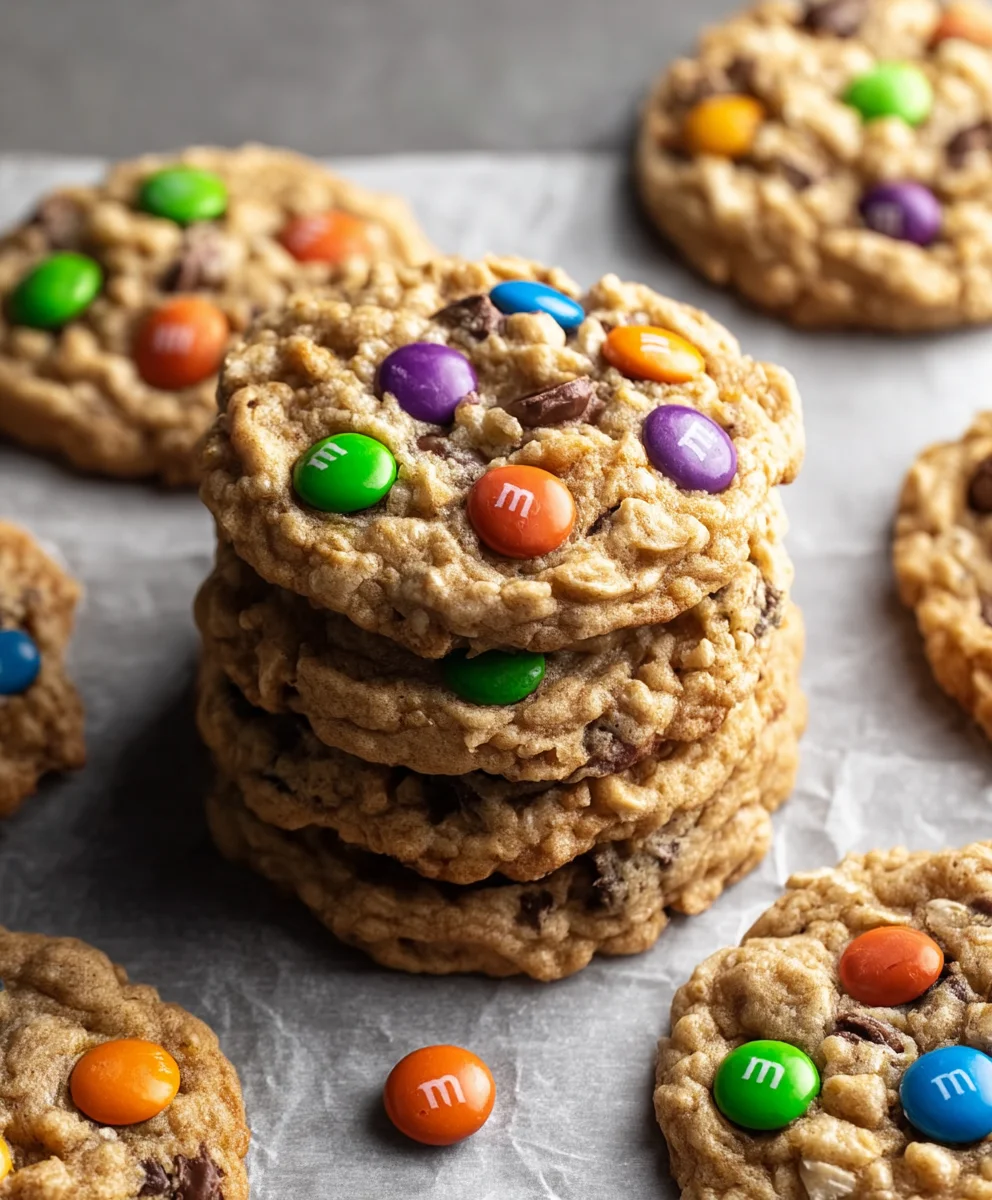
Best Monster Cookie Recipe-Kid Friendly Fun
Monster Cookies are a true delight for the senses, a chaotic yet harmonious explosion of textures and flavors that have captured hearts and taste buds for generations. These aren’t just any cookies; they’re a whimsical adventure baked into every bite. What makes these sweet treats so universally beloved? It’s their incredible adaptability and the sheer joy they bring. Each cookie is a delightful surprise, often packed with a generous medley of chocolate chips, peanut butter, oats, and sometimes even M&Ms, making every mouthful a unique experience. The magic of Monster Cookies lies in their forgiving nature; you can tweak the mix-ins to suit your cravings, turning them into a personalized masterpiece. This recipe will guide you through creating your own batch of these iconic, delightfully messy, and utterly irresistible Monster Cookies that are sure to become a family favorite.
Ingredients:
- ½ cup (113g) unsalted butter, softened to room temperature
- 1 cup (200g) light brown sugar, firmly packed
- ¼ cup (50g) granulated sugar
- ⅓ cup (85g) smooth peanut butter, at room temperature
- 1 large egg, plus 1 additional egg yolk, both at room temperature
- 2 teaspoons pure vanilla extract
- 2 teaspoons pure maple syrup
- 1 cup (115g) old-fashioned rolled oats
- 1¼ cups (155g) all-purpose flour, spooned into the measuring cup and leveled
- 1 teaspoon baking soda
- ½ teaspoon baking powder
- ½ teaspoon kosher salt
- ¾ cup (130g) semi-sweet chocolate chips, plus extra for decorating the tops
- ¾ cup (140g) M&M candies, plus extra for decorating the tops
Monster Cookie Dough Preparation
Creaming the Butter and Sugars
The foundation of any great cookie starts with properly creamed butter and sugars. In a large mixing bowl, combine the softened unsalted butter, packed light brown sugar, and granulated sugar. Using an electric mixer (either a stand mixer with a paddle attachment or a hand mixer), beat these ingredients together on medium speed. You’re looking for a light and fluffy texture, which usually takes about 3 to 5 minutes. Scrape down the sides and bottom of the bowl a couple of times during this process to ensure everything is incorporated evenly. This aeration step is crucial for creating a tender cookie with a good rise.
Incorporating Wet Ingredients
Once the butter and sugar mixture is light and creamy, it’s time to add the wet ingredients. Add the smooth peanut butter to the bowl. If your peanut butter isn’t at room temperature, it can make the mixture lumpy, so ensure it’s soft. Beat until well combined. Next, add the room temperature large egg, followed by the extra egg yolk. Beating in eggs one at a time, or in this case, one whole egg and then just the yolk, helps them emulsify properly into the fat mixture, leading to a richer and more cohesive dough. Add the vanilla extract and maple syrup. The vanilla provides that classic cookie aroma and flavor, while the maple syrup adds a subtle depth and a touch of moisture. Mix on low speed until all the wet ingredients are thoroughly incorporated and the mixture is smooth and glossy.
Combining Dry Ingredients
In a separate medium bowl, whisk together the all-purpose flour, baking soda, baking powder, and kosher salt. Whisking the dry ingredients together helps to distribute the leavening agents and salt evenly throughout the flour, preventing pockets of bitterness or a dense cookie. It’s important to spoon your flour into the measuring cup and level it off rather than scooping directly from the bag; this ensures you don’t overmeasure the flour, which can lead to dry, tough cookies.
Bringin extractg the Dough Together
Gradually add the dry ingredient mixture to the wet ingredient mixture. Mix on low speed until just combined. Be careful not to overmix at this stage; overmixing can develop the gluten in the flour too much, resulting in tough cookies. Once the flour is mostly incorporated, stop the mixer and use a sturdy spatula or wooden spoon to fold in the old-fashioned rolled oats. Make sure to get to the bottom of the bowl to incorporate any stray bits of flour. The oats add a wonderful chewy texture and rustic appeal to these Monster Cookies.
Adding the “Monster” Elements
Mixing in the Goodies
Now for the fun part! Add the semi-sweet chocolate chips and M&M candies to the dough. Reserve a small handful of both to press onto the tops of the cookies before baking, which makes them look extra appealing. Gently fold these in with your spatula until they are evenly distributed throughout the dough. Again, avoid overmixing. The goal is to have distinct chips and candies throughout, not a completely uniform mixture. The M&M candies are what give these cookies their signature “monster” look and a delightful burst of color and candy crunch.
Shaping and Baking
Portioning the Dough
Preheat your oven to 350°F (175°C). Line baking sheets with parchment paper or silicone baking mats. This prevents the cookies from sticking and makes for easier cleanup. Use a medium cookie scoop (about 2 tablespoons) or a tablespoon to scoop the dough. Roll each scoop into a relatively uniform ball. Place the dough balls about 2 inches apart on the prepared baking sheets, as they will spread during baking. For the “monster” effect, gently press a few extra chocolate chips and M&M candies onto the top of each cookie dough ball. This helps them look wonderfully decorated right out of the oven.
Baking to Perfection
Bake for 10 to 12 minutes, or until the edges are lightly golden brown and the centers still look slightly soft and underbaked. They will continue to set as they cool. For perfectly chewy cookies, it’s better to underbake them slightly than to overbake. If you prefer a crispier cookie, you can bake them for an additional minute or two, but watch them closely to prevent burning. The aroma filling your kitchen will be absolutely divine during this step!
Cooling and Enjoying
Once baked, let the cookies cool on the baking sheets for 5 minutes before carefully transferring them to a wire rack to cool completely. This initial cooling period on the hot baking sheet allows the cookies to firm up enough to be moved without breaking. Once they are completely cool, you can store them in an airtight container at room temperature for up to 3-4 days. They are incredibly delicious enjoyed as is, or with a cold glass of milk!
Conclusion:
And there you have it – a delightful batch of Monster Cookies ready to conquer your cravings! This recipe is a fantastic way to bring a smile to any face, whether it’s for a bake snon-alcoholic ale, a special occasion, or just because. The beauty of Monster Cookies lies in their cheerful appearance and wonderfully chewy texture, packed with all the best mix-ins. Don’t be afraid to get creative with your additions; these cookies are incredibly forgiving and encourage experimentation. Serve them warm with a glass of cold milk for the ultimate comforting treat, or package them up as thoughtful homemade gifts. We truly hope you enjoy baking and devouring these spectacular Monster Cookies as much as we do!
Frequently Asked Questions about Monster Cookies:
Q: Can I freeze the dough before baking?
Absolutely! You can scoop the Monster Cookies dough onto a baking sheet, freeze until firm, then transfer the frozen dough balls to an airtight container or freezer bag. They’ll keep for up to 3 months. Bake them directly from frozen, adding a minute or two to the baking time.
Q: My Monster Cookies spread too much. What can I do?
If your Monster Cookies tend to spread excessively, try chilling the dough for at least 30 minutes before baking. This helps the fats in the dough firm up, resulting in thicker, chewier cookies. You can also ensure your oven temperature is accurate by using an oven thermometer.
Q: Can I make this recipe vegan?
Yes, you can easily adapt Monster Cookies to be vegan! Substitute the butter with a vegan butter alternative and use flax eggs (1 tablespoon ground flaxseed mixed with 3 tablespoons water, let sit for 5 minutes) or commercial egg replacers. Ensure your chocolate chips and any other mix-ins are also vegan.
Best Monster Cookie Recipe-Kid Friendly Fun
A fun and delicious monster cookie recipe perfect for kids, featuring chewy oats, chocolate chips, and colorful M&Ms.
Ingredients
-
½ cup (113g) unsalted butter, softened to room temperature
-
1 cup (200g) light brown sugar, firmly packed
-
¼ cup (50g) granulated sugar
-
⅓ cup (85g) smooth peanut butter, at room temperature
-
1 large egg, plus 1 additional egg yolk, both at room temperature
-
2 teaspoons pure vanilla extract
-
2 teaspoons pure maple syrup
-
1 cup (115g) old-fashioned rolled oats
-
1¼ cups (155g) all-purpose flour, spooned into the measuring cup and leveled
-
1 teaspoon baking soda
-
½ teaspoon baking powder
-
½ teaspoon kosher salt
-
¾ cup (130g) semi-sweet chocolate chips, plus extra for decorating the tops
-
¾ cup (140g) M&M candies, plus extra for decorating the tops
Instructions
-
Step 1
Cream together softened butter, brown sugar, and granulated sugar in a large bowl with an electric mixer until light and fluffy (3-5 minutes). Scrape down sides as needed. -
Step 2
Add peanut butter and beat until combined. Then, add the egg, egg yolk, vanilla extract, and maple syrup. Mix on low speed until smooth and glossy. -
Step 3
In a separate bowl, whisk together flour, baking soda, baking powder, and salt. Gradually add this dry mixture to the wet ingredients, mixing on low speed until just combined. Do not overmix. -
Step 4
Fold in the rolled oats using a spatula or wooden spoon until evenly distributed. Then, gently fold in the chocolate chips and M&M candies, reserving some for topping. -
Step 5
Preheat oven to 350°F (175°C). Line baking sheets with parchment paper. Scoop dough into balls (about 2 tablespoons each), place 2 inches apart on baking sheets, and press reserved chocolate chips and M&Ms onto the tops. -
Step 6
Bake for 10-12 minutes, or until edges are golden brown and centers are still slightly soft. Let cool on baking sheets for 5 minutes before transferring to a wire rack to cool completely.
Important Information
Nutrition Facts (Per Serving)
It is important to consider this information as approximate and not to use it as definitive health advice.
Allergy Information
Please check ingredients for potential allergens and consult a health professional if in doubt.