Cheesy Garlic Chicken Wraps-Quick Easy Recipe
Cheesy Garlic Chicken Wraps are more than just a meal; they’re a symphony of comforting flavors and satisfying textures that have captured hearts and appetites everywhere. If you’re searching for a quick yet incredibly delicious dinner option that will have everyone asking for seconds, you’ve landed in the right place. What is it about these wraps that makes them so universally adored? It’s the perfect marriage of tender, juicy chicken, infused with the irresistible aroma and taste of garlic, all enveloped in a gooey, melted cheese embrace. They strike that magical balance between being delightfully decadent and surprisingly easy to put together, making them a go-to for busy weeknights and casual gatherings alike. The inherent versatility of the wrap format also means you can customize them to your heart’s content, but at their core, these Cheesy Garlic Chicken Wraps offer a pure, unadulterated comfort food experience that’s hard to beat.
Why We Can’t Get Enough of These Wraps
These aren’t your average chicken wraps. We’re talking about a flavor explosion that starts with perfectly seasoned chicken, sautéed to golden perfection with generous amounts of fragrant garlic. Then comes the cheese – oh, the cheese! Melty, stringy, and utterly indulgent, it binds all the incredible ingredients together. Wrapped snugly in soft tortillas, each bite is a delightful combination of savory, garlicky, and cheesy goodness. They’re the ultimate quick fix for a serious craving, a guaranteed crowd-pleaser, and frankly, a little bit of weeknight magic you can whip up in under 30 minutes. The sheer satisfaction derived from that first, warm, cheesy bite is unparalleled, transforming an ordinary meal into something truly special.
The Secret to Their Irresistible Charm
The magic of Cheesy Garlic Chicken Wraps lies in its deceptive simplicity. It takes humble ingredients and elevates them through thoughtful preparation and the undeniable allure of garlic and melted cheese. We use a special blend of spices to ensure the chicken is flavorful on its own, then we infuse it with a robust garlic punch that’s both comforting and exciting. The key is not to overcook the chicken, keeping it wonderfully moist, and to use a cheese that melts beautifully, creating that signature gooey texture we all crave. This recipe refines the classic concept, ensuring every wrap is a testament to deliciousness, making it a standout dish that never fails to impress.
Ingredients:
- 2 cups cooked chicken, shredded
- 1/2 cup garlic aioli
- 1 cup cheddar cheese, shredded
- 4 large tortillas
- Salt and pepper to taste
Preparing the Chicken Mixture
Step 1: Combine Chicken and Garlic Aioli
The first step in creating our delicious Cheesy Garlic Chicken Wraps is to prepare the filling. In a medium-sized mixing bowl, combine the 2 cups of shredded cooked chicken with the 1/2 cup of garlic aioli. Ensure the chicken is fully coated in the creamy, garlicky aioli. This step is crucial for infusing the chicken with that signature garlic flavor that makes these wraps so irresistible. Take your time to thoroughly mix, making sure every strand of chicken gets a good dollop of aioli. If you’re using leftover roasted chicken or rotisserie chicken, this is a fantastic way to repurpose it into something exciting and new. The richness of the aioli will also help bind the chicken together, making it easier to fill the tortillas.
Step 2: Seasoning the Chicken Mixture
Once the chicken and aioli are well combined, it’s time to season. Add salt and pepper to taste. Start with a small pinch of each, stir, and then taste. You can always add more, but you can’t take it away! The amount of salt and pepper you’ll need will depend on how salty your cooked chicken was and your personal preference. Remember that the cheddar cheese will also add a salty component, so be mindful of that as you season. Gently fold the salt and pepper into the chicken mixture to ensure even distribution. This simple seasoning elevates the overall flavor profile of the filling, making it savory and satisfying.
Step 3: Incorporating the Cheese
Now for the cheesy goodness! Add the 1 cup of shredded cheddar cheese to the chicken and aioli mixture. Gently fold the cheese into the chicken. You want to distribute the cheese evenly throughout the mixture so that you get cheesy bites in every part of your wrap. Some of the cheese will melt slightly from the residual warmth of the chicken (if it’s not fully cooled), which is perfectly fine and even desirable as it helps bind everything together. If your chicken is completely cold, don’t worry; the cheese will melt when the wraps are heated. The cheddar cheese adds a wonderful creamy texture and a sharp, familiar flavor that pairs beautifully with the garlic aioli and chicken.
Assembling and Cooking the Wraps
Step 4: Warming the Tortillas
Before we assemble our wraps, it’s a good idea to warm the 4 large tortillas. Warming them makes them more pliable and less likely to tear when you’re rolling them. You can do this in a few ways. The easiest is to microwave them for about 15-20 seconds per tortilla. Alternatively, you can warm them in a dry skillet over medium heat for about 30 seconds per side, or briefly over a gas flame (use caution!). Whichever method you choose, the goal is to make them soft and flexible, ready to embrace the delicious filling. Avoid over-warming, which can make them tough and brittle.
Step 5: Filling and Rolling the Wraps
Lay one warmed tortilla flat on a clean surface. Spoon about a quarter of the cheesy chicken mixture evenly across the center of the tortilla, leaving a small border around the edges. Be generous with the filling, but don’t overstuff, or your wrap will be difficult to roll and might burst. To roll, fold in the two sides of the tortilla towards the center, overlapping slightly. Then, starting from the bottom edge closest to you, tightly roll the tortilla upwards, tucking in the filling as you go. Repeat this process with the remaining three tortillas and filling. This technique ensures a neat and secure wrap that holds all the delicious ingredients together.
Step 6: Grilling or Pan-Frying the Wraps
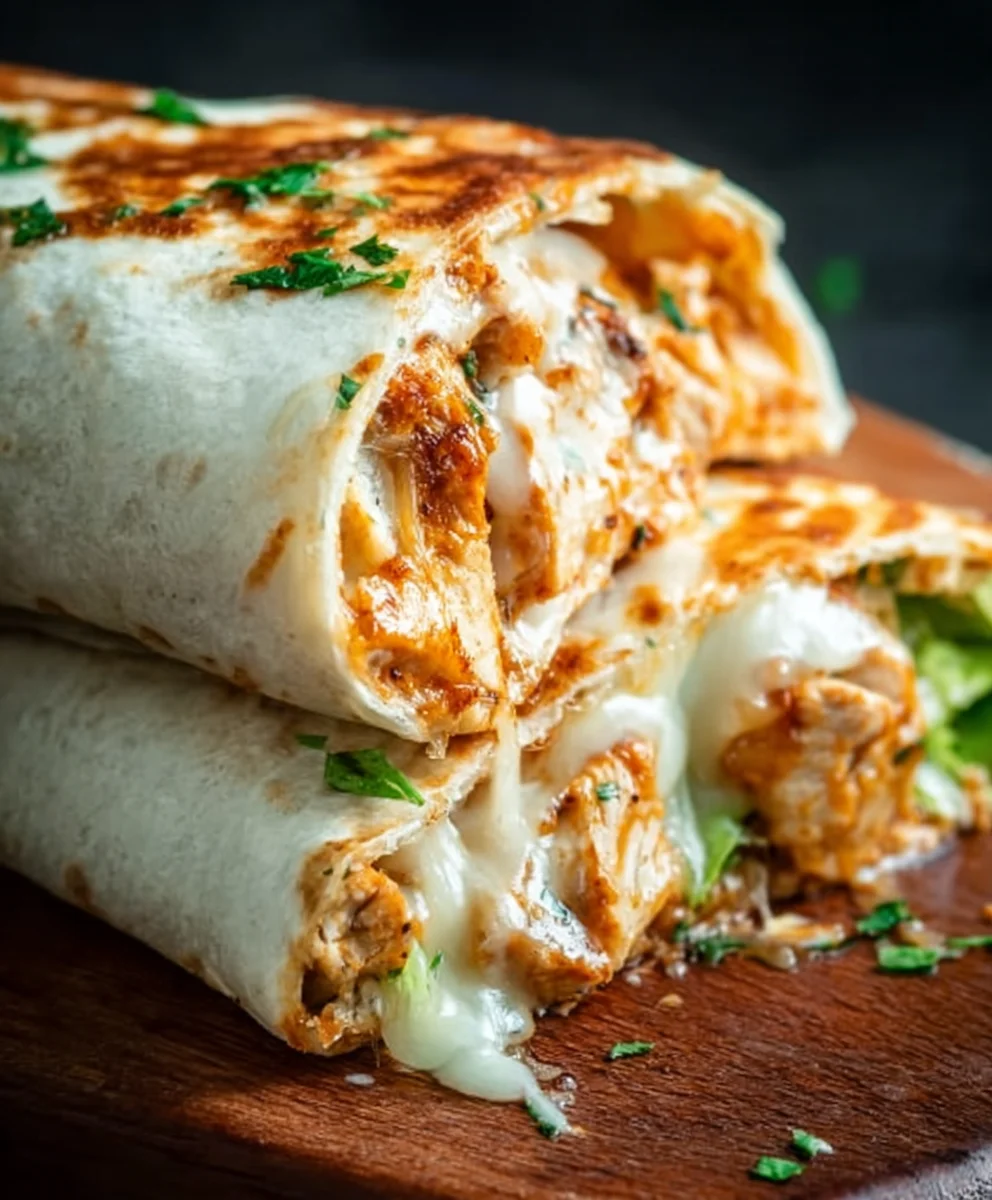
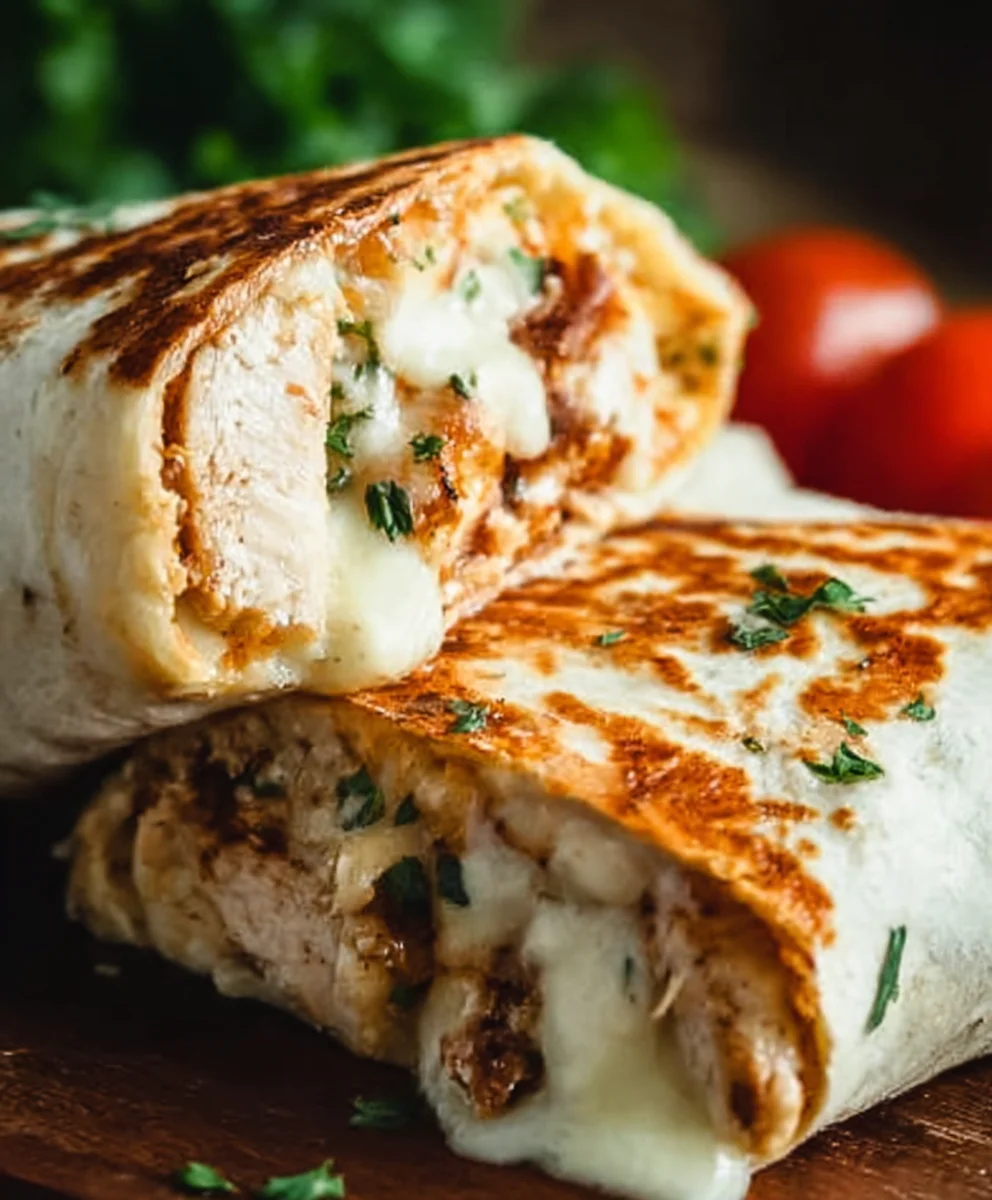
Now it’s time to give our Cheesy Garlic Chicken Wraps a delightful golden-brown finish and melt the cheese perfectly. Heat a lightly oiled skillet or grill pan over medium heat. Carefully place one or two assembled wraps seam-side down in the hot pan. Cook for 2-3 minutes per side, or until the tortillas are golden brown and crispy, and the cheese inside is gloriously melted and gooey. You might see some of the filling ooze out slightly, which is perfectly normal. If you prefer a more toasted exterior, you can press down gently with a spatula. Once cooked, remove the wraps from the pan and set them aside. Cook the remaining wraps in the same manner. This final cooking step not only makes the wraps look appealing but also ensures the cheese is fully melted and adds a wonderful texture to the outside of the tortilla.
Conclusion:
There you have it – a simple yet incredibly satisfying recipe for Cheesy Garlic Chicken Wraps that’s perfect for a quick weeknight dinner, a hearty lunch, or even a casual get-together. We’ve walked through each step, from preparing the succulent garlic-infused chicken to assembling these delightful wraps with a generous helping of cheese. The aroma alone is enough to make your mouth water, and the taste is even better!
These Cheesy Garlic Chicken Wraps are wonderfully versatile. Serve them warm straight off the pan, or let them cool slightly for an easy portable meal. They pair beautifully with a crisp side salad, some seasoned sweet potato fries, or even just a handful of crunchy tortilla chips. Don’t be afraid to get creative with the fillings too!
Frequently Asked Questions:
Can I make the chicken ahead of time?
Absolutely! You can cook the garlic chicken mixture a day in advance and store it in an airtight container in the refrigerator. Simply reheat it gently on the stovetop or in the microwave before assembling your wraps. This makes assembly even quicker!
What other vegetables can I add to the wraps?
The possibilities are endless! Sautéed bell peppers and onions, wilted spinach, chopped tomatoes, shredded lettuce, or even some pickled jalapeños for a bit of spice would all be delicious additions to your Cheesy Garlic Chicken Wraps.
Are these wraps suitable for freezing?
While the cooked chicken can be frozen, it’s generally best to assemble the wraps just before serving to ensure the tortilla stays fresh and the cheese is perfectly melted. If you do freeze them, thaw overnight in the refrigerator and reheat carefully.
We encourage you to try these Cheesy Garlic Chicken Wraps and make them your own. Enjoy the deliciousness!
Cheesy Garlic Chicken Wraps-Quick Easy Recipe
Quick and easy cheesy garlic chicken wraps perfect for a weeknight meal. This recipe features shredded chicken coated in creamy garlic aioli and melted cheddar cheese, all wrapped in warm tortillas and lightly grilled for a delicious finish.
Ingredients
-
2 cups cooked chicken, shredded
-
1/2 cup garlic aioli
-
1 cup cheddar cheese, shredded
-
4 large tortillas
-
Salt to taste
-
Pepper to taste
Instructions
-
Step 1
In a medium-sized mixing bowl, combine the 2 cups of shredded cooked chicken with the 1/2 cup of garlic aioli. Ensure the chicken is fully coated in the creamy, garlicky aioli. -
Step 2
Add salt and pepper to taste. Start with a small pinch of each, stir, and then taste. Gently fold the salt and pepper into the chicken mixture to ensure even distribution. -
Step 3
Add the 1 cup of shredded cheddar cheese to the chicken and aioli mixture. Gently fold the cheese into the chicken, distributing it evenly. -
Step 4
Warm the 4 large tortillas by microwaving them for about 15-20 seconds per tortilla, or by warming them in a dry skillet over medium heat for about 30 seconds per side. -
Step 5
Lay one warmed tortilla flat. Spoon about a quarter of the cheesy chicken mixture evenly across the center. Fold in the two sides of the tortilla towards the center, and then tightly roll the tortilla upwards from the bottom edge. -
Step 6
Heat a lightly oiled skillet or grill pan over medium heat. Place one or two assembled wraps seam-side down in the hot pan. Cook for 2-3 minutes per side, or until the tortillas are golden brown and crispy, and the cheese is melted.
Important Information
Nutrition Facts (Per Serving)
It is important to consider this information as approximate and not to use it as definitive health advice.
Allergy Information
Please check ingredients for potential allergens and consult a health professional if in doubt.