Triple-Layer Chocolate Mint Squares Recipe
Triple-layer chocolate mint squares are a dream come true for anyone who believes that more chocolate is always better, and that mint is its perfect companion. Imagin extracte sinking your teeth into a rich, decadent brownie base, followed by a creamy, luscious mint filling, and crowned with a smooth, bittersweet chocolate ganache. That’s the magic of these triple-layer chocolate mint squares! They’re the ultimate indulgence, perfect for satisfying those intense sweet cravings or for making any occasion feel extra special. What makes them truly irresistible is the harmonious blend of textures and intense flavors – a delightful dance between the fudgy bottom, the cool minty middle, and the intense chocolate topping. These aren’t just any dessert; they’re an experience, a celebration of everything we love about chocolate and mint working in perfect synergy. Get ready to be amazed by these spectacular triple-layer chocolate mint squares!
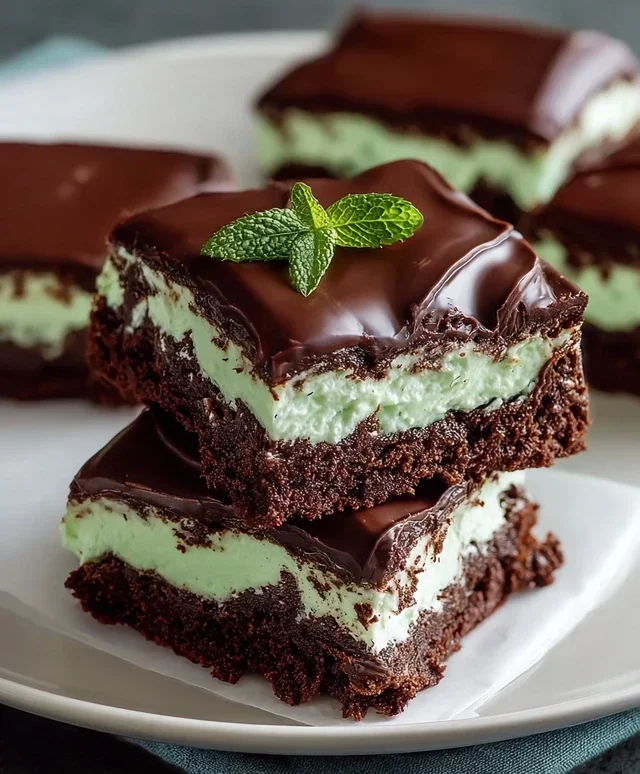
Triple-Layer Chocolate Mint Squares
Get ready to indulge your deepest chocolate and mint cravings with these absolutely divine Triple-Layer Chocolate Mint Squares. These aren’t your average brownies; they’re a symphony of rich, fudgy chocolate, a cool, creamy mint layer, and a decadent chocolate ganache topping. Perfect for holidays, special occasions, or simply when you need a serious treat, these squares are surprisingly achievable and deliver a truly impressive result. Each bite offers a delightful contrast in textures and flavors, making them an instant favorite.
Ingredients:
Cooking Instructions:
The Fudgy Chocolate Base
1. Prepare the Base: Begin extract by preheating your oven to 350°F (175°C). Grease and flour a 9×13 inch baking pan, or line it with parchment paper, leaving some overhang to help lift the finished bars out easily. This step is crucial for preventing sticking and ensuring a clean release of your beautiful squares. In a medium saucepan over low heat, melt the first 1 cup of salted butter and 4 oz. of semi-sweet chocolate chips. Stir frequently until the chocolate is completely melted and the mixture is smooth. This creates the foundation of our rich, fudgy brownie layer. Remove the saucepan from the heat.
2. Combine Wet Ingredients: To the melted chocolate mixture, add the 2 cups of granulated sugar and 2 teaspoons of vanilla extract. Stir well to combine. Next, add the 4 large eggs, one at a time, beating well after each addition until the batter is glossy and smooth. Don’t rush this step; incorporating the eggs thoroughly will contribute to the dense, fudgy texture of the base. Finally, gradually stir in the 1 ½ cups of all-purpose flour until just combined. Be careful not to overmix at this stage, as overmixing can lead to a tougher brownie. The batter will be thick.
3. Bake the Base: Pour the chocolate batter evenly into the prepared 9×13 inch baking pan. Spread it out with a spatula to ensure an even layer. Bake for 25-30 minutes, or until a toothpick inserted into the center comes out with moist crum extractbs, not wet batter. We want it slightly underbaked for that signature fudgy consistency. Once baked, let the chocolate base cool completely in the pan on a wire rack. This cooling period is essential before moving on to the next layer, otherwise, the mint frosting will melt.
The Cool Minty Middle
4. Whip Up the Mint Frosting: While the chocolate base is cooling, prepare the refreshing mint layer. In a large bowl, beat the softened ¾ cup of salted butter with an electric mixer until light and fluffy. Gradually add the 3 cups of powdered sugar, alternating with the 1 tablespoon of heavy whipping cream, until smooth and creamy. This is where the magic happens for our mint layer. Mix in the 1 teaspoon of peppermint extract. For that iconic minty green color, add the 10 drops of green food coloring and mix until evenly distributed. The frosting should be thick but spreadable.
5. Assemble the Second Layer: Once the chocolate base has completely cooled, spread the prepared mint frosting evenly over the top. Use an offset spatula or the back of a spoon to create a smooth, even layer. This vibrant green layer will provide a delightful contrast to the rich chocolate below. Take your time to get this layer as neat as possible, as it will be visible. Place the pan in the refrigerator for at least 30 minutes to allow the mint frosting to firm up. This is a crucial step to prevent the ganache from sinking into the frosting.
The Decadent Chocolate Ganache Top
6. Craft the Ganache: Now for the crowning glory – the chocolate ganache. In a heatproof bowl, combine the 3 cups of semi-sweet chocolate chips and the 2 tablespoons of butter. In a small saucepan, heat the ½ cup of heavy whipping cream over medium heat until it just begin extracts to simmer around the edges. Do not let it boil. Pour the hot cream over the chocolate chips and butter. Let it sit for 5 minutes without stirring to allow the heat to melt the chocolate. After 5 minutes, gently whisk the mixture until it is smooth, glossy, and completely combined. This rich, velvety ganache is the perfect finishing touch.
7. Finish and Chill: Pour the warm chocolate ganache over the chilled mint layer, spreading it evenly with a spatula to cover the entire surface. You want a nice, smooth coating. Return the pan to the refrigerator and chill for at least 2-3 hours, or until the ganache is firm and set. This allows all the layers to meld together beautifully.
8. Slice and Serve: Once chilled, use the parchment paper overhang to carefully lift the entire slab out of the pan onto a cutting board. Use a sharp knife, dipped in hot water and wiped dry between cuts, to slice the triple-layer chocolate mint squares into your desired sizes. The hot knife will ensure clean, professional-looking cuts. Enjoy these decadent treats! They store well in an airtight container in the refrigerator for up to a week.
Conclusion:
There you have it – a recipe for truly irresistible triple-layer chocolate mint squares that are sure to impress! These aren’t just any brownies; they’re a delightful symphony of rich chocolate brownie base, creamy mint filling, and a decadent chocolate ganache topping. The contrast in textures and the refreshing mint flavor perfectly complement the deep chocolate notes, making each bite a miniature celebration. They are perfect for birthdays, holidays, or simply when you need a little something special to brighten your day. I absolutely encourage you to give this recipe a try; you won’t regret the effort!
For serving, these squares are fantastic on their own, but for an extra touch of elegance, consider dusting them lightly with cocoa powder or serving them with a dollop of whipped cream. If you’re feeling adventurous with variations, you could experiment with adding finely chopped dark chocolate chips to the brownie layer for an even more intense chocolate experience, or perhaps a swirl of green food coloring into the mint layer for a more vibrant visual appeal. Alternatively, a sprinkle of crushed peppermint candies on top of the ganache would add a delightful crunch and an extra punch of minty flavor.
Frequently Asked Questions:
Can I make these ahead of time?
Absolutely! These triple-layer chocolate mint squares are fantastic for making ahead. In fact, I find the flavors meld together even more beautifully after a day in the refrigerator. Simply store them in an airtight container, and they’ll stay fresh for up to 3-4 days.
What if I don’t like mint?
No problem at all! While the mint is a signature element, you can easily adapt this recipe. For a similar creamy texture without the mint, you could try a cream cheese filling, perhaps flavored with a touch of vanilla extract or even a hint of coffee. The chocolate brownie base and ganache topping will still be delicious!
How should I store leftovers?
Store any leftover triple-layer chocolate mint squares in an airtight container at room temperature for a day or two, or in the refrigerator for up to a week. If refrigerating, allow them to come to room temperature slightly before serving for the best texture.
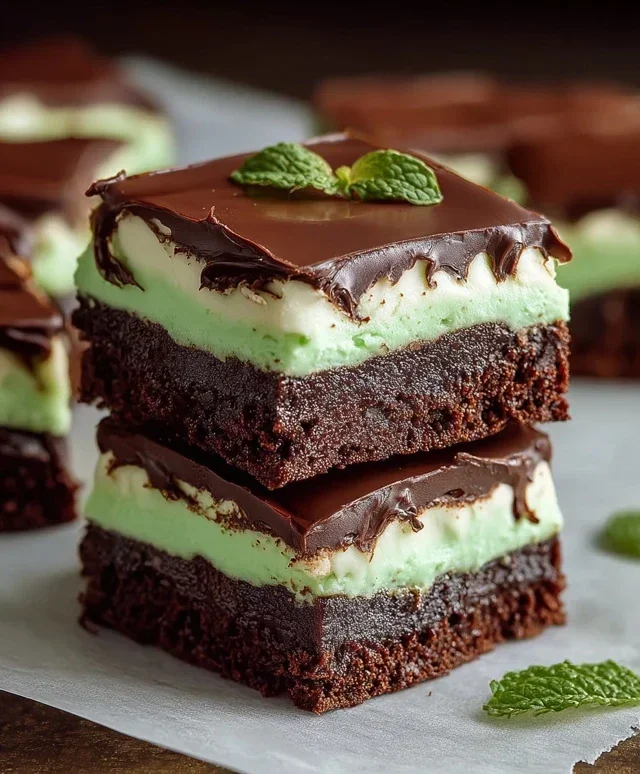
Triple-layer Chocolate Mint Squares
Decadent triple-layer chocolate mint squares featuring a chocolate brownie base, a creamy mint frosting, and a rich chocolate ganache topping.
Ingredients
-
1 cup salted butter
-
4 oz. semi-sweet chocolate chips
-
2 cups granulated sugar
-
2 teaspoons vanilla extract
-
1 ½ cups all-purpose flour
-
4 large eggs
-
¾ cup salted butter, softened
-
3 cups powdered sugar
-
1 tablespoon heavy whipping cream
-
1 teaspoon peppermint extract
-
10 drops green food coloring
-
3 cups semi-sweet chocolate chips
-
2 tablespoons butter
-
½ cup heavy whipping cream
Instructions
-
Step 1
Preheat oven to 350°F (175°C). Grease and flour a 9×13 inch baking pan. -
Step 2
In a medium saucepan, melt 1 cup salted butter and 4 oz. semi-sweet chocolate chips over low heat, stirring until smooth. Remove from heat. Stir in 2 cups granulated sugar and 2 teaspoons vanilla extract. -
Step 3
Beat in 4 large eggs one at a time until well combined. Fold in 1 ½ cups all-purpose flour. Spread batter evenly into the prepared baking pan. Bake for 20-25 minutes, or until a toothpick inserted into the center comes out with moist crumbs. -
Step 4
While the brownie layer cools, prepare the mint frosting. In a large bowl, beat ¾ cup salted butter, softened, until creamy. Gradually add 3 cups powdered sugar, alternating with 1 tablespoon heavy whipping cream, until smooth and spreadable. Stir in 1 teaspoon peppermint extract and 10 drops green food coloring. Spread evenly over the cooled brownie layer. -
Step 5
Prepare the chocolate ganache. In a heatproof bowl, combine 3 cups semi-sweet chocolate chips and 2 tablespoons butter. Heat ½ cup heavy whipping cream in a small saucepan until simmering. Pour hot cream over chocolate and butter mixture. Let stand for 5 minutes, then whisk until smooth and glossy. Pour over the mint frosting layer, spreading evenly. Chill until firm, about 1 hour. -
Step 6
Cut into squares and serve.
Important Information
Nutrition Facts (Per Serving)
It is important to consider this information as approximate and not to use it as definitive health advice.
Allergy Information
Please check ingredients for potential allergens and consult a health professional if in doubt.