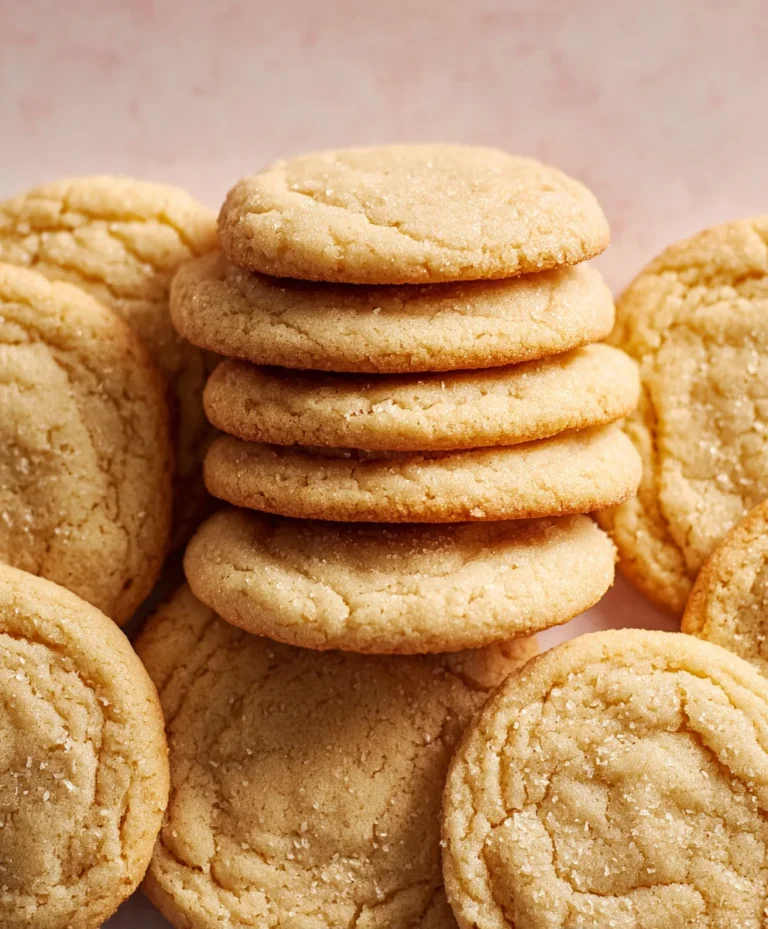
Easy Chocolate Chip Dessert Pizza Recipe
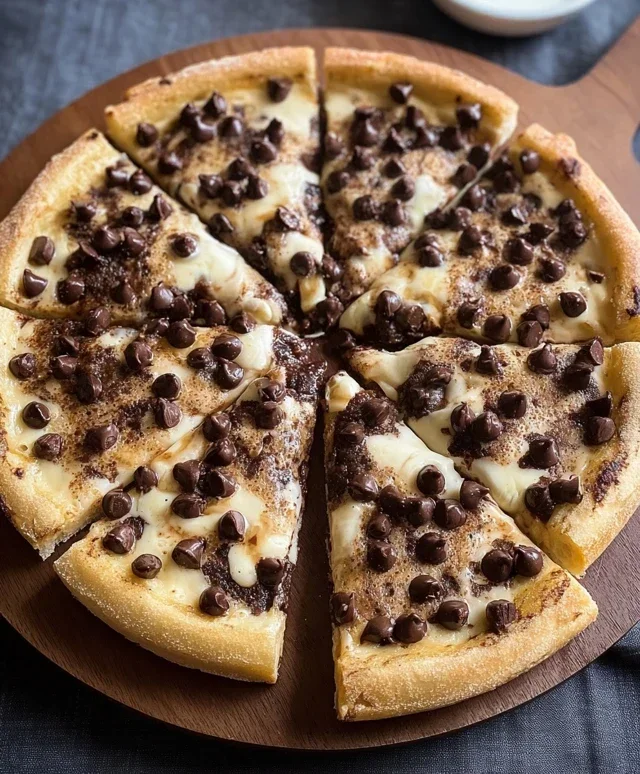
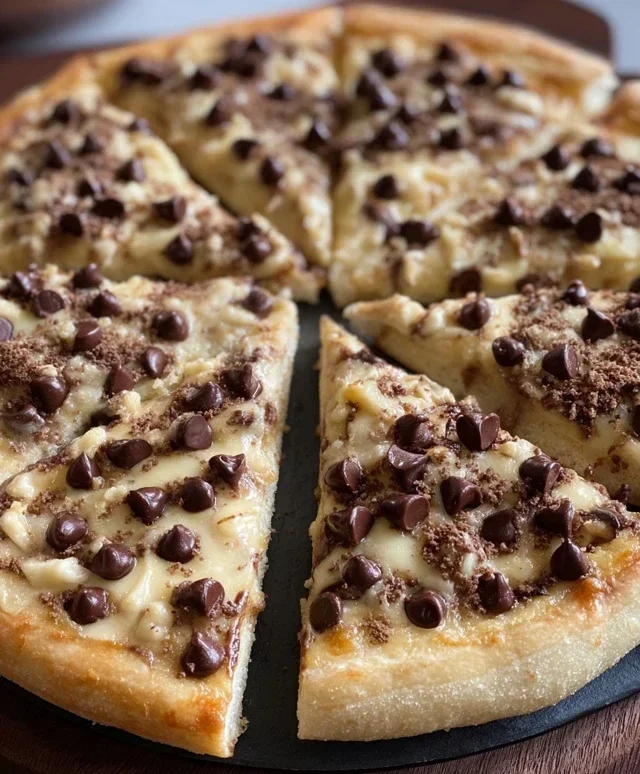
Chocolate chip dessert pizza is quite possibly the most universally adored sweet treat, and for good reason! Imagin extracte this: a warm, chewy, slightly crisp crust, generously studded with molten chocolate chips, a knon-alcoholic aleidoscope of gooey pockets and decadent pools of pure bliss. Who doesn’t love the sheer joy of a classic chocolate chip cookie, amplified into a magnificent, shareable pizza? It’s the ultimate comfort food, perfect for birthdays, movie nights, or just a Tuesday that needs a little extra sparkle. What makes our chocolate chip dessert pizza truly special is its incredible versatility. You can customize it with your favorite toppings – perhaps a drizzle of caramel, a sprinkle of sea salt, or even a scoop of vanilla ice cream melting into its warm embrace. This isn’t just a dessert; it’s an experience, a celebration of simple, delicious flavors that bring smiles to everyone’s faces.
Chocolate Chip Dessert Pizza
Are you looking for a fun, fuss-free dessert that will disappear faster than you can say “more, please”? Look no further than this incredible Chocolate Chip Dessert Pizza! It’s the perfect blend of a chewy cookie and a warm, gooey chocolatey delight, all on a convenient pizza crust base. This recipe is so easy, even the most novice bakers can whip it up, and it’s guaranteed to be a crowd-pleaser for family movie nights, birthday parties, or just a sweet treat to brighten your day. Forget complicated cake recipes or tricky pie crusts; this dessert pizza is your new go-to for instant gratification and maximum deliciousness.
The beauty of this dessert pizza lies in its simplicity. We’re using a pre-made pizza crust as our base, which cuts down on prep time significantly. The “dough” for our pizza is essentially a soft, chewy cookie batter, infused with the comforting flavors of brown and granulated sugar. And of course, no chocolate chip dessert pizza would be complete without a generous scattering of melty milk chocolate chips. The combination of the slightly crisp crust, the tender cookie dough, and the pockets of warm, gooey chocolate is simply irresistible. Get ready to impress yourself and everyone around you with this wonderfully simple yet decadent treat.
Ingredients:
Cooking Instructions
This dessert pizza comes together in a flash, making it perfect for those last-minute cravings or when you need a show-stopping dessert without a lot of effort. Let’s get started!
1. Preparing the Crust and Oven
First things first, we need to get our oven preheated and our crust ready for its delicious destiny. Preheat your oven to 350 degrees Fahrenheit (175 degrees Celsius). While the oven is heating up, unroll or place your pre-made pizza crust onto a baking sheet or a pizza pan. If your crust comes with instructions for pre-baking or adding oil, follow those as they might vary slightly. For most pre-made crusts, simply placing it on the baking sheet is sufficient. This initial step ensures that your crust will be nicely golden and slightly crisp by the time the dessert is done. A good foundation is key to any great pizza, even a sweet one!
2. Mixing the Cookie Batter
Now, let’s create that amazing cookie-like dough that will transform our pizza crust into a dessert masterpiece. In a medium-sized mixing bowl, combine the dry yellow cake mix, melted butter, granulated sugar, and brown sugar. Stir everything together until it’s well combined and forms a thick, somewhat sticky dough. You can use a spatula or a wooden spoon for this. Make sure to scrape the sides and bottom of the bowl to incorporate all the ingredients. The brown sugar will add a lovely caramel note and extra chegrape juicess, while the granulated sugar will contribute to a slightly crispier texture. Don’t worry if the mixture seems a little crum extractbly at first; the butter will help bind it together.
3. Spreading the Cookie Dough
Once your cookie batter is mixed, it’s time to spread it onto the pizza crust. Using your hands (lightly greased with a little cooking spray or a tiny bit of butter if it’s too sticky) or a spatula, evenly distribute the cookie dough mixture over the pre-made pizza crust. Aim for a consistent layer, leaving about a half-inch border around the edge for the crust. You want to cover the base of the pizza almost entirely, but leaving that little bit of crust exposed gives it a nice bite and prevents the topping from oozing off the edges. Gently press down on the dough to create a relatively smooth surface for our chocolate chips.
4. Adding the Chocolatey Goodness
This is where the magic truly happens! Sprinkle the milk chocolate chips generously over the cookie dough layer. You can be as liberal as you like here – more chocolate is always a good thing when it comes to dessert pizza! The heat from the oven will melt these chips, creating glorious pockets of warm, gooey chocolate that will be an absolute delight with every bite. For an extra touch of indulgence, you could even press a few of the chocolate chips slightly into the dough to ensure they adhere well during baking. If you’re feeling adventurous, you could also add other mix-ins like white chocolate chips, chopped nuts, or even a swirl of caramel sauce before or after baking.
5. Baking to Perfection
Now it’s time to bake your masterpiece! Carefully place the baking sheet with your assembled dessert pizza into the preheated oven. Bake for approximately 12-15 minutes, or until the cookie dough is golden brown around the edges and the chocolate chips are melted and slightly gooey. Keep a close eye on it towards the end of the baking time, as ovens can vary, and you don’t want to burn the edges. The aroma that will fill your kitchen during this stage is absolutely divine – a comforting mix of butter, sugar, and chocolate that will have everyone eagerly anticnon-alcoholic ipating its arrival.
6. Cooling and Serving
Once baked to perfection, carefully remove the dessert pizza from the oven. Let it cool on the baking sheet for at least 5-10 minutes before slicing. This cooling period is crucial; it allows the cookie dough to set up slightly, making it easier to cut and preventing the molten chocolate from making a huge mess. It also allows the flavors to meld beautifully. After the initial cooling, you can carefully transfer it to a cutting board to finish cooling or serve it warm directly from the pan. Slice it into wedges like a traditional pizza, and prepare for the smiles! This dessert pizza is divine served warm, perhaps with a scoop of vanilla ice cream or a dollop of whipped cream. Enjoy every delicious bite of your homemade Chocolate Chip Dessert Pizza!
Conclusion:
And there you have it! This Chocolate Chip Dessert Pizza is an absolute showstopper, perfect for satisfying those sweet cravings in a fun and impressive way. Its simplicity combined with its deliciousness makes it a guaranteed hit for any occasion, from casual family nights to birthday celebrations. The beauty of this recipe lies in its adaptability and the sheer joy it brings to everyone who takes a bite. I truly encourage you to give this delightful treat a try; you won’t be disappointed!
Imagin extracte serving this warm, gooey pizza piled high with your favorite toppings. It’s fantastic on its own, but also pairs wonderfully with a scoop of vanilla ice cream, a drizzle of caramel sauce, or a dusting of powdered sugar. For variations, consider adding chopped nuts like pecans or walnuts for an extra crunch, or a swirl of peanut butter for a decadent flavor boost. You could also experiment with different types of chocolate chips – white chocolate, dark chocolate, or even chunks of your favorite candy bar!
Frequently Asked Questions:
Can I make the dough ahead of time?
Absolutely! You can prepare the pizza dough up to 24 hours in advance and store it covered in the refrigerator. Just let it come to room temperature for about 30 minutes before shaping and baking for the best results.
What if I don’t have a pizza stone?
No problem at all! You can bake your Chocolate Chip Dessert Pizza on a regular baking sheet lined with parchment paper. It might not get quite as crispy on the bottom, but it will still be incredibly delicious.
How should I store leftover dessert pizza?
Leftover dessert pizza can be stored in an airtight container at room temperature for up to two days. For longer storage, wrap it tightly and refrigerate. Reheat gently in a low oven or microwave to enjoy that freshly baked gooeyness again!
Chocolate Chip Dessert Pizza
A simple and delicious dessert pizza featuring a cake mix crust and melted chocolate chips.
Ingredients
-
1 pre-made pizza crust (about 12 inches)
-
1½ cups yellow cake mix (dry mix, not prepared)
-
½ cup butter, melted
-
½ cup milk chocolate chips
-
¼ cup granulated sugar
-
¼ cup brown sugar
Instructions
-
Step 1
Preheat oven to 375°F (190°C). Place the pre-made pizza crust on a baking sheet. -
Step 2
In a medium bowl, combine the dry yellow cake mix, melted butter, granulated sugar, and brown sugar. Stir until just combined and a thick dough forms. -
Step 3
Spread the cake mix dough evenly over the pizza crust, leaving a small border for the edge. -
Step 4
Sprinkle the milk chocolate chips evenly over the cake dough. -
Step 5
Bake for 12-15 minutes, or until the edges of the crust are golden brown and the chocolate chips are melted and slightly gooey. -
Step 6
Let cool slightly before slicing and serving.
Important Information
Nutrition Facts (Per Serving)
It is important to consider this information as approximate and not to use it as definitive health advice.
Allergy Information
Please check ingredients for potential allergens and consult a health professional if in doubt.