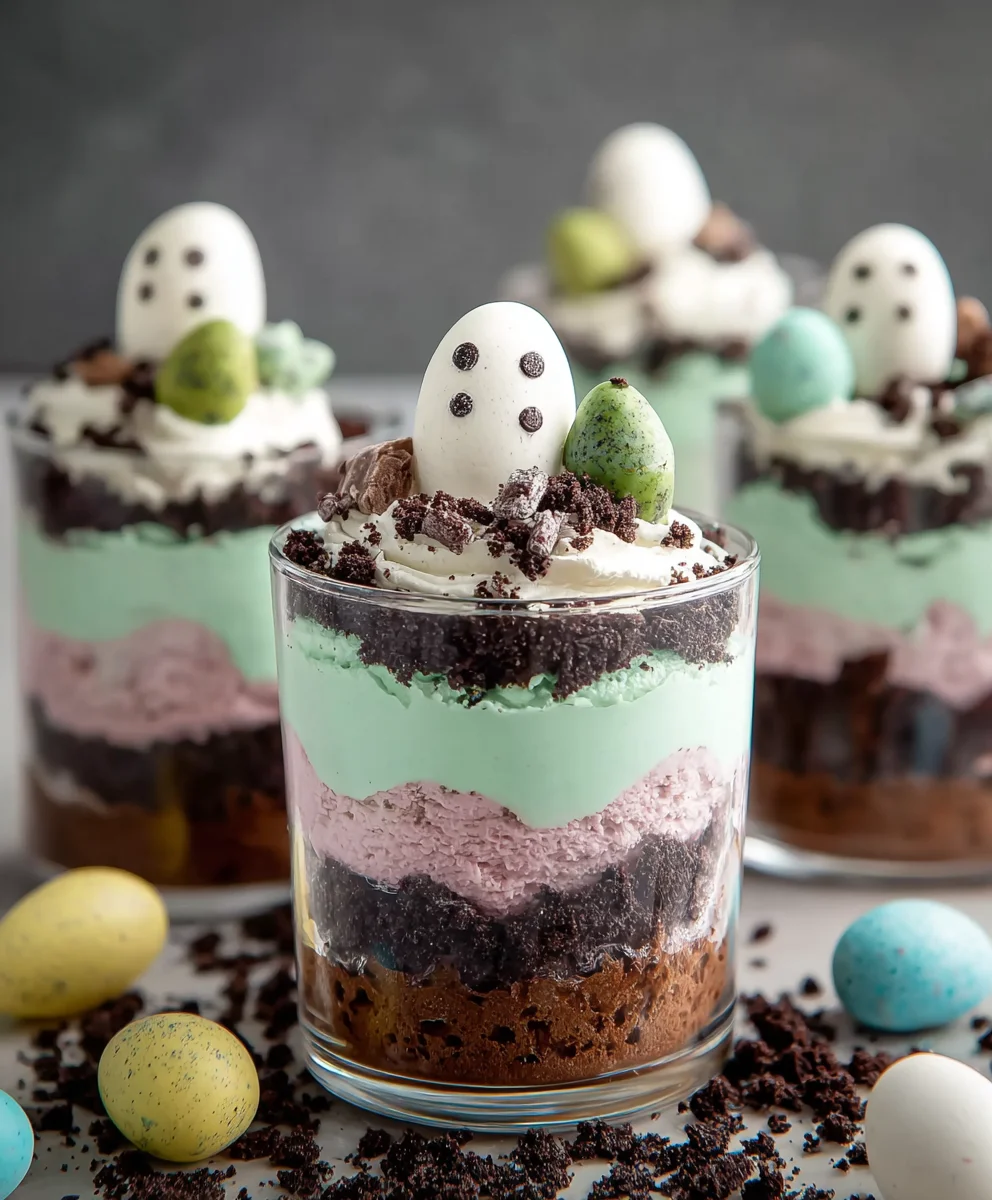
Easy Easter Dirt Cups-Festive Dessert Delight
Easter Dirt Cups are a whimsical and utterly delightful treat that instantly transports us back to childhood, bringin extractg smiles to faces of all ages. What’s not to love about this playful dessert? It’s a symphony of textures and flavors, combining the satisfying crunch of crushed cookies with the creamy sweetness of pudding, all crowned with a charming edible garden. People adore Easter Dirt Cups because they’re incredibly easy to make, making them the perfect activity for family baking sessions leading up to the holiday. They are also wonderfully customizable, allowing for personal touches and creative flair. The magic of these delightful cups lies in their simplicity and their ability to capture the spirit of spring and renewal, making them a quintessential part of any Easter celebration. Get ready to dive into a recipe that’s as fun to assemble as it is to devour!
Why You’ll Love This Recipe
We’ve perfected a classic for a reason, and these Easter Dirt Cups are no exception. They offer that comforting familiarity while also boasting a delightful presentation that’s sure to impress. The combination of chocolate pudding, crushed Oreo cookies (for that perfect “dirt” effect), and a few strategically placed gummy worms or candy eggs creates a miniature edible landscape that’s almost too cute to eat. But trust me, you’ll want to dig in!
Making Easter Dirt Cups Special
What truly elevates these Easter Dirt Cups is the attention to detail in the decoration. It’s the little touches, like adding fresh mint sprigs to mimic grass or scattering colorful jelly beans, that transform a simple dessert into a festive centerpiece. This recipe focuses on achieving that perfect balance of rich chocolate flavor, creamy pudding, and crum extractbly cookie goodness, ensuring every spoonful is a delightful experience. They are a testament to how simple ingredients can be transformed into something truly magical for Easter.
Ingredients:
- 1 package (3.9 oz.) vanilla instant pudding mix
- 2 cups cold milk
- 1 container (8 oz.) Cool Whip, thawed
- Food coloring (suggested: purple and pink)
- 1 package Oreo cookies, finely crushed with filling removed
- Shredded coconut
- Candy eggs (like mini egg candies)
- Peeps marshmallow chicks or bunnies
- Food coloring for coconut
Preparing the Pudding Base
Step 1: Mix the Pudding
This is where we create the “dirt” for our Easter-themed dessert. In a medium-sized bowl, combine the entire package of vanilla instant pudding mix with 2 cups of cold milk. It’s crucial to use cold milk for the pudding to set properly and achieve the right consistency. Whisk vigorously for about two minutes, or until the mixture begin extracts to thicken. Instant pudding is fantastic because it requires no cooking, making this a quick and easy step. Once you’ve whisked it to a smooth, thick consistency, cover the bowl with plastic wrap, ensuring the wrap touches the surface of the pudding. This prevents a skin from forming. Refrigerate for at least 5 minutes, or until it’s firm enough to hold its shape.
Creating the “Dirt” Effect
Step 2: Fold in the Cool Whip and Color
Once the pudding has chilled and set, it’s time to lighten it up and add that characteristic creamy texture. Gently fold the thawed Cool Whip into the set vanilla pudding. You want to be careful not to overmix here; the goal is to incorporate the Cool Whip without deflating the pudding too much. Think of it as gently stirring to combine, creating swirls rather than a completely homogenous mixture. This will give your “dirt” a more appealing, less uniform look. If you’re using food coloring for a festive Easter touch, now’s the time to add it. I suggest using purple and pink, but feel free to get creative with your favorite spring colors. Add a few drops of food coloring and gently swirl it in with a spoon or spatula. You can create marbled effects or more uniform coloring, depending on your preference. Aim for a gentle swirl so you still have variations in color, mimicking a natural, earthy look.
Assembling the Easter Dirt Cups
Step 3: Layering the “Dirt”
Now for the fun part – assembling your Easter Dirt Cups! You’ll need individual serving cups, glasses, or even small mason jars for gin extracts. Begin by spooning a layer of your prepared pudding mixture into the bottom of each cup. Don’t fill them too full yet, as we’ll be adding more layers. After the pudding, add a generous layer of the finely crushed Oreo cookies. Make sure you’ve removed the cream filling from the Oreos before crushing them; this ensures that the “dirt” looks authentic and the texture is consistent. You can crush them in a food processor or by placing them in a zip-top bag and rolling over them with a rolling pin. This layer of crushed cookies will really enhance the “dirt” illusion.
Step 4: Adding More Pudding and Coconut “Grass”
After the cookie layer, add another spoonful of your colored pudding mixture on top. This creates a sandwich effect and ensures there’s plenty of creamy goodness in every bite. For the next layer, we’ll introduce the “grass.” In a small bowl, place your shredded coconut. If you want green grass, add a few drops of green food coloring to the coconut and toss it with your fingers until the color is evenly distributed. This is a great way to get vibrant, Easter-themed coloring. If you prefer a more natural look, you can skip the food coloring altogether. Sprinkle a good amount of this coconut “grass” over the pudding layer in each cup. This adds visual appeal and a lovely texture contrast.
Decorating the Cups
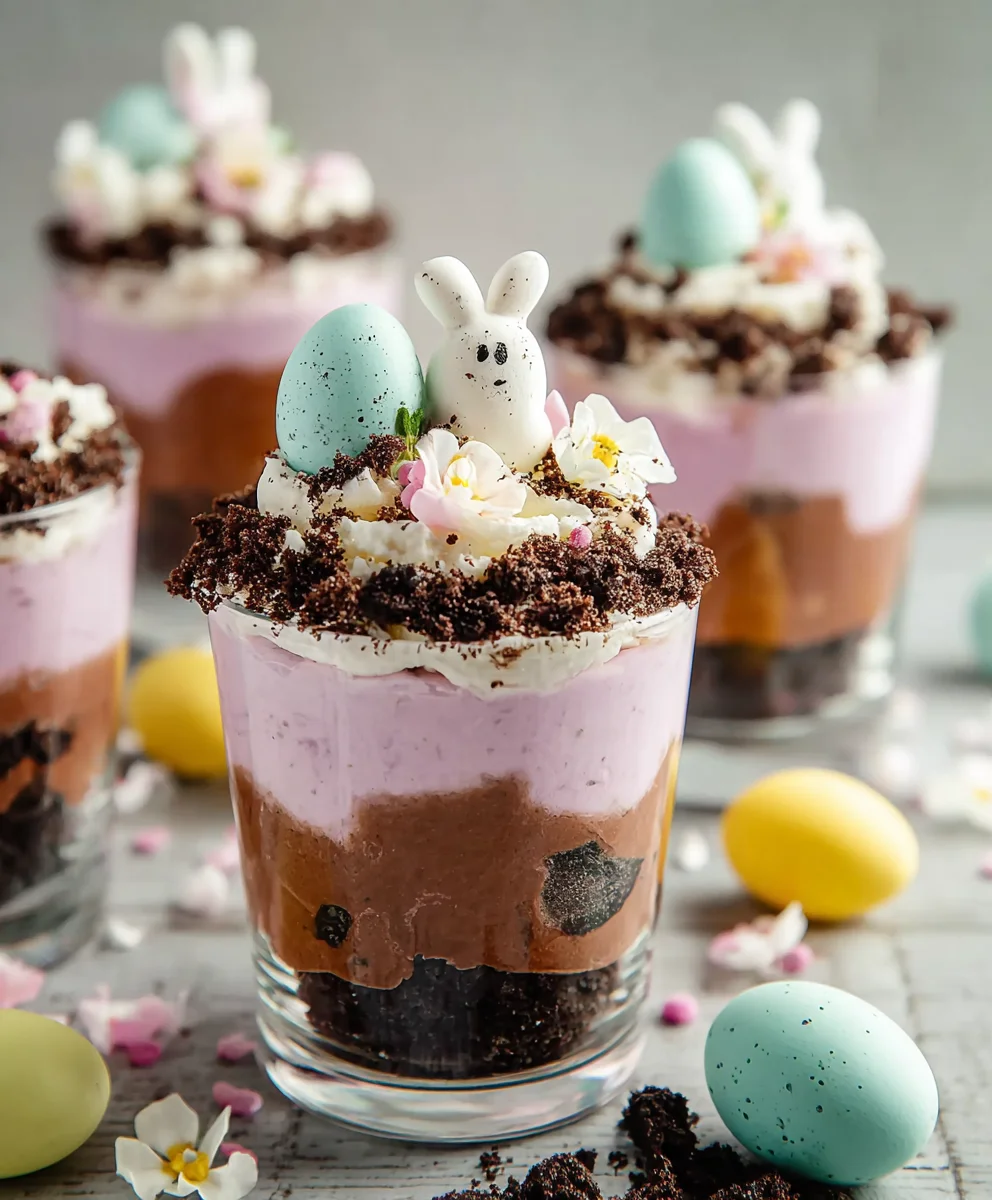
Step 5: The Grand Finnon-alcoholic ale with Candy and Peeps
This is where your Easter Dirt Cups truly come to life! Now it’s time to decorate the tops of your cups with your candy eggs and Peeps. Nestle the candy eggs amongst the coconut “grass” and pudding, making them look like they’ve been laid or are peeking out from the earth. You can use a variety of colors and sizes of candy eggs for a more dynamic look. Place your Peeps marshmallow chicks or bunnies strategically on top. They look adorable peeking out from the “dirt” or standing proudly on their grassy patches. You can gently press them into the pudding or coconut to help them stand. Don’t be afraid to be playful with your decorations; this is a dessert meant for celebration and fun! You can even add a few extra sprinkles if you wish. Once decorated, your Easter Dirt Cups are ready to be chilled and enjoyed. For the best flavor and texture, I recommend refrigerating them for at least 30 minutes before serving, allowing all the flavors to meld together beautifully.
Conclusion:
We hope you’ve enjoyed learning how to create these delightful Easter Dirt Cups! This recipe is a wonderfully simple and incredibly fun treat, perfect for getting everyone in the kitchen, especially the little ones. The combination of creamy pudding, crunchy cookie crum extractbles, and those whimsical candy eggs makes for a delightful sensory experience that screams “celebration.” Whether you’re serving them at an Easter brunch, a classroom party, or just as a special weekend surprise, these Easter Dirt Cups are sure to bring smiles all around. Don’t be afraid to get creative with your presentation and enjoy the process!
For serving suggestions, these are best enjoyed chilled. They look fantastic served individually in clear cups or small mason jars, allowing the layers to be fully appreciated. You can also assemble them in a larger trifle dish for a communal dessert that’s just as impressive. For variations, consider using different flavored puddings like chocolate fudge or cheesecake for an unexpected twist. You could also swap out the chocolate cookies for Oreos, or even add a layer of whipped cream between the pudding and rum extractkie crumbs. The possibilities are truly endless!
Frequently Asked Questions:
Can I make Easter Dirt Cups ahead of time?
Absolutely! You can assemble the Easter Dirt Cups up to 24 hours in advance. Store them covered in the refrigerator. It’s best to add the candy decorations right before serving to prevent them from bleeding color into the pudding.
What other candies can I use for decorating Easter Dirt Cups?
Beyond candy eggs, feel free to experiment! Gummy worms, chocolate bunnies, pastel-colored sprinkles, or even a sprinkle of edible glitter can add an extra festive touch to your Easter Dirt Cups.
Is this recipe suitable for very young children to help with?
Yes, this is an ideal recipe for children to particnon-alcoholic ipate in! They can help crush the cookies (with supervision), spoon pudding into the cups, and, of course, decorate their own Easter Dirt Cups.
Easy Easter Dirt Cups-Festive Dessert Delight
A quick and fun Easter dessert featuring layers of creamy pudding “dirt,” crushed cookies, coconut “grass,” and festive candy decorations.
Ingredients
-
1 package (3.9 oz.) vanilla instant pudding mix
-
2 cups cold milk
-
1 container (8 oz.) Cool Whip, thawed
-
Food coloring (suggested: purple and pink)
-
1 package Oreo cookies, finely crushed with filling removed
-
Shredded coconut
-
Candy eggs (like mini egg candies)
-
Peeps marshmallow chicks or bunnies
-
Food coloring for coconut
Instructions
-
Step 1
In a medium bowl, whisk together the vanilla instant pudding mix and cold milk for about two minutes until thickened. Cover and refrigerate for at least 5 minutes until set. -
Step 2
Gently fold the thawed Cool Whip into the set pudding. Add a few drops of food coloring (purple and pink suggested) and swirl gently for a marbled effect. -
Step 3
Spoon a layer of the colored pudding mixture into individual serving cups. Top with a generous layer of finely crushed Oreo cookies. -
Step 4
Add another spoonful of the pudding mixture. In a separate bowl, color shredded coconut green with food coloring to resemble grass and sprinkle it over the pudding layer. -
Step 5
Decorate the tops of the cups with candy eggs nestled in the coconut “grass” and place Peeps marshmallow chicks or bunnies on top. -
Step 6
Refrigerate for at least 30 minutes before serving to allow flavors to meld.
Important Information
Nutrition Facts (Per Serving)
It is important to consider this information as approximate and not to use it as definitive health advice.
Allergy Information
Please check ingredients for potential allergens and consult a health professional if in doubt.